Title

Title
Tally Ho!
Showing posts with label Irish Brigade. Show all posts

Saturday, 6 May 2017

Battle of Dunbar, 1650 - sort of...


The Battle


For our second game of Captaines & Calivars we recreated the battle of Dunbar, but with a twist. In the historic battle Cromwell's New Model Army attacked and defeated a Covenanter force under Leslie by focusing their attack on the end of the Scottish line to achieve a local superiority.

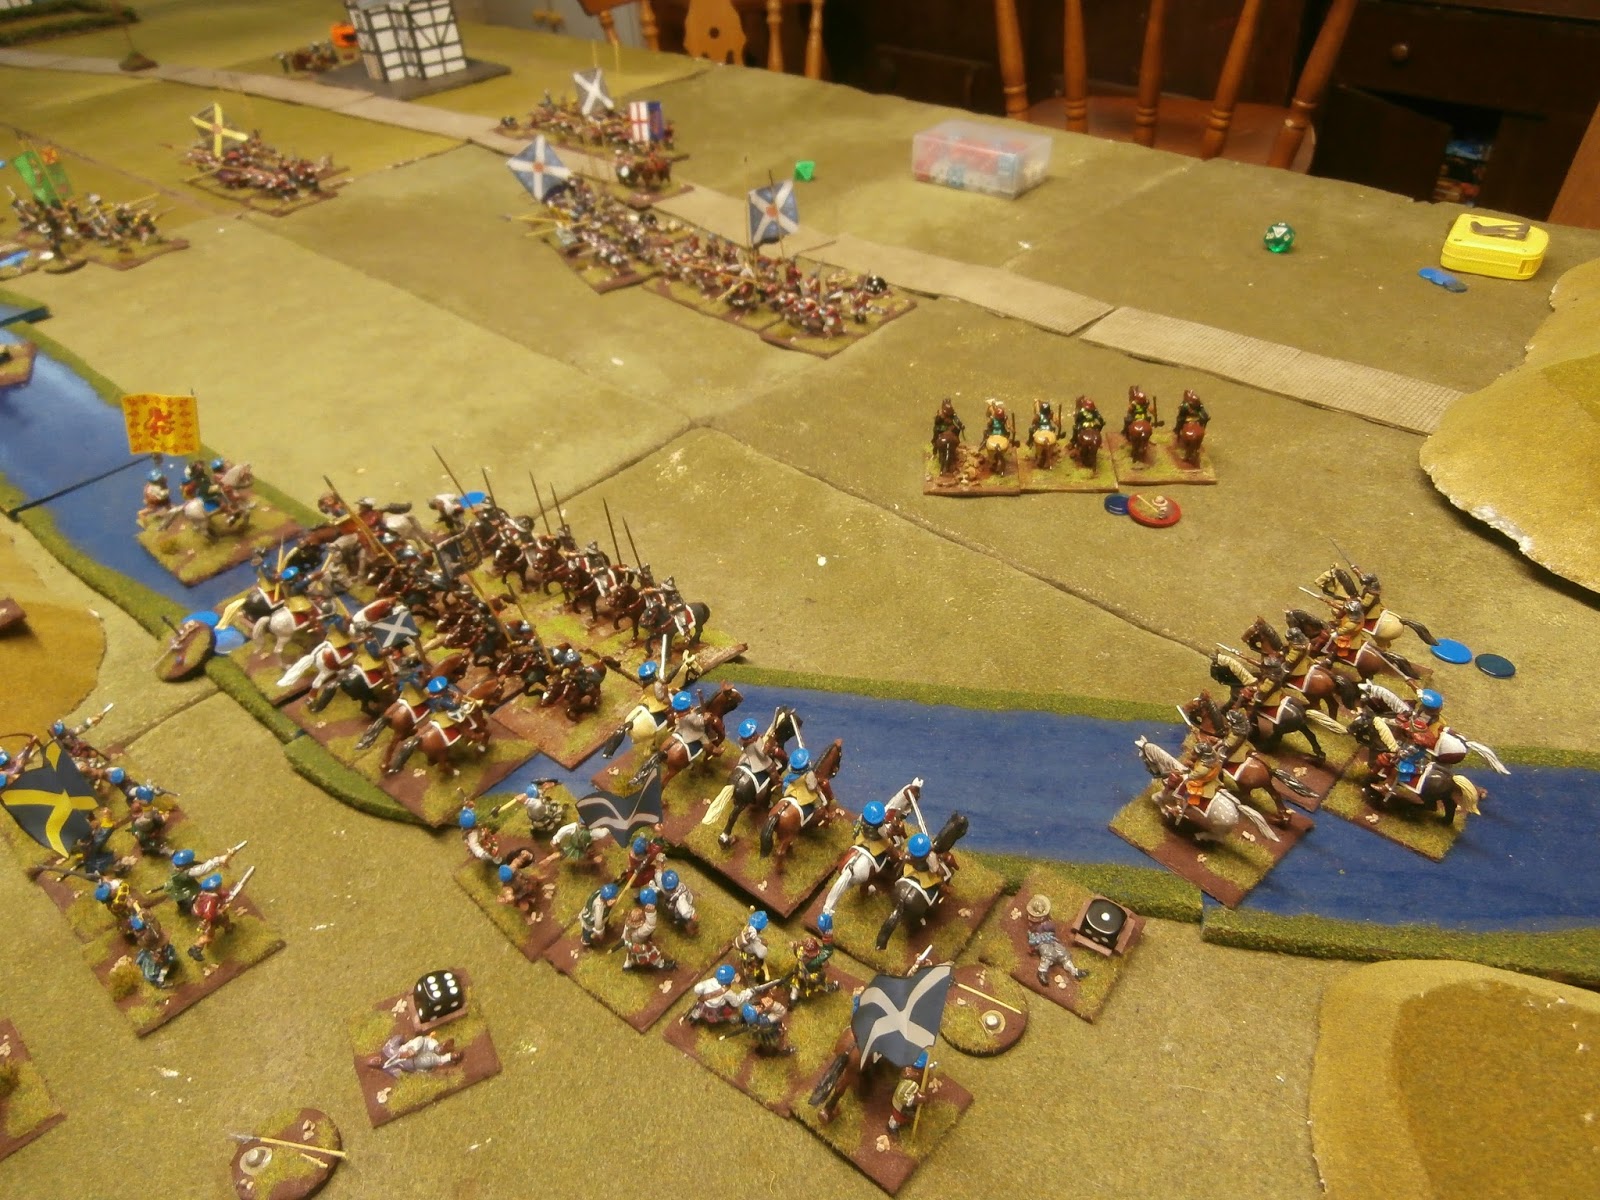
For our refight we reversed the forces and so a Parliamentary force defended the heights while a Scottish Royalists force modelled on Montrose attacked them. The setup was similar though with A class Irish troops focused against the left flank of the Parliamentarians and dragoons screening the right. In theory the out-numbered and out-classed Parliamentary forces should struggle unless they can bring their unengaged units to bear.

The Scottish left which outflanks and outnumbers the Parliamentary defenders

Dragoons and Horse trying to delay the Parliamentary left

Irish Brigade and Highlanders ready to attack

Parliamentary left - can they flank the attacking Scots?

Long-shot of the battlefield from the Scottish side

Long-shot from the Parliamentary side 

The battle began with both sides attacking on their left sides with their Horse in an attempt to outflank their opponents, with both sides having a numerical advantage on one of the sides.

Cavalry action on the Parliamentary left

On the opposite side the Scots attack

The Parliamentary cavalry went as expected with their larger force pushing back the smaller Scottish Horse. On the opposite side fortunes were reversed though - despite having an advantage the Scottish failed to break the Parliamentary Horse and were themselves routed with substantial losses. Mostly this was down to some bad luck on the Scottish side and dodgy dice.

Scottish Horse win on their left

Unexpectedly Cromwell routs his opponents 
So the weight of the assault would have to fall to the Irish Brigade and Highlanders if the Scottish were to win a victory. They pressed forward against the Parliamentary forces arrayed on the heights and had some initial success against the first line of defenders. They quickly became bogged-down and found themselves flanked by Parliamentary infantry.      

Irish and Highlanders push uphill

View from the Irish Brigade position

The attack fizzles out
With their cavalry beaten, and the Irish Brigade stalled, it was agreed that Parliament had won a famous victory that reversed history.  


The Verdict


Our second game of Captaines and Calivars was an enjoyable one with no obvious defects in the rules and a good ECW feel to the game. The only change from last time was to award Infantry who stand and fire +1/2 in combat rather than an additional combat dice - this seemed more reasonable.

We also discussed whether or not an ACW version for 15mm might be possible. Certainly for the early war little change from the Napoleonic version would be needed. For the mid and later wars a few issues to look at would be:
  • Rifled muskets were more deadly to massed troops than their smoothbore cousins.
  • Cavalry had ceased to have a shock role and was mostly mounted infantry.
  • Formations were less dense with mass skirmishing more common than before.
  • Combat was rare as one side usually ran unless defending cover.   


Wednesday, 15 June 2016

Montrose Campaign - week 6

Angus September 1644 - Montrose win

Scenario

This weeks battle  required a little more movement than some and is inspired by Grants reinforcements off-table scenario. For this battle the Covenanters started with 25% of their troops garrisoning a fortified church complex and 50% of their forces trying to breakthrough. Montrose was free to split his troops between assaulting the defences and holding off the relief force as he saw fit. The winner was the one holding the church at the end.

Covenanter Forces - garrison
3 * Foot regiments
1 * Field gun

Covenanter Forces - relief column
4 * Horse (2 regts)
3* Foot regts

Montrose Forces
3 * Veteran Foot (Irish)
3 * Gordon Foot
2 * Highlanders
4 * Horse (2 regts)
2 * Field gun
1 * Light gun
1 * Forlorn Hope

The Battle

Montrose deployed with his best assault troops facing the church supported by the Field guns. The Highlanders deployed opposite the side of the church with the Irish Brigade facing the more challenging front. On the other side the Forlorn Hope was poised to attack. This week Montrose decided to play The Brewery territory card - this gives a unit  +1 in combat and morale, but you must advance at and attack the enemy along with the accompanying beer wagon.

Facing the relief column was the Horse and the weaker Gordon's Foot with the support of a Light gun.  


The Irish Brigade ready to attack, Highlanders in the distance

The blocking force waits the relief column 

Close-up of the Highlanders, complete with beer wagon

The Covenanter garrison

On Montrose left the Covenanter relief column arrived and pressed forward with the Horse in the lead. In a reversal of recent battles it was Montrose Horse that had the upper hand, destroying the leading Covenanter squadron and pushing back the remaining Horse. Combining well with the Gordon Foot they were able to pin the relief force back, who were hampered by the fields on their flanks.

Covenanter relief column advances 

Battle is joined - Montrose Horse doing well for a change 
Over at the church Montrose began the battle with an ineffective bombardment against the defences before beginning his advance against the garrison. On the right side of the church the somewhat intoxicated Highlanders advanced quickly and with a 2-1 advantage were able to force their way across the defences. On the left side of the church the Irish Brigade advanced and commenced a fire-fight against the defenders. Despite the cover the garrison lost a regiment of Foot fairly quickly as 3 of Montrose foot focused their fire. After a brief struggle the garrison was routed and the church complex captured for Montrose. 


Stuart the Elder demonstrates a rare left-handed Wargames point

The Highlanders breach the walls

Relief force bottled-up

The church just before it falls

The relief force struggles


 Campaign Situation

This was a forth win for Montrose putting him 6-4 ahead on territories controlled.

We agreed that we would make a few tweaks if this scenario is played again:
1. We would allow shuffles sideways inside the defences
2. We would allow the whole of the defenders forces to fight (75% vs 50% in the relief column
3. We would start with the relief column a bit closer


Saturday, 11 June 2016

Montrose Campaign - week 5

Perthshire Aug 1644 - Covenanters win


Scenario

A fairly straightforward affair this week as the scenario generator produced a Pitched Battle. Both sides clash head-on but to add some uncertainty, deployment is done behind screens and then revealed. Both sides also place an objective in each sides half that counts as a routed enemy unit if captured. Victory is achieved by routing 50% of the enemy forces.

Covenanter Forces
9 * Foot regiments in 2 brigades
4 * Horse squadrons in 2 regiments
1 * Field artillery
1 * Forlorn Hope
Montrose Forces
3 * Veteran foot regiments (Irish)
4 * Foot Regiments (Gordon Foot)
2* Highlander regiments
5 * Horse in 2 regiments
1 * Field artillery
1 * Light artillery 


The Battle


Montrose deployed along the ridge-line behind a stream. On the right were massed the Horse and Highlanders with the Irish Brigade in support. On the left were the lower-grade Gordon foot. The plan was a simple one - to beat-back the Covenanter Horse through superior numbers and turn the flank the position. Meanwhile the weaker left would be refused to allow time for this to be completed.
 
The covenanters deployed with the bulk of their Foot in the centre. The Horse were on the left (opposite Montrose mounted) and half a Foot brigade deployed on the right to attempt a flanking manoeuvre.       

Covenanter centre and left


Covenanter right - Stuart demonstrates the art of Wargames pointing (again)

Montrose right - mounted and highlanders

Montrose refused left flank

Montrose flank-guards
The battle opened with a swift advance to combat by both sets of Horse. Honours were fairly even between the two sets of Trotters but the Covenanter lancers proved deadly and destroyed a squadron of Montrose Horse for very little loss. Things got worse for Montrose as both sets of Covenanter Horse gained the upper hand, pushing him back onto the Highlanders.
 
The cavalry clash

The covenanters gain the advantage 
In the centre the Irish Brigade advanced to support the Horse and soon began a fire-fight with the Covenanter Foot. Although well positioned the Irish shooting proved disappointing and casualties soon began to mount against them. Meanwhile on their right the Covenanter Foot advanced steadily and eventually came in range of the weaker Gordon  Foot holding the heights. 

Irish Brigade under pressure 

Montrose left under pressure
 

As the game drew to a conclusion Montrose superiority in Horse began to tell and they were able to force their opponents back. It was however too late, the beleaguered centre was all but gone and the Gordon Foot began to wobble. By now every Royalist commander apart from Montrose was also dead or wounded. Sensing that defeat may be close Montrose ordered a retreat and left the field to the Covenanters.  
 
Montrose Horse finally drive back the enemy
Montrose plan was a reasonable one but came unstruck as the mounted could not achieve a rapid enough victory to threaten the Covenanter foot. Some poor shooting from the Irish was then enough to seal their fate.  

Campaign Situation

This was the Covenanters second  victory meaning Montrose is ahead 5 territories to 4.


Tuesday, 31 May 2016

Montrose Campaign - week 4

Selkirkshire - July 1644. Montrose Wins

Scenario

This battle saw the Covenanters out-manoeuvred by Montrose and facing a possible double envelopment. As with a Flank Attack upto 1/3 of the attackers forces can be sent on a flank march, but in this variant both sides may be attacked not just one.

Covenanter Forces
8 * Foot regiments in 2 brigades
4 * Horse squadrons in 2 regiments
2 * Field artillery
1 * Forlorn Hope (Vet)
Montrose Forces
3 * Veteran foot regiments (Irish Brigade)
3 * Foot Regiments (Gordon Foot)
4 * Horse in 2 regiments
1 * Field artillery
1 * Dragoons

The Battle

Somewhat fearful of the double envelopment the Covenanters deployed in a slightly deeper than usual formation with guns between the brigades. Cavalry guarded the more open right flank, whilst the Forlorn Hope occupied the manor house. Montrose decided to forgo the flank march and instead focus on a two-pronged attack. The Irish Brigade and Horse would attack the likely corner on the Covenanters right and the Highlanders would  manor house with flanking support.

View from Montrose right flank

View from Montrose left flank. One of the Covenanters clearly visible keeping busy with his painting

The Horse - view on Montrose left
The battle began with an all-out assault by the Highlanders on the Forlorn Hope in the manor house. The Forlorn Hope's shooting was fairly ineffective but Montrose artillery had a rare success causing them to be become Shaken. With a skirl of the pipes the Highlanders fell upon the unfortunate musketeers and quickly routed them. Their blood clearly up they contained their attack and managed to eject the supporting infantry regiment from the grounds of the manor house.
 
The calm before the storm

The Highlanders make a dent in the lines
On the Covenanters right both sides advanced their Horse and executed a charge, as is often the case with cavalry combat it was a to-and-fro affair. Montrose lancers smashed their way through their opposite numbers assisted by some excellent saving throws. Conversely Montrose trotters failed to charge and were pushed-back by their opponents. Honours fairly even in the cavalry melee.
 
If you can nt be good be luck....
Over on the Covenanters left the Highlanders completed their captured of the manor and with the support of the Dragoons and some infantry managed to rout a further two units, turning the flank.
 
The flank attack presses home 
 
 
The flank is turned
In the centre and right Montrose managed to execute his attack on the dog-legged Covenanters line. On the flank itself the attack went pretty well, with the Irish Brigade managing to outnumber the enemy and score significant hits.  However you can nt be strong everywhere and Montrose had deliberately weakened his centre to enable the flank attacks. Unable to withstand the Covenanters advance the centre eventually collapsed.
 
The successful flank attacks were however enough to rout more than 50% of the covenanters, forcing them to withdraw from the field.  
 
The flank attack moves in 

Montrose centre crumbles

The Covenanters right flank vanishes
A close-fought battle with the Highlanders for once proving successful, aided as they were by some poor morale for the Covenanters which meant they were always Shaken when attacked.   
 

Campaign Situation

Montrose scored his third victory of the campaign and so now controls 5 territories to 3.