Title

Title
Tally Ho!

Friday 31 March 2017

Key Points Napoleonic Campaign - Battle 5

The Scenario

In battle 3 the British failed to capture the French-held town in the north of the map following a bloody assault. Unwilling to repeat the venture they fell back onto the fortifications fought over in battle 1. So for our fifth battle the outnumbered French were trying to recapture the forts. As the British had voluntarily withdrawn they had to deploy first.

The three forts were stretched across the battlefield with the largest in the centre. Capturing two would win the battle for the French.

The Setup

The British deployment was a little unusual. Each fort was occupied by a battalion from the Light Brigade with British infantry and guns between - so far so conventional. Unusually though the reserves of Dutch-Belgium's and Hanoverians were formed on the flanks in march column, hoping to pull-off a bulls-horns manoeuvre.  

The left-hand British fort held by Prussian Jaegers

The right-hand British fort hold by light infantry with the British in the centre


The Dutch-Belgium reserves 
 

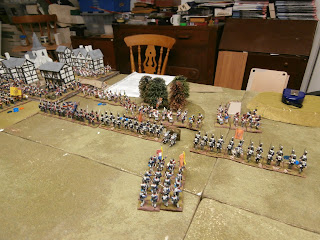
Outnumbered and with only 3 A class battalions at their disposal, the French focused all their efforts on the British left-hand fort. Two brigades were assigned to the assault with a third hoping to outflank the British also on their left. A final brigade was thrown-out on the British right to prevent the Dutch-Belgium's an easy flanking manoeuvre.
 
French facing the Dutch-Belgium's

The assault columns

French centre supporting the main attack.
 

The Battle

On the British right they felt they had the numbers to advance and try to prevent the main French assault by attacking the flanks of the advancing brigades. So they abandoned the fort and the Dutch-Belgium troops moved forwards.  
British advance from the right-hand fort

Dutch-Belgium's advance

They could not though ignore the Brigade of Leger opposing them and so precious troops were diverted to attack them and care taken with moving the cavalry into a flanking position. Although causalities were light this all took time to execute safely and so could not significantly slow the French's own attack..

The Dutch-Belgium's are assigned to contain the Leger on the French left

Allied cavalry practice their parade-ground display
 On the British left the French main assault was made by the Swiss regiment while other troops flanked the position and tried to cut-off the fort for aid. The struggle for the fort was to rage across 5 full turns with the Swiss winning every round but the Prussians morale holding firm and them only finally succumbing at the end of the game.
  
Swiss attack goes in

Several turns later they are still there

In the centre the French came under  pressure as the British advanced in the hopes of spoiling the attack on the fort with a counter of their own. In a calculated gamble the French unleashed their Chasseurs against the British, catching them in line and sweeping them away in confusion as well as a unit of Hanoverians.

Boys in green do it for their Emperor
Flushed with success the French repeated the trick, this time the Dragoons caught some British line out of square and also routed them. With two bold charges the centre was safe for now and the allied counter-attack halted. On the allied right the Dutch-Belgium's and Leger settled into a gentlemanly fire-fight which suited both sides. 
 

Dragoons get in on the act


A brisk exchange of fire
As night fell across the battle field the French had all but secured one fort but had made no impression on the other two - so a victory for the defending British. Once again A class troops well entrenched proved a tough-nut to crack even when out numbered 2-1. 
 
Napoleons children look on

Hanoverian postmen flee for their lives 

The battle for the forts continue 
 

The Campaign Situation


With the French to secure the forts it remains at four key points a side. Next week the French assault the farm houses occupied by the Prussians

Monday 27 March 2017

Lowland Scots - 28mm ECW


With our Napoleonic campaign underway I've been able to revisit my lead (well mostly plastic) pile and begin some long-term painting projects again. So for the next few months I'm focusing on completing my Montrose ECW army and putting together some Royalists for a future campaign.

First off the blocks my final unit of lowland foot - 28mm Warlord Games plastic with mostly homemade bonnets from milliput.

Lowland scots

Lowland scots
   

Saturday 25 March 2017

Key Points Napoleonic Campaign - Battle 4

The Scenario

British light dragoons
The fourth battle of the campaign saw the French renewing their assault against the crossroads being contested by the Prussians. Both sides aim was simple - capture and hold this vital junction to secure their supply lines for future operations.

The French forces were at their strongest here deploying both the Guards and their additional cavalry brigade. The Prussians were supported by a British cavalry brigade.  

The Setup

The outnumbered Prussians adopted a slightly half-and-half deployment somewhat between attack and defence. About two thirds of the infantry were in the centre ready to attack the crossroads and about one third in line defending the left flank. The cavalry was all massed on the right.

Prussians ready to move against the crossroads

Allied cavalry massed to attack?

The French plan was more aggressive, with a large mass of infantry (including all the A class troops) forming the centre. A single brigade and most of the guns guarded the right flank and cavalry brigade the left. The plan was to buy time on the flanks and assault in the centre  - a classic plan from Marshall L'Boss.
The outnumbered French horse

The assault units of the French army

More assault units including some cavalry mixed-in 

The flank guards 

The Battle

The action began with both sides pushing forward in the centre to establish control of the crossroads and the nearby farm house. The Prussians demonstrated on the left flank against the weaker French but surprisingly did not attack the outnumbered French cavalry.

French move into the farm in strength

Dutch allies move cautiously forward

The massed French move on the crossroads

Wider shot of the French with Marshall L'Boss directing operations

Prussian reserves waiting behind the farm
 
The initial manoeuvring was fairly even until the French unleashed a unit of Dragoons in the centre of their lines against the Prussians advancing on the crossroads. Although the charge was halted by heavy fire it did buy time for the French to steal a march and advance over the crossroads first.   


The Dragoons attack 

The Guards move forward

Seeing they were outnumbered in the centre the Allies finally advanced with their cavalry in an attempt to force an advantage on their right flank. They outnumbered the French horse 5-3 on this flank.

Allied cavalry advances, but too late?

In the centre the French assault on the Prussian lines began with A class Swiss and Guard units leading the way.  Outnumbered 2-1 the weaker Prussians were gradually pushed-back away from the crossroads.

The main attack begins from the French
 
A different angle of the French pushing the Prussians back 
On the Prussian left they found themselves under assault from French infantry and cavalry, with one line battalion swept-away by the gallant Chasseurs and a second routed by combined musket / artillery fire.

French advance on their right
The last hope for the Allies was their cavalry on their right where they had a 5-3 advantage. This rapidly became 4-3 as the Prussian hussars were halted by French artillery fire and then 3-3 when a unit of British hussars proved reluctant to charge. 

The cavalry melee
 
With numbers now even, the heavier French cavalry made fairly short work of the Allies and the last hope was snuffed-out. 
 
Cuirassiers beat-up the British light dragoons
 So the battle ended with the French in firm control of the crossroads and both Allied flanks in trouble. A good win for the French and their first on the attack.   

The Old Guard claim the crossroads for the emperor
 
British RHA open-up
 

Campaign situation

Two French victories had resorted the balance in the campaign with both sides once again holding equal territory.


Tuesday 14 March 2017

Key Points Napoleonic Campaign - battle 3


The Scenario

Our third battle of the mini-campaign sees the British on the attack following their victory in the first game. In this scenario they are trying to secure a vital town and the supply-dump contained inside.

We found the previous games a little slow and skirmishers too powerful, so we reverted to set we've played before - Muskets and Marshalls developed by Ian over at the Hinton Hunt Blog. The rules can be found here http://hintonhunt.blogspot.co.uk/p/muskets-marshals.html. This had a major affect on the armies as mapping from Rank and File to M&M suddenly all the British are A class, meaning about half the Allied army was of high quality.

For this scenario the town was divided into 6 zones (buildings) each capable of holding a single battalion plus attached gun. The attackers needed to capture 4 to win the game.

The Set-up

The French deployment was simple and compact. Half the force occupied the 6 areas of the town supported by 2 batteries, with the A class Leger in the front line. A brigade guarded each of the town's flanks, with cavalry and skirmishers out wide to delay the enemy advance.

The Allies deployed with the A class British poised to attack the town head-on and the Hanoverians / Dutch-Belgium's looking to apply pressure on the flanks. The Dutch-Belgium cavalry lined-up opposite the French horse.   

Hanoverians
 
Dutch-Belgiums
 
The British forming the main assault 

Horse lurking out wide

Town and woods well defended

The Game

The battle opened with a general advance on the Allied side, with the fast-moving cavalry quickly getting in position for an assault. The first cavalry clash occurring in the second turn.

Dutch-Belgium cavalry advance

The Rifles home in on the Swiss

Battle is joined
In the centre a solid wall of redcoats ground forward taking lively fire from the French guns. The Allies gained the initiative and charged their Carbineers into some stationary Chasseurs. However the attack was unsupported and so the French Dragoons were free to join the fray. The outnumbered Belgium's were pushed back in Disorder.   

Coming on in the same old way

Belgium Carbineers get mauled
On the French left the Dutch-Belgium units quickly got into range while a cavalry fight raged on their flanks. Both sides settled into a firefight that would last the remainder of the battle. On the French right the Hanoverians pushed cautiously forward against the French skirmishers occupying a field, but never really threatened the flank.    


So the main action was in the centre as the British assaulted the town. The Allies advanced behind screening units and with some long-range artillery support. When the crucial moment came they launched a column attack against each of the three front building zones. Two of the A class British columns successfully charged-in but the third met a devastating musket / canister fusillade and halted short of the target.


The two assaulting columns were thrown back by the defending Leger with minimal  losses and so the first assault had failed. With losses mounting the Allies parlayed to be able to recover their wounded and withdraw from the field, and so the battle was done. 


When assaulting cover in M&M you need at least two-to-one odds to stand a chance of success, especially against high quality troops. So whilst the British were well marshalled perhaps they should have focused on attacking less of the town and in greater local strength. 

Campaign Situation   

As the attack failed the French were the winners and have the option to either defend again or pursue the British back to the fortifications battle-field. Next-time the second battle at the crossroads...