Sometimes its fun to paint some terrain and being gifted some Mantic Terrain Crate alien worlds stuff gave me a chance to do something colourful. This could also pass for Jurassic-style jungle and the few of the plants look distinctly carnivorous.
Title
Tally Ho!
Showing posts with label terrain. Show all posts
Saturday, 18 November 2023
Rumble in the (alien) jungle
Sometimes its fun to paint some terrain and being gifted some Mantic Terrain Crate alien worlds stuff gave me a chance to do something colourful. This could also pass for Jurassic-style jungle and the few of the plants look distinctly carnivorous.
Sunday, 9 August 2020
Digging for victory
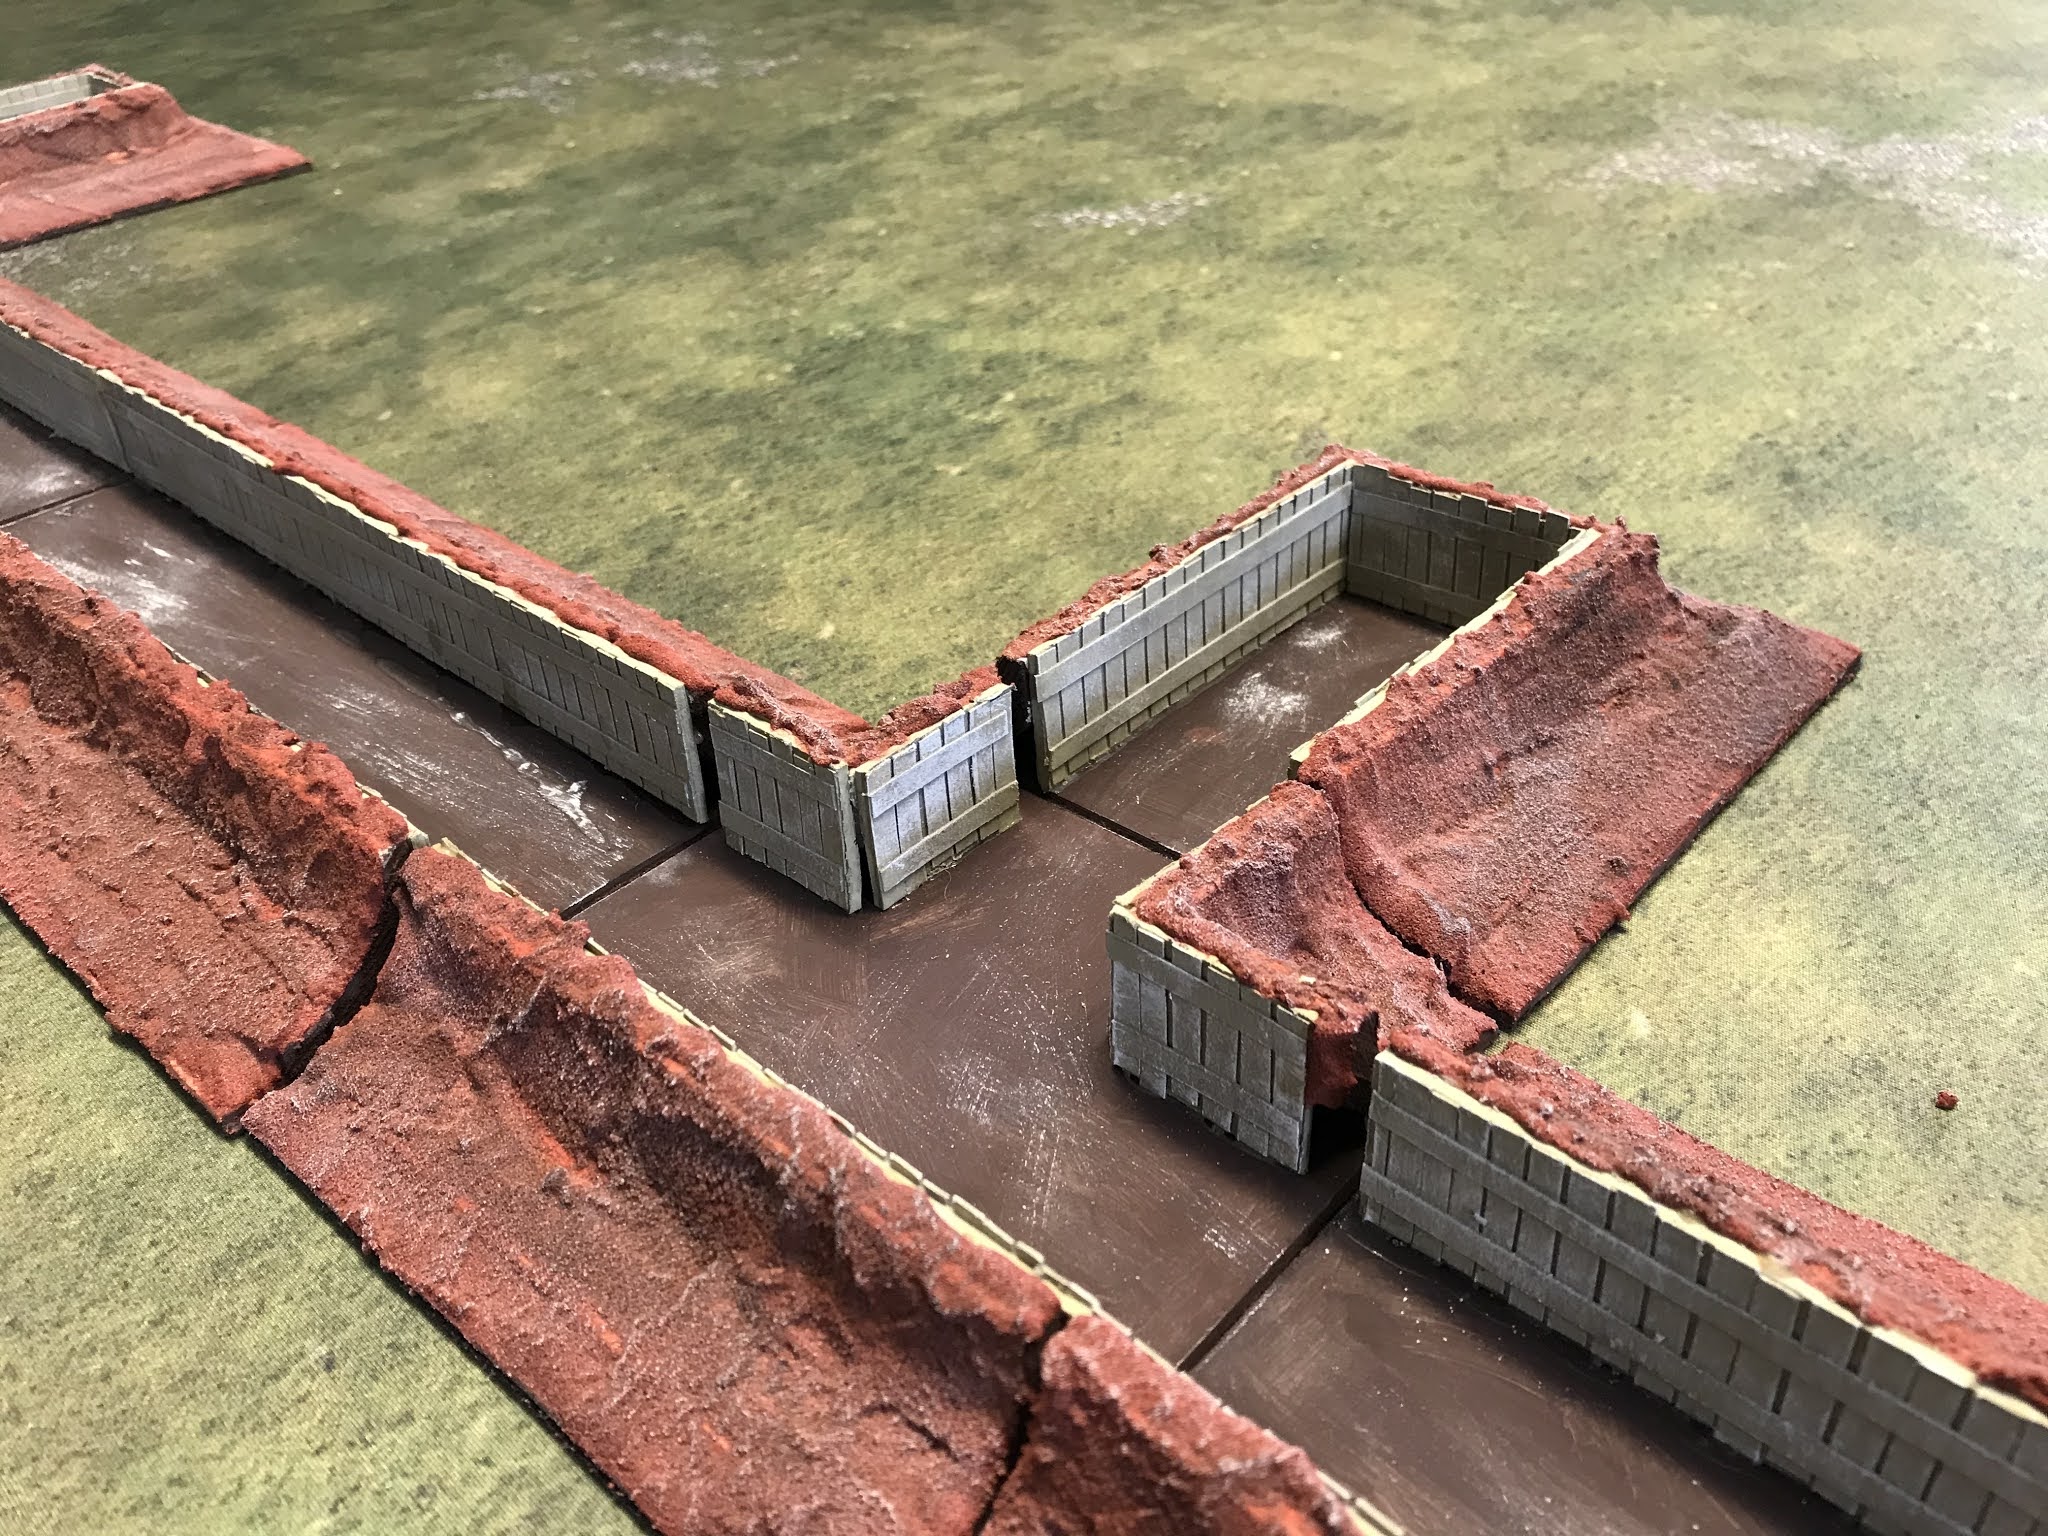
Our resident 40K gamer wanted some additional terrain making - this time a trench system. As I lack something substantial in 28mm I decided to have a go. Its constructed from wooden beading and cardboard all mounted on hardboard to stop warping.
The whole set is pretty big with 6*straights, 2*corners, 2*T-junctions, and 2*end pieces. I had planned a command post but ran out of beading and it only comes in 6' lengths, so that may have to wait for some future date or become sandbag construction.
Stretched out I think there is 8' worth.
| Add caption |
| Add caption |
| Add caption |
Friday, 20 September 2019
Journey to the end of the world
I've recently returned from a tour of west Wales, plenty of castles and dark ages stuff on show, plus some Napoleonic material. I may be inspired to further round of terrain building.
First up some Dark Ages Welsh buildings at St Fagan's - a round house, a section of stone wall and a Welsh kings hall. The wall seems quite luxurious being stone but I suppose it is for a king.
Next the gatehouse at St David's cathedral - definitely more defensive than pretty.
From the Napoleonic era is a recent tapestry depicting the French invasion of Fishguard in 1797. I've only shown a couple of frames from the 100 metre tapestry which was done for the 200th anniversary in 1997.
Also in Fishguard a small fort overlooking the harbour. A shot was fired at the approaching French but the garrison only had blanks so it was more a warning than a threat.
Way back to the Iron Age is this tomb Pentre Ifan from about 3500 BC.
Now a few shots of Pembroke castle which is fairly complete and mostly accessible. The gatehouse is especially impressive although largely rebuilt in the 1920s.
And finally a pill-box at Cardigan castle overlooking the main bridge. Decent lines of fire...
First up some Dark Ages Welsh buildings at St Fagan's - a round house, a section of stone wall and a Welsh kings hall. The wall seems quite luxurious being stone but I suppose it is for a king.
Next the gatehouse at St David's cathedral - definitely more defensive than pretty.
From the Napoleonic era is a recent tapestry depicting the French invasion of Fishguard in 1797. I've only shown a couple of frames from the 100 metre tapestry which was done for the 200th anniversary in 1997.
Also in Fishguard a small fort overlooking the harbour. A shot was fired at the approaching French but the garrison only had blanks so it was more a warning than a threat.
Way back to the Iron Age is this tomb Pentre Ifan from about 3500 BC.
Now a few shots of Pembroke castle which is fairly complete and mostly accessible. The gatehouse is especially impressive although largely rebuilt in the 1920s.
And finally a pill-box at Cardigan castle overlooking the main bridge. Decent lines of fire...
Thursday, 3 January 2019
Scrath-built seige equipment - this years Christmas makes
In best Blue Peter tradition I like to make something over the Christmas period that I can use in my forthcoming games. This year I opted for some siege equipment to go along with the inclusion of sieges in Clash of Kings 2019. It should see action in the upcoming Crusader historic campaign and also the planned fantasy campaign.
I already have some mantlets and ladders from a previous game so I've supplemented them with siege towers and catapults. More details below.....
Simple frames are constructed for the "stop" and then catapult arms added from a carved lolly stick. The whole construct is then added to a base for additional rigidity. I opted not to bother with wheels but these could be easily added.
Finally they are painted with acrylics, which really bring them to life.
The sides of the box are then glued in place, with one hinged to form the draw-bridge. I did nt add chains or ropes but this could have easily been done at this point. The whole structure is glued with PVA and made from 3mm artist board. With the walls and floor in place it surprisingly strong.
Detailing is needed though otherwise these would be somewhat slab-sided and dull. So I went for some timber framing made from extra-long matches, again glued with PVA. Wheels were added from some 20mm round plastic bases leftover from my Perry 8th Army.
As with the Catapults it they were finished with acrylic paints and dry-brushed to bring out the textures.
I already have some mantlets and ladders from a previous game so I've supplemented them with siege towers and catapults. More details below.....
Catapults
These are constructed from 6mm beading obtained cheaply from the local DIY store. Each is about
100mm long by 60mm wide. The card on the corners adds some strength to the but-joints and also allows some detailing later.
Finally they are painted with acrylics, which really bring them to life.
| Rear view |
| Front view |
Siege towers
The siege towers were a slightly more involved build. I started with 3 sides made from card with reinforcements that would support the floors - vital to make the structures rigid. I went for 120mm wide and 190mm high, with space to accommodate three standard Kings of War infantry regiments or Armati units.
| Two floor and part of the front in place |
| Completed structures with the bridges in place |
As with the Catapults it they were finished with acrylic paints and dry-brushed to bring out the textures.
| Front view with troops in place - 28mm crusaders |
| Rear view |
Friday, 30 March 2018
How to make 28mm olive trees
This summer we're planning to stage a WWII campaign based on the German airborne invasion of Crete. A quick bit of research revealed that olive groves were a major terrain feature on Crete and so I began pondering how to recreate this. Buying 60+ olive trees would be costly so I set about making my own.
The starting point was some plastic tree armatures from Woodland Scenics, I went for two packs of 28 * 3" - 5". These are in two parts which you press together, no glue needed. They are usually about £15 a pack including postage.
To create the distinctive trunk colours, I went for some heavy dry-brushing in both light brown and then white to bring out the texture on the models. The armatures can then be twisted into various shapes and in this case that meant the swept-back look common in olive trees
For the foliage I have used some rubberised horse hair, spray pained with a Halfords ultra-matt light green and then dty-brushed in white. The effect I was after was the grey-green colour so prevalent in olive trees. I was lucky enough to inherit several large sheets of horsehair from someone's failed foray into furniture restoration and it certainly works well as foliage.
The branches have plenty of spikes on them so I have opted to simple push them into the rubberised and not glue them. As my wargames stuff rarely leaves the comfort of my room I don't need to worry about then being transported. Finally I attached them to small bases to add some weight to the bottom
At just over 50p each I think they will do nicely for Crete and for our various ancients campaigns in the classical world.
The starting point was some plastic tree armatures from Woodland Scenics, I went for two packs of 28 * 3" - 5". These are in two parts which you press together, no glue needed. They are usually about £15 a pack including postage.
To create the distinctive trunk colours, I went for some heavy dry-brushing in both light brown and then white to bring out the texture on the models. The armatures can then be twisted into various shapes and in this case that meant the swept-back look common in olive trees
For the foliage I have used some rubberised horse hair, spray pained with a Halfords ultra-matt light green and then dty-brushed in white. The effect I was after was the grey-green colour so prevalent in olive trees. I was lucky enough to inherit several large sheets of horsehair from someone's failed foray into furniture restoration and it certainly works well as foliage.
The branches have plenty of spikes on them so I have opted to simple push them into the rubberised and not glue them. As my wargames stuff rarely leaves the comfort of my room I don't need to worry about then being transported. Finally I attached them to small bases to add some weight to the bottom
At just over 50p each I think they will do nicely for Crete and for our various ancients campaigns in the classical world.
Subscribe to:
Posts (Atom)