Title

Title
Tally Ho!
Showing posts with label Teutonic Knights. Show all posts

Saturday, 12 March 2016

Lion Rampant - the final battle

Saracens:  28 Glory Points
Crusaders: 32 Glory Points

The Scenario

For our final game we decided on a Battle Royal - a variation on the Bloodbath scenario, with three 20 point retinues per side. For the Crusaders it was Knights Hospitaller, Teutonic knights and the English. The Saracens fielded a large force of mounted and infantry, pretty much all the figures we had. The scenario was simple (destroy the enemy) so we threw in a few Boasts to liven things up and a Princess to be rescued and returned to her father.

The deployment

The wargames gods were cruel to the Saracens as they were forced to deploy all three of their retinues before the enemy. This enabled the Crusaders to deploy their best defence forces (the English) against the massed Arab cavalry attack on the Saracen left.

Teutonics and Hospitellers hold the centre / left

The English on the right 

The Saracen centre and right 

The Saracen centre 


The Saracen cavalry massed on their left

Long-shot from the Saracen left 

Long-shot from the Saracen right
As its a large game it is perhaps best described by zone rather than strict chronology.

 The Saracen right

On this flank Stuart the Elder's Hospitallers made their first outing against the Younger's Saracen's. Things started badly for the Arabs with the horse archers failing to evade and being destroyed. A unit of Saracen heavy cavalry also feel victim, until a well-timed flank-charge ended the knights run and saw the Grandmaster struck-down leading the attack. 

Tally ho

Knights press forward
Some bad dice meant the Hospitaller infantry was late to the fight and made limited progress. It was advantage Crusaders though as they had done the most damage.

The Saracen Left 

The Arab force on this flank was entirely mounted with 2 units of horse archers and about 5 of heavy cavalry. Usually this would be a powerful force but they were up against the English in a good defence position.

Glamping Saracen style
 
Saracens advance


The English holding firm

The Saracens break through 
The Arabs were eventually able to wear-down the English and dispose of a couple of units including one of the longbow men. The Saracens were well-placed to turn the flank.

The Centre

If the flanks had been decisive then the centre was much more sew-saw. The battle began with a strong Saracen advance seizing both the wood and the farm in the centre. The Arab skirmishers managed to rescue the Princess and spirit her away to safety. The Saracen archers also won the archery duel with the Teutonic crossbow men and forced them back. So far so good for the Saracens.    

Capture the farm
 
The Saracens rescue the princess 
However as we all know things are never straight forward in Lion Rampant and a couple of bad turns can decide the outcome. The first Saracen misadventure was that the Fierce Foot found the Teutonic foot knights an irresistible target and both charged head-long into the fray. Bad move - they were quickly dispatched for minimal casualties.

At this point the centre suddenly began to look weak. Infantry had to be diverted to the Saracen right to counter the Hospitaller advance, leaving it short-handed as the Teutonic mounted knights rumble forward through a couple of units.        

With loses mounting fast in the centre only a unit of Saracen spearmen stood farm in the farm. With hedgehog formation and cover they had a  might 5 Armour and were pretty-much untouchable.


Propping-up the Saracen right
With the game all but lost Saracen commanders issued a challenge to single combat to the Teutonic leader. Amazing he managed to win the combat rolling 2 sixes! Even that was not enough though as the Saracens had lost too many points to have any hope of winning.

The End

So dear reader that is the end of the battle and of the campaign. The Crusaders won the final battle and claimed the campaign with a last-gasp victory after being behind for much of the time.

Overall a fun campaign and a fun set of rules once we learned not to take them seriously. The big plusses were the small  / colourful armies and the ability to fit 2 or 3 games into an evening.  The introduction of the flanking rules and allowing a reroll if your first go failed helped the play too.

So now its on to our next campaign - Montrose's fight to secure Scotland for the King


Saturday, 5 March 2016

Sword and Spear Ancients - our first game

This week we tested a new set of ancients rules - Sword and Spear by Mark Lewis. This is part of the on-going quest to find a set that  is suitable for club nights. Since you should define your terms for me Suitable is:
  • Plausible outcomes where reasonable tactics are rewarded.
  • Simple and fun with limited scope for arguments (we're gamers so NONE = impossible!)
  • Good for multiple players per side with everyone involved most of the time.
  • Visually attractive.
  • Fast enough to resolve a decent sized game in 3 hours.
  • Not needing rebasing.

The Rules

The core of the rules is the activation system, which has something in common with Bolt Action. One dice is placed in a bag for each unit, different colours for each side. Seven dice at a time are drawn, rolled, and used to activate units. Units have an activation score and meeting or exceeding the score allows different actions. You can place multiple dice against a unit to increase combat power, movement, or morale. You can also use dice to counter enemy actions.  The turn is over when all the dice have been used.

So an interesting twist on "friction command" with less randomness than games like Lion Rampant as you should always move a good proportion of your army each turn. The plus is that it forces you to make choices all the time. The fact each mini-turn has a mix of both sides dice means you are involved throughout and there is some subtlety in use of your dice.

The down-side is its "friction command" at the end of the day. So if you don't like that, find it gamey, or want to have full control of your troops then it will not appeal to you.

The Game  

As we had the figures available from our recent Lion Rampant games we decided to pit our Early Crusaders verses Turks. We played with 450 point armies on an 8'*4' table with a couple of players a side. Since it was a practice game we just lined-up with infantry in the centre and mounted on the wings

The Crusader right - lots of doughty spearmen and crossbows

The Crusader left - Teutonic Knights subbing as Brother knights 


Turkish right - the elite cavalry 

Turkish left - the average / poor stuff

Turkish infantry - not much expected from them ;-) 
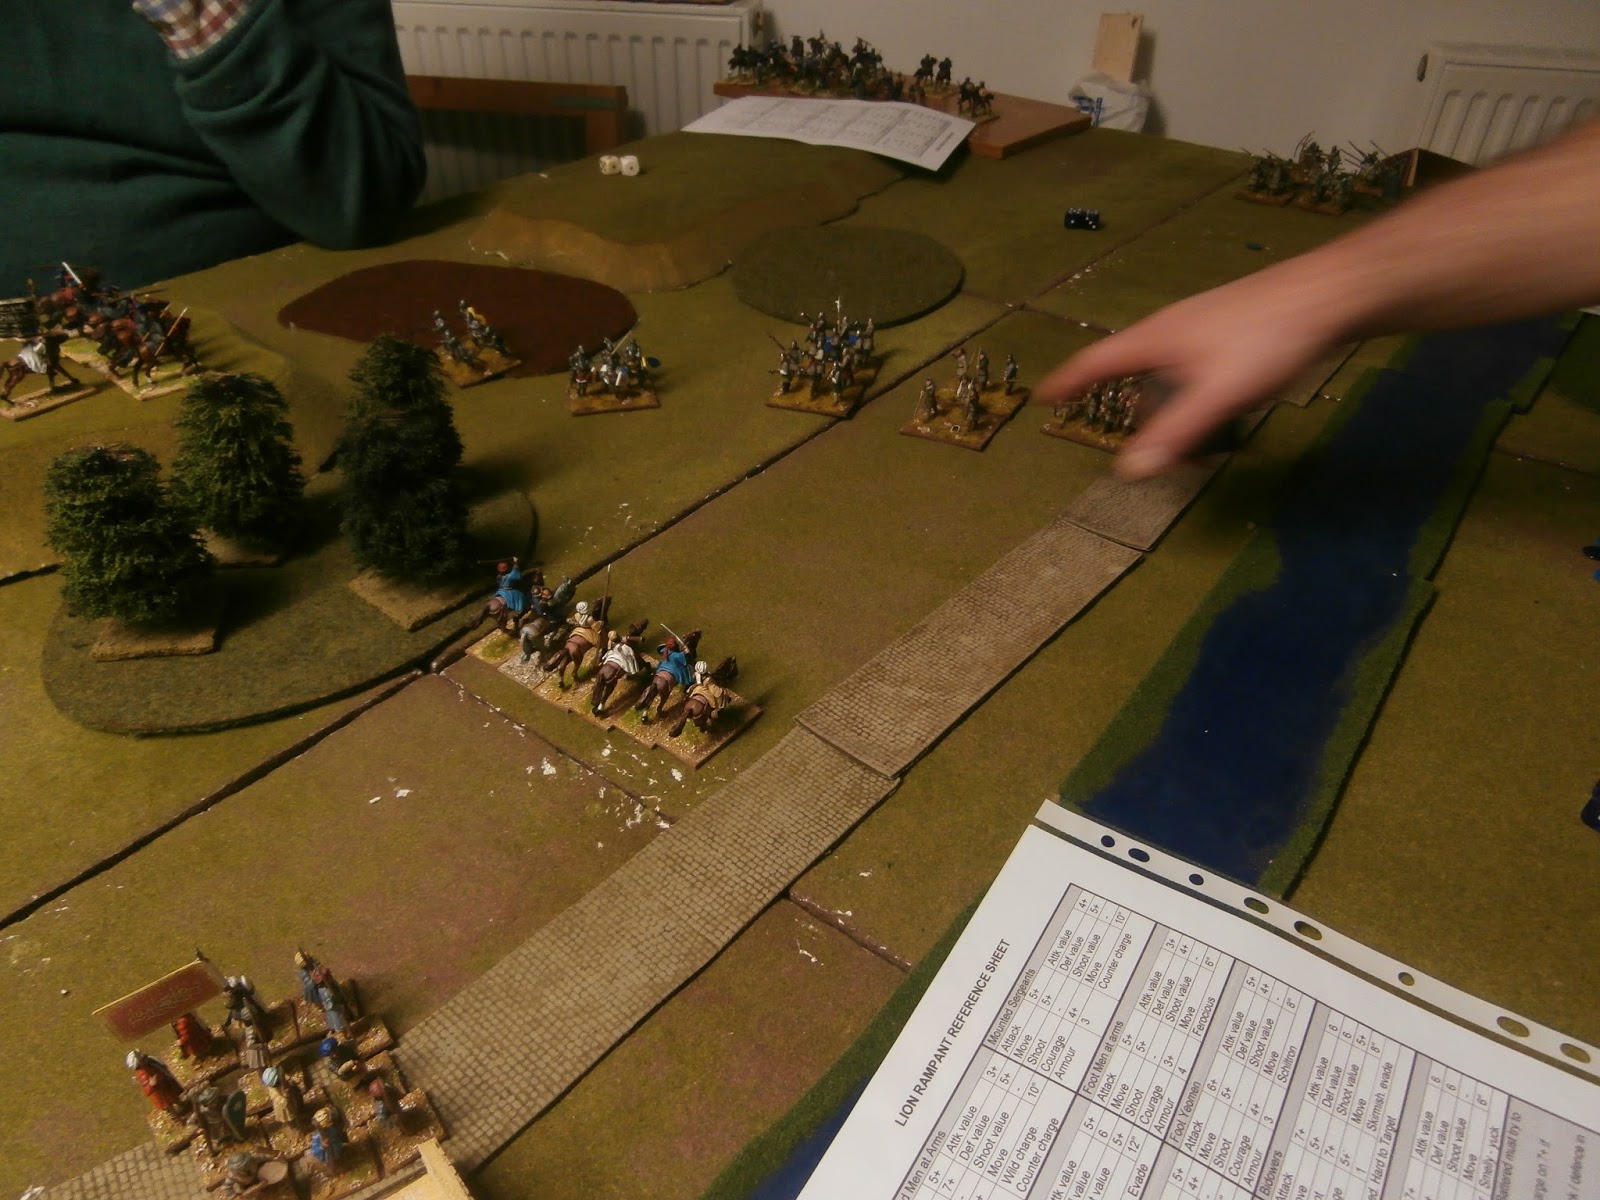
Overview
Due to the points difference the Turks had 18 dice to the Crusaders 12. The Crusaders also had quite a few units (spearmen and crossbows) who looked like they would do better on the defensive. So the Turks attacked and the infidels wisely sat back.   
Turks advance on their left
The one exception was that the Brother Knights pushed forward in search of prey. In S&S they are "Impact" troops which makes them deadly if they charge. Use of the initiative dice meant that one unit was charged and flanked - bad news for them. The other though as able to get up a head of steam an smashed two units of Turks.

Brother Knights rumble into action
 On their left however the Turks saw-off some mounted sergeants and flanked the enemy position.

Turks do well on the left
At this point the Turks noticed they had some potent "Impact" infantry lurking at the back and so pushed forward with the centre. By now most units were committed and it was about careful use of the dice to try and win some victories.  
A general melee ensues!
By finishing time the Turks had reached a soft army break-point (1/3 points lost) but the Crusaders were not far behind. Another 30mins and we'd have seen a result.

The Verdict

An interesting set of rules that did force you to constantly make choices and keep both sides engaged throughout as you had to counter enemy activation dice placement. The attraction is the friction command system, so if you don't like that approach, then Sword and Spear will likely not appeal.

We've decided to play a second game with the same armies so we can focus on the tactics not learning the game / armies.

So how does it do against my checklist?

  • Plausible outcomes  - TBD after a further game
  • Simple and fun - YES
  • Good for multiple  - YES
  • Visually attractive.- YES
  • Fast enough to resolve a decent sized game - TBD.
  • Not needing rebasing - YES


  • Wednesday, 10 February 2016

    Lion Rampant Campaign - week 6 AAR

    Campaign Standings

    Saracens:  27 Glory Points
    Crusaders: 20 Glory Points

    After a week off we resumed with 2 battles. Both we have fought before but we swapped sides / players around so no one was fighting a side they had used previously.   

     Hammer and anvil - Saracen win, 4 points

    This scenario involved the English attempting to exit the far edge of the board. A force of Saracen infantry acted as the anvil with the Arab horse playing the hammer.

    The English attacking force

    Part of the Saracen Anvil

    Long view of the table
    The early moves seemed to favour the English with most troops moving forward smartly and the Saracen cavalry mostly failing to appear apart from some Yeomen horse archers. However once the English came in range of the Arab foot archers they suffered an unlucky  Battered on their lead bowmen. In Lion Rampant Battered units under fire can unravel quickly and that proved the case here as both units if English archers became bogged-down. 

    
    Saracen horse arrive
    With the arrival of the Saracen horse the English found themselves surrounded, under heavy fire, and with no effective way to respond. In the end they were forced to charge with their foot sergeants, which handed an advantage to the Saracen mounted sergeants.  

    English try to break out

    End Game
    At the close of play the English had lost several units and failed to advance more than a foot into the table. A victory for Saracen shooting and wobbly English morale. We've certainly found that mounted archers or well protected foot bowmen can be a winning combination more often than not.

    The Convoy - Saracen win, 4 points to 2 points

    In this scenario the Teutonic knights were escorting some booty-laden donkeys from one corner of the table to the opposite one. The Saracens deployed in the other three corners, with their foot sergeants blocking the Teutonic knights exit.

    
    The Teutonic Knights

    
    Part of the Saracen ambushers
    The Germans initial move was to send its mounted forward to clear the Saracen force threatening its right flank. After a brisk fight they were able to clear away some of the enemy but at the loss of their Saracen auxiliary cavalry. The Arab horse archers though proved as slippery as usual.

    The Teutonic's try to clear the flank 

    Success!

    The initial threat removed, the convoy advanced down the road where some Saracen foot lay in ambush for them. As usual the fierce foot proved fun but short-lived, causing limited damage to the Teutonic foot. More successful though was the two units of mounted archers who wore away the Germans.

    Ambush awaits

    Germans press forward

    The horse archers reappear on the flank
     
    Thanks to some focused shooting the Saracens destroyed two of the three units guarding the treasure and  so the Teutonic Knights could not win. Victory was conceded to the Saracens.

    Reverse view

    Saturday, 16 January 2016

    Lion Rampant campaign - week 4

    Campaign Standings

    Saracens: 19 Glory Points
    Crusaders: 15 Glory Points

    Two games this week. The English (Bruce / Mike) fought The Ambush against the Saracens (Roy). The Teutonic Knights (John / Richard) fought A Taxing Afternoon against the Saracens (Stu / Stuart)

    A Taxing Afternoon - Saracen win

    This scenario features both sides attempting to raid a village and collect taxes hidden under treasure markers scattered about the field. As the armies are 30points we expanded the markers and had 1*3points, 3*2points, 2*1point, and 2*0points.

    The Teutonic forces

    The Saracens

    The target of the action - the unfortunate village 
    The game opened with both sides rushing forward, well more lumbering in the case of the Germans.
    The early phases favoured the Saracens, with their greater mobility, as they secured 4 points worth of treasure.

    Germans advance to the village

    The Saracen horse secure some treasure
    The key battle was on the south side of the village where both sides struggled over 3 objectives in the fields. There was punch and counter punch but the Saracens came out ahead securing 2 points to 1.

    The key action
     As the Saracens were ahead on treasure points they withdrew their cavalry, effectively winning the game at that point. However the Saracens pressed forward hoping to catch the Teutonic's slower moving troops.


    After a successful rear-guard action by their infantry the Germans were able to secure their treasure. The result was a Saracen victory by 2 points. 

    The Ambush - English win

    This scenario is another based on C S Grants Scenarios for Wargames book. The English column is marching down a road, heading for a bridge and safety, when it is ambushed by a Saracen force concealed in four hiding places. 1 point is awarded for each units escaping (1/2 if half strength) or 1 point to the Saracens for each destroyed / failing to escape.   
    

    Nice day for a stroll
    The Saracens sprung their ambush as soon as the English were about half way down the table, with a small blocking force at the bridge and most of the troops attacking the middle of the column. The English followed classic doctrine and advanced into the thickest of the ambushers to clear the kill zone.

    The ambush is sprung
     
    Have at them lads
      
    The English make progress

    The blocking force  
    The Saracens caused a steady stream of casualties to the English, who made no real attempt to make for the bridge, but instead focused on killed the enemy. The English foot men-at-arms proved especially resilient and ground-down the Saracens. With the enemy cleared the English advanced on the bridge itself  and the Arabs lacking any missile troops were forced to withdraw.  
     
    The English advance 
      
    In the end the result was close with the English winning by 1 point.