Title

Title
Tally Ho!
Showing posts with label Highlanders. Show all posts

Saturday, 20 August 2016

Montrose camapign - week 11

Battle of Ross and Cromarty - Montrose Wins

After a short break over the summer we resumed the Montrose ECW campaign. Following a recent run of success Montrose was now well ahead with Scotland very close to falling entirely to the Royalist forces. This would therefore be the final battle of the campaign should Montrose win.

The Scenario

Once again this was straightforward pitched battle with both sides seeking to inflict maximum damage on their opponents - the winner being the first to rout 50% of the enemy. The victory markers in the village each counted as 1 routed unit.

Covenanter Forces8* Foot (1 * Vets)
1 * Field artillery
5 * Horse (2.5 regts)
1 * Forlorn Hope (Vets)

Montrose Forces
3 * Vet Foot (Irish)
5 * Gordon Foot (3 Raw)
3 * Highlanders
1 * Field artillery
4 * Horse (2 regts)
1 * Light gun

The Battle

The two sides adopted slightly different plans on this occasion. The Covenanters launched a general assault on their right and centre but refused their left as they found their cavalry facing foot. Montrose went for something closer to the Bulls Horns with Horse attacking on the left and Highlanders and Gordon foot on the right,
Stuart the Elder points-out his attacking foot. Montrose horse in the distance

Lowlanders and highlanders attack
On Montrose right his Raw lowland foot made good progress against the Covenanter horse but the highlanders were repulsed by the Veteran Forlorn Hope holding the village. In the centre the Covenanter foot advanced steadily in two lines - this looked a strong position as Irish Brigade was thinly spread with no reserves. The Wargames gods are fickle though, and for the second battle in a row the Irish Brigades shooting was deadly, quickly destroying the first rank of attackers.

Highlanders make slow progress in the village

Covenanter foot under heavy fire

Over on Montrose left the Horse made good progress against their outnumbered opponents and were able to push them  back, threatening the flank of the Covenanters. In the centre the slaughter continued with the Irish brigade routing several units of the enemy foot for little apparent damage.

Montrose Horse dominates the field

Still no progress for the Highlanders

Covenanter foot quits the field
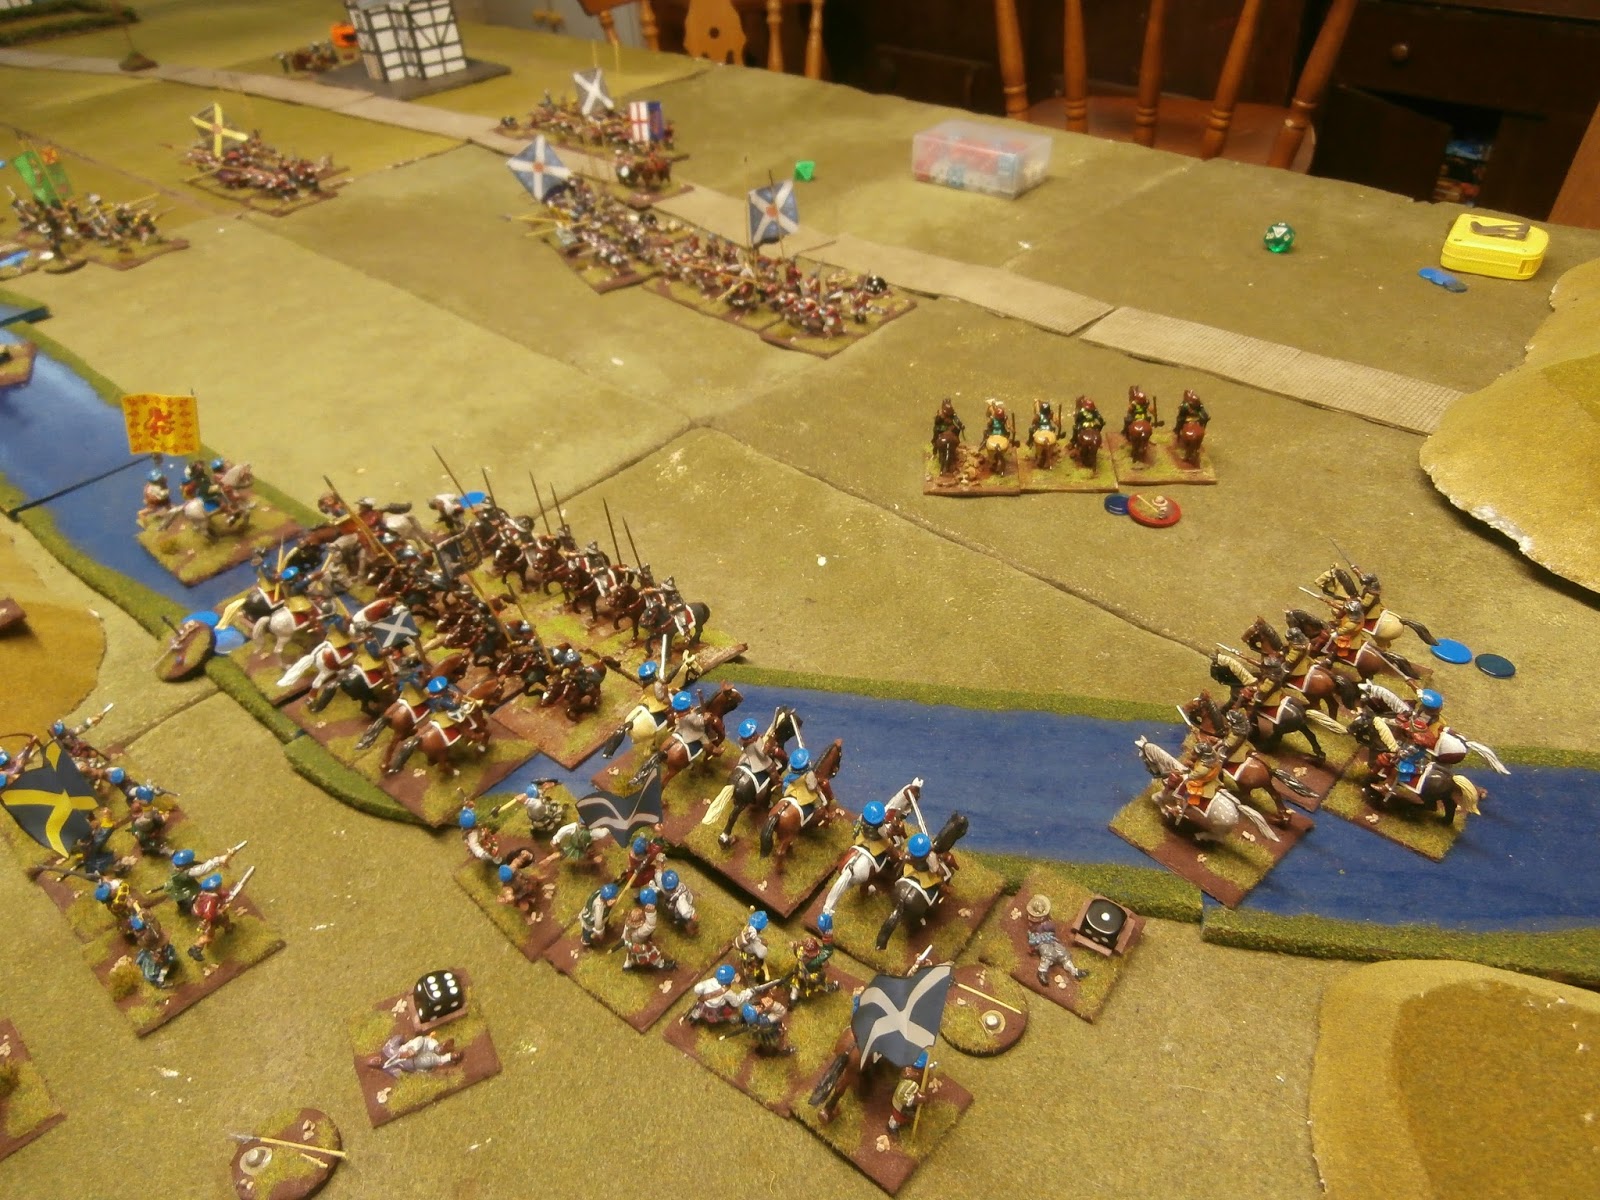
In a slightly bizarre, but understandable, mix-up the Covenanter lancers on their left launched an unsupported frontal charge on the Gordon Foot. It turned-out the blue bonnets had led them to believe they were Highlanders. Needless to say it did not go well for the Horse. 

Opps
With the centre crumbling, and the flanks in trouble, we reached the point where 50% of the Covenanters had routed. So a third straight win for Montrose.
View of the field

The Verdict

This victory meant that Montrose had taken a decisive lead and was 9-5 ahead in territories held. By common agreement we felt that Scotland had fallen to the Royalists and so in  June 1645 the Covenanters sued for peace.
So all-in-all a strong showing for Montrose and it was nice to play a campaign through to conclusion over a period of about 4 months. Some reflections from my perspective:

1. The games looked great and with the addition of Stuart the Elders troops we were able to field some large armies which added to the spectacle.

2. Our various tweaks to the rules worked pretty well, with large battles (15'ish units a side) fought to conclusion within 3 hours every week.

3. The simple campaign system provided some benefits to winning but obviously limited strategic scope. With both sides attacking and perhaps the territory rewards known in advance this aspect could have been enhanced.

4. Creating overlaps was the key to success as this enabled you to rapidly create unsustainable damage on the enemy. Montrose seemed to manage this more often than the Covenanters. Cavalry combats were too slow and bloody though, so in-effect they cancelled each other out and even the winners were unable to take any further part in the game.  
       

Saturday, 2 July 2016

Montrose Campaign - Week 8

Lanarkshire Nov 1644 - Covenanter Win 

Scenario

Following last week's draw both sides once again contested Lanarkshire. The game involved a meeting engagement with both sides trying to capture two vital river crossings. In addition there was the possibility that one side might discover a previously undocumented ford and so be able to force an additional crossing. The weather for this battle was heavy rain, meaning no volley fire and no long range artillery fire.


Covenanter Forces
9* Foot (1 * Vets)
5 * Horse (2.5 regts)
1 * Field artillery

Montrose Forces
3 * Vet Foot (Irish)
3 * Gordon Foot
3 * Highlanders
4 * Horse (2 regts)
1 * Light gun
1 * Field artillery


The Battle

Given the scenario there were limited options for both commanders, the main choices being about what forces to devote to the search for the ford. The Covenanters deployed with infantry facing each bridge, Horse on their right, and more infantry on their right. Montrose deployed with Horse ready to storm one of the bridges and also search for the ford on his left. The Highlanders were deployed on his left.

Left-hand bridge - Covenanters forces

Left-hand bridge - Irish Brigade
Right-hand bridge - Covenanter forces

Right-hand bridge - Montrose forces


Gordon Horse prepare to attack

Doughty Covenanters ready for  action

The deployment on the flanks very much favoured the Converters on this occasion. Lacking any distance shooting Montrose Horse on his right were forced to withdraw and not search for the ford for fearing of simply being picked-off. On his left Montrose highlanders lack of distance shooting meant they could not hinder the Covenanter's Horse.
 
On the right-hand bridge Montrose made a vigorous charge straight across the river, forcing the Covenanter foot into pike stand and tying down most if that wing. The Covenanter shooting eventually told for the leading squadron of Montrose Horse, but the second squadron was able to charge some infantry in the flank, routing them, before going on to attack some Horse lurking at the back. The delaying action meant that Montrose was initially able to dominate this bridge but he was unable to force a victory. so the right-hand bridge remained contested throughout the battle.

Gordon Horse attack

Gordon Horse hemmed-in but still fighting hard

Gordon's are alive - they escape the trap and rout some Covenanters

Stalemate at the right-hand bridge 

On the left-hand bridge both sides settled into an extended firefight that last most of the game. Numbers were equal but Montrose seemed to have all the advantages of superior morale, artillery support, and cover for one of the regiments. Despite this the Irish Brigade, as so often, found itself outshot and eventually the centre regiment broke. At this point numbers told as the Covenanters were able to bring-up reinforcements and force a crossing. So the left-hand bridge fell to the Covenanters.

Covenanters force across the rivwe

The left-hand bridge is lost 

On the far left both sides advanced, with the Covenanter Horse locating the ford after a few turns. The Highlanders moved to block them and sealed the flank of Montrose position. Despite being at a disadvantage the Highlanders were able to contain the enemy Horse for the remainder of the game.

Battle for the ford

Highlanders hanging-on

Horse cross the river but the flank is stable for now

So in the end a victory for the Covenanters by 1 bridge to 0.  In our post-match analysis we concluded this was a good scenario for the Covenanters as they had a significant advantage in quality and quantity of Foot regiments overall, despite the Irish Brigade. In this game the Highlanders lack of distance shooting told against them.

Campaign Situation   

Montrose remains slightly ahead on territory captured.


Saturday, 11 June 2016

Montrose Campaign - week 5

Perthshire Aug 1644 - Covenanters win


Scenario

A fairly straightforward affair this week as the scenario generator produced a Pitched Battle. Both sides clash head-on but to add some uncertainty, deployment is done behind screens and then revealed. Both sides also place an objective in each sides half that counts as a routed enemy unit if captured. Victory is achieved by routing 50% of the enemy forces.

Covenanter Forces
9 * Foot regiments in 2 brigades
4 * Horse squadrons in 2 regiments
1 * Field artillery
1 * Forlorn Hope
Montrose Forces
3 * Veteran foot regiments (Irish)
4 * Foot Regiments (Gordon Foot)
2* Highlander regiments
5 * Horse in 2 regiments
1 * Field artillery
1 * Light artillery 


The Battle


Montrose deployed along the ridge-line behind a stream. On the right were massed the Horse and Highlanders with the Irish Brigade in support. On the left were the lower-grade Gordon foot. The plan was a simple one - to beat-back the Covenanter Horse through superior numbers and turn the flank the position. Meanwhile the weaker left would be refused to allow time for this to be completed.
 
The covenanters deployed with the bulk of their Foot in the centre. The Horse were on the left (opposite Montrose mounted) and half a Foot brigade deployed on the right to attempt a flanking manoeuvre.       

Covenanter centre and left


Covenanter right - Stuart demonstrates the art of Wargames pointing (again)

Montrose right - mounted and highlanders

Montrose refused left flank

Montrose flank-guards
The battle opened with a swift advance to combat by both sets of Horse. Honours were fairly even between the two sets of Trotters but the Covenanter lancers proved deadly and destroyed a squadron of Montrose Horse for very little loss. Things got worse for Montrose as both sets of Covenanter Horse gained the upper hand, pushing him back onto the Highlanders.
 
The cavalry clash

The covenanters gain the advantage 
In the centre the Irish Brigade advanced to support the Horse and soon began a fire-fight with the Covenanter Foot. Although well positioned the Irish shooting proved disappointing and casualties soon began to mount against them. Meanwhile on their right the Covenanter Foot advanced steadily and eventually came in range of the weaker Gordon  Foot holding the heights. 

Irish Brigade under pressure 

Montrose left under pressure
 

As the game drew to a conclusion Montrose superiority in Horse began to tell and they were able to force their opponents back. It was however too late, the beleaguered centre was all but gone and the Gordon Foot began to wobble. By now every Royalist commander apart from Montrose was also dead or wounded. Sensing that defeat may be close Montrose ordered a retreat and left the field to the Covenanters.  
 
Montrose Horse finally drive back the enemy
Montrose plan was a reasonable one but came unstruck as the mounted could not achieve a rapid enough victory to threaten the Covenanter foot. Some poor shooting from the Irish was then enough to seal their fate.  

Campaign Situation

This was the Covenanters second  victory meaning Montrose is ahead 5 territories to 4.


Tuesday, 31 May 2016

Montrose Campaign - week 4

Selkirkshire - July 1644. Montrose Wins

Scenario

This battle saw the Covenanters out-manoeuvred by Montrose and facing a possible double envelopment. As with a Flank Attack upto 1/3 of the attackers forces can be sent on a flank march, but in this variant both sides may be attacked not just one.

Covenanter Forces
8 * Foot regiments in 2 brigades
4 * Horse squadrons in 2 regiments
2 * Field artillery
1 * Forlorn Hope (Vet)
Montrose Forces
3 * Veteran foot regiments (Irish Brigade)
3 * Foot Regiments (Gordon Foot)
4 * Horse in 2 regiments
1 * Field artillery
1 * Dragoons

The Battle

Somewhat fearful of the double envelopment the Covenanters deployed in a slightly deeper than usual formation with guns between the brigades. Cavalry guarded the more open right flank, whilst the Forlorn Hope occupied the manor house. Montrose decided to forgo the flank march and instead focus on a two-pronged attack. The Irish Brigade and Horse would attack the likely corner on the Covenanters right and the Highlanders would  manor house with flanking support.

View from Montrose right flank

View from Montrose left flank. One of the Covenanters clearly visible keeping busy with his painting

The Horse - view on Montrose left
The battle began with an all-out assault by the Highlanders on the Forlorn Hope in the manor house. The Forlorn Hope's shooting was fairly ineffective but Montrose artillery had a rare success causing them to be become Shaken. With a skirl of the pipes the Highlanders fell upon the unfortunate musketeers and quickly routed them. Their blood clearly up they contained their attack and managed to eject the supporting infantry regiment from the grounds of the manor house.
 
The calm before the storm

The Highlanders make a dent in the lines
On the Covenanters right both sides advanced their Horse and executed a charge, as is often the case with cavalry combat it was a to-and-fro affair. Montrose lancers smashed their way through their opposite numbers assisted by some excellent saving throws. Conversely Montrose trotters failed to charge and were pushed-back by their opponents. Honours fairly even in the cavalry melee.
 
If you can nt be good be luck....
Over on the Covenanters left the Highlanders completed their captured of the manor and with the support of the Dragoons and some infantry managed to rout a further two units, turning the flank.
 
The flank attack presses home 
 
 
The flank is turned
In the centre and right Montrose managed to execute his attack on the dog-legged Covenanters line. On the flank itself the attack went pretty well, with the Irish Brigade managing to outnumber the enemy and score significant hits.  However you can nt be strong everywhere and Montrose had deliberately weakened his centre to enable the flank attacks. Unable to withstand the Covenanters advance the centre eventually collapsed.
 
The successful flank attacks were however enough to rout more than 50% of the covenanters, forcing them to withdraw from the field.  
 
The flank attack moves in 

Montrose centre crumbles

The Covenanters right flank vanishes
A close-fought battle with the Highlanders for once proving successful, aided as they were by some poor morale for the Covenanters which meant they were always Shaken when attacked.   
 

Campaign Situation

Montrose scored his third victory of the campaign and so now controls 5 territories to 3.