Title

Title
Tally Ho!

Sunday 29 July 2018

Kimgs of War Lizardmen - the end is nigh

Several painting projects have been completed at the same time as I've had a little flurry of basing this week. The main beneficiaries are my Lizardmen (aka Salamanders in KOW) who are now almost completed.

Firstly a Battle Platform - not something that receives great reviews in the forums but a nice centre-piece for the army. This is converted from a Schleich plastic dinosaur with bits and bobs from the various GW Lizardmen I've bought.


Secondly two regiments of Ancient on Rinosaurs, the hardest hitting of the Lizardmen's mounted units. They are based so they could be fielded as a horde instead.


Another artillery piece has also been added. This is scratch built from leftovers from the Lizardmen, to depict a multi-barrel bolt gun.


Finally another large dinosaur, this time the GW Troglodon. This could be used as a Firedrake to provide some short-range breath weapon support or perhaps as something from another list such as the Varangur Jabberwocky.


All that now remains is a final unit of Primes / Ancients infantry and the army is complete.

Saturday 28 July 2018

Mantic Greater Fire Elemental review (Kings of War)

In the post today I received a gift from my little brother, ordered from the Mantic stand at the recent Attack wargames show in Devizes. Its the Mantic Greater Fire Elemental, costing £29.99


The kit comes well wrapped as a 3 part model plus a 75mm base. Its made from a softish resin making it easy to carve and light weight. It stands about 120mm tall.


Mine had only a small amount of flash on the arm joints that was easily removed with a scalpel. Once assembled the pose is nice and there is lots of detail to get stuck into.  The only slightly odd thing is the base is too large for Kings of War (unless Clash of Kings changed it) but I have plenty of bases to hand so its not a problem.

Front shot

Rear shot

It looks a nice model and there are some very pretty examples around. As I already have an air elemental this could be the start of a nature/elemental allied force for a future army. I will repost when mine is painted but for now here is the "official" Mantic paint job.


Image result for mantic greater fire elemental


Tuesday 24 July 2018

ACW Campaign - week 5

The second battle back from the mid-campaign break saw us struggling for control of a strategically vital cross-roads in an attack vs defence game. This was the first battle of 1863.

A feature of Longstreet is that as units gain experience their shooting / defensive melee improves but their Elan / offensive melee declines.  Winning the scouting role, and having lots of Veteran or Cautious troops, I therefore decide to defend.

The Confederates opted to deploy their strongest units on their right, aiming to attack the side of the crossroads. Their centre featured a grand battery and their left was occupied by more infantry. A cavalry unit was thrown wide on the left to distract or exploit any openings.
 
Reb right - the main attack

Reb centre / left - the grand battery

Reb left - cavalry standing by
 Deploying first I had to go with a more balanced position. Strong units of infantry held the objective with artillery support. Infantry occupied woods on either flank of the crossroads. My far right was held by my cavalry and further artillery support.
 
Union left

Union centre

Union right
As the attacker the Rebs made the first move opening-up with the grand battery and then pushing forward across the line. Fearing my centre could be blown-away I pulled back my central infantry into cover and so out of sight of the Rebs guns.

Reb right moves forward

Probing attack in the centre

Reb cavalry threatens the line  
As the Rebs approached the main defensive line, both sides engaged in some lively fire. Good cards, good dice, and helpful cover meant this went the way of the Union with gaps appearing along the Confederate line.


Rather than suffer in an uneven fight the Rebs gave a whoop and charged into combat on their right. This is where the command cards came into their own though - the Union having a card that halted one of the attackers in their tracks. The others charged-in but the fight was not now in their favour and they bounded back with more losses.


In the centre the Rebs also prepared to delver another assault to claim the crossroads. Dag nabit though if the same did nt happen with one of the attackers held-up and the other bouncing off out numbered.


The Rebs rallied gamely for a further try but were subjected to murderous fire from the well entrenched Union defenders. With little hope of victory the Confederates collected their wounded and pulled back from the attack.  

Reb attack runs out of steam on the right

Central attack stalls
This was certainly a battle where the command cards favoured the Union. The Rebs had few cards that could disrupt the defenders and were forced to use lots of cards to mitigate shooting damage. The Union by contrast had just the right cards and right time to bugger-up the Rebs attacks.

Thursday 19 July 2018

ACW Campaign - Week 4

The final battle of 1862 was a classic encounter - the Confederates were required to hold two strategic hills while the Union tried to capture then. Both sides were fairly equal in size and composition, so perhaps a tough ask for the attacker.

Deploying first the Rebs balanced favoured the right-hand hill with a reserve ready to react to the enemies movements.

Right-hand hill defenders

Left-hand hill defenders

The reserve 

The Union plan was a simple one - mass the best troops against the least defended hill and hope to out flank it before it could be reinforced. A smaller force would try to keep the defender on the right-hand hill busy by giving them a shooting target.  

The main attack

The distracting force 

The artillery park
The game opened with the Rebs pushing forward to occupy a central wood and seeking to reinforce the weak left.


The Union pressed ahead with the planned attack and threw forward a small force of NY cavalry to try and slow-down the reinforcements, or at least create a problem for them.


Now came the decisive action of the battle. The Union launched the freshly arrived NY Zouaves up the hill and routed the defending Texas infantry unit from the ridge. With the NY Calvary in support they looked likely to roll-up the line and win the day.  


However this is where the card system bit back - with the Rebs in danger of being annihilated they played series of cards that froze the Zouaves in place and allowed the Rebs deploy a deadly looking cross-fire. I say deadly looking as the dice were unkind and this cunning Confederate plan was undone by some awful rolling that left the Zouaves largely unscathed.

oh bugger - that's  lot of shooting


Not needing a second invitation the Zouaves surged off the hill and routed a second Texas regiment from the field before swinging left to threaten a third.  


Victory!

Confederate losses, combined with the captured victory marker, meant the Rebs passed their break-point, handing an unlikely win to the Union. Without doubt the stars were the NY Zouaves who loaded with advantageous cards more or less won the game on their own. Losses were heavy in the Union delaying force but they did their job!

Heroes of the Union

Saturday 14 July 2018

Saga Saracens - review and first battle

Faction Overview


Saladin - the knight of Islam
The Saracen faction offers an interesting mixture of units with a choice of being melee or shooting oriented. The core units are easy consisting of cavalry armed with melee weapons or with composite bows. These are available in either Hearth Guard or Warrior variants, and as usual the bow armed version have a lower defence value than the melee. Infantry is easy - your only choice are Levy bowmen!

So depending on the opponents / scenario you can flex your Warband to be shoot'y or harder hitting. It will however always be mostly mounted, and so may struggle in rough terrain or against massed archery.

The Abilities

These choices are also reflected in the Battle Board in the clustering of the abilities.
  • Some give upgrades in melee with additional attack/defence dice available, hit additions, or enhance melee survivability.
  • Some give shooting upgrades with free shots or hit additions. Most interesting here is Brotherhood, which gives melee bonus if the enemy took shooting casualties this turn.
  • Finally we have a couple of utility actions that help recover fatigue or remove enemy Saga dice under certain circumstances.
  • The top ability (Rare + Rare) is Appeal to the Prophet, which gives all units Resilience (2) that turn, so enhancing survivability considerably.
  • There are no hero only abilities and nothing that really disrupts the enemy, with Ruse removing a Saga dice but only if you have two units within S of the enemy.       
So nothing complex on the Battle Board and very few abilities playing off against each other. Brotherhood is the only one with any interactions and as it can be activated with any dice looks like something you should be using often. Coordination (+4 melee dice and +2 every time a Saga ability is used against you) looked powerful and would be something to use as often as possible needing Common + Common.  

Saracen Army

My Warband


Knowing I would be facing Militias Christi I was expecting large numbers of elite Hearth Guard heavy knights with a few crossbowmen and foot sergeants in support. The scenario has not been determined in advance so I chose a balanced force offering both combat and shooting:
  • 1 x Warlord
  • 8 x Hearth guard cavalry, melee weapons (2 points)
  • 8 x Warriors cavalry, melee weapons
  • 8 x Warriors cavalry, composite bow
  • 8 x Warriors  cavalry, composite bow
  • 12 x Levy archers
Composite bows give activation-free shooting, so guaranteeing plenty of archery and playing well with Brotherhood.

The first game

The scenario chosen involved both sides attempting to capture a holy relic being escorted across the table by neutral troops. So it would be a bit of a race. I lined up with most of my cavalry on my right, ready to cut-off the relic and a small blocking force on the left.


The Militias Christi (Order of Lazarus) did largely the opposite, with most of their troops heading straight for the relic and a unit of brother knights on their left.


The game opened with both sides advancing towards the middle of the table. I pushed my bow-armed warriors quickly into the knights, hoping for a devastating volley.  I was however disappointed due to some poor dice and an annoying ability called Orison, which enables the knights to cancelled up to 3 hits a turn. With the archery failing the knights then barrelled down from their hill and mashed one unit of Saracen's.    


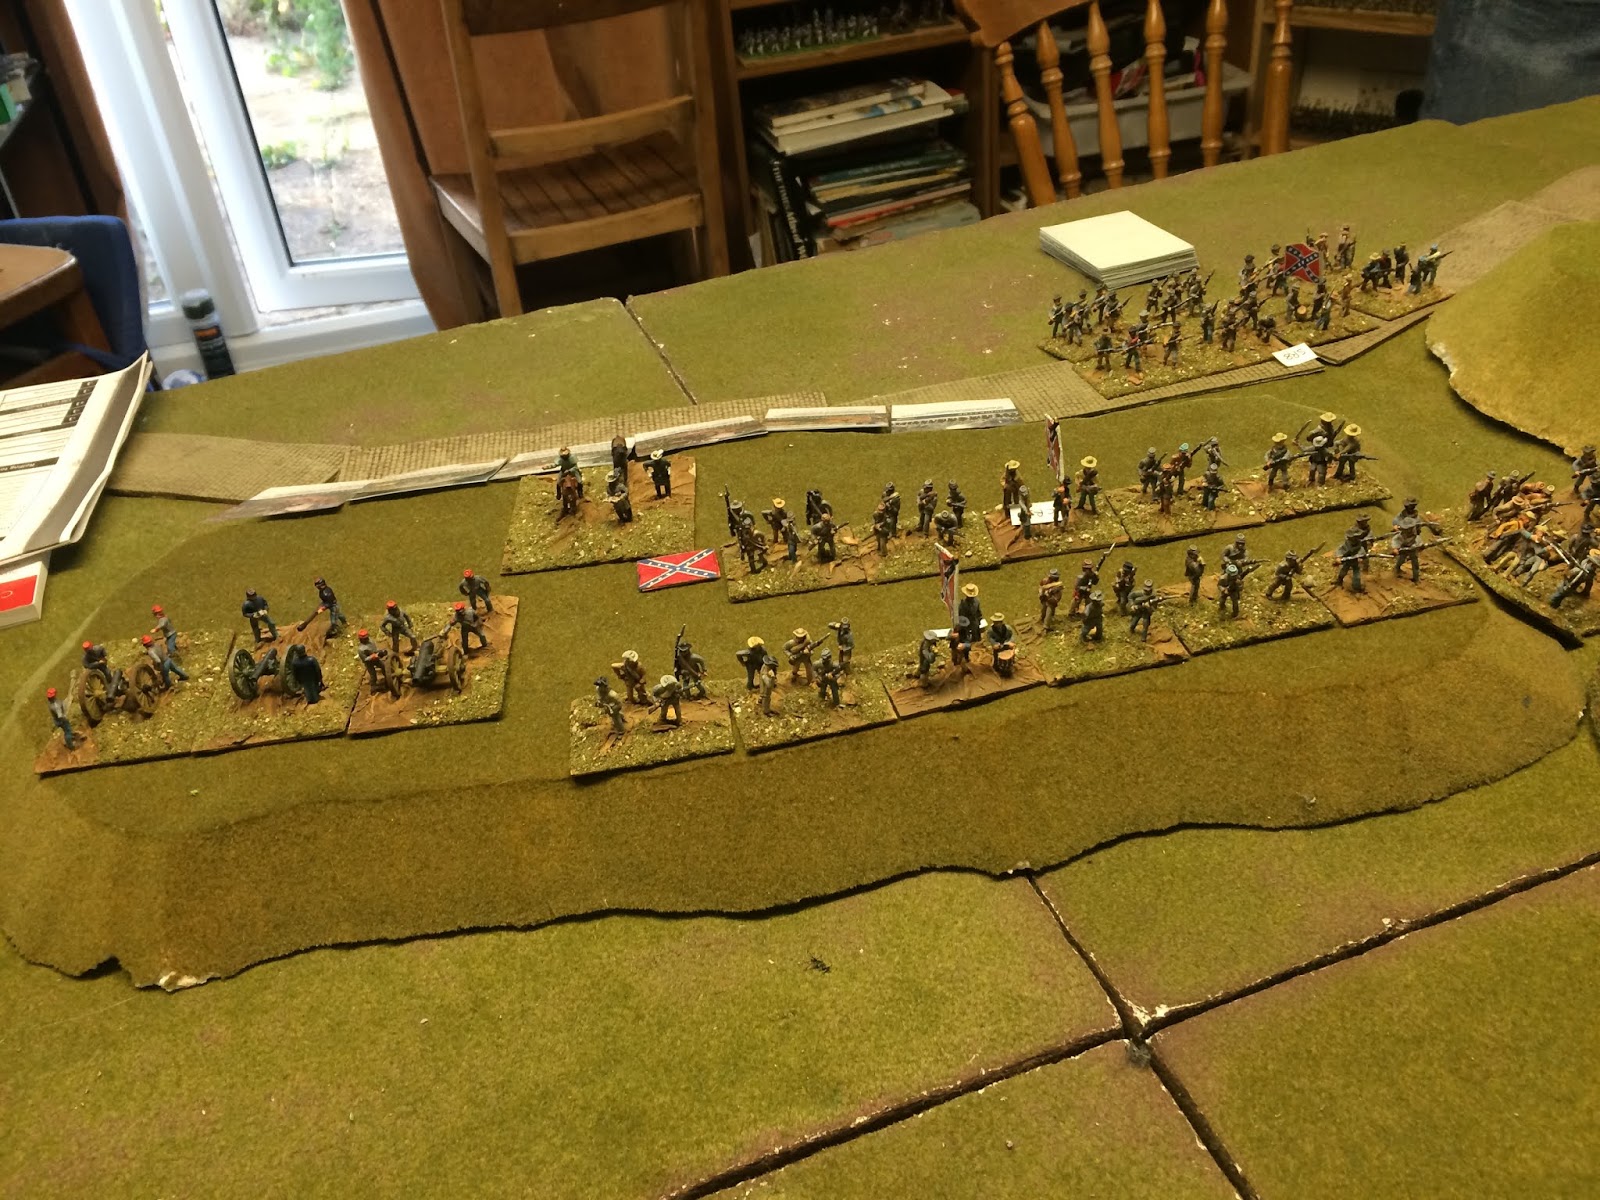
More in hope than expectation I unleashed a shot from the Levy archers. The knights gambled and chose not to use Orison, but this was a fatal error as 75% of the unit fell from their saddles. Just to rub salt into the wound I then captured the relic with my Ghulam's.


The Levy's unleash hell on the knights

The Militias Christi then played their final card and charged the Ghulam's head-on with the last unit of knights. Despite loading up my defences I lost 75% casualties and was pushed back.    


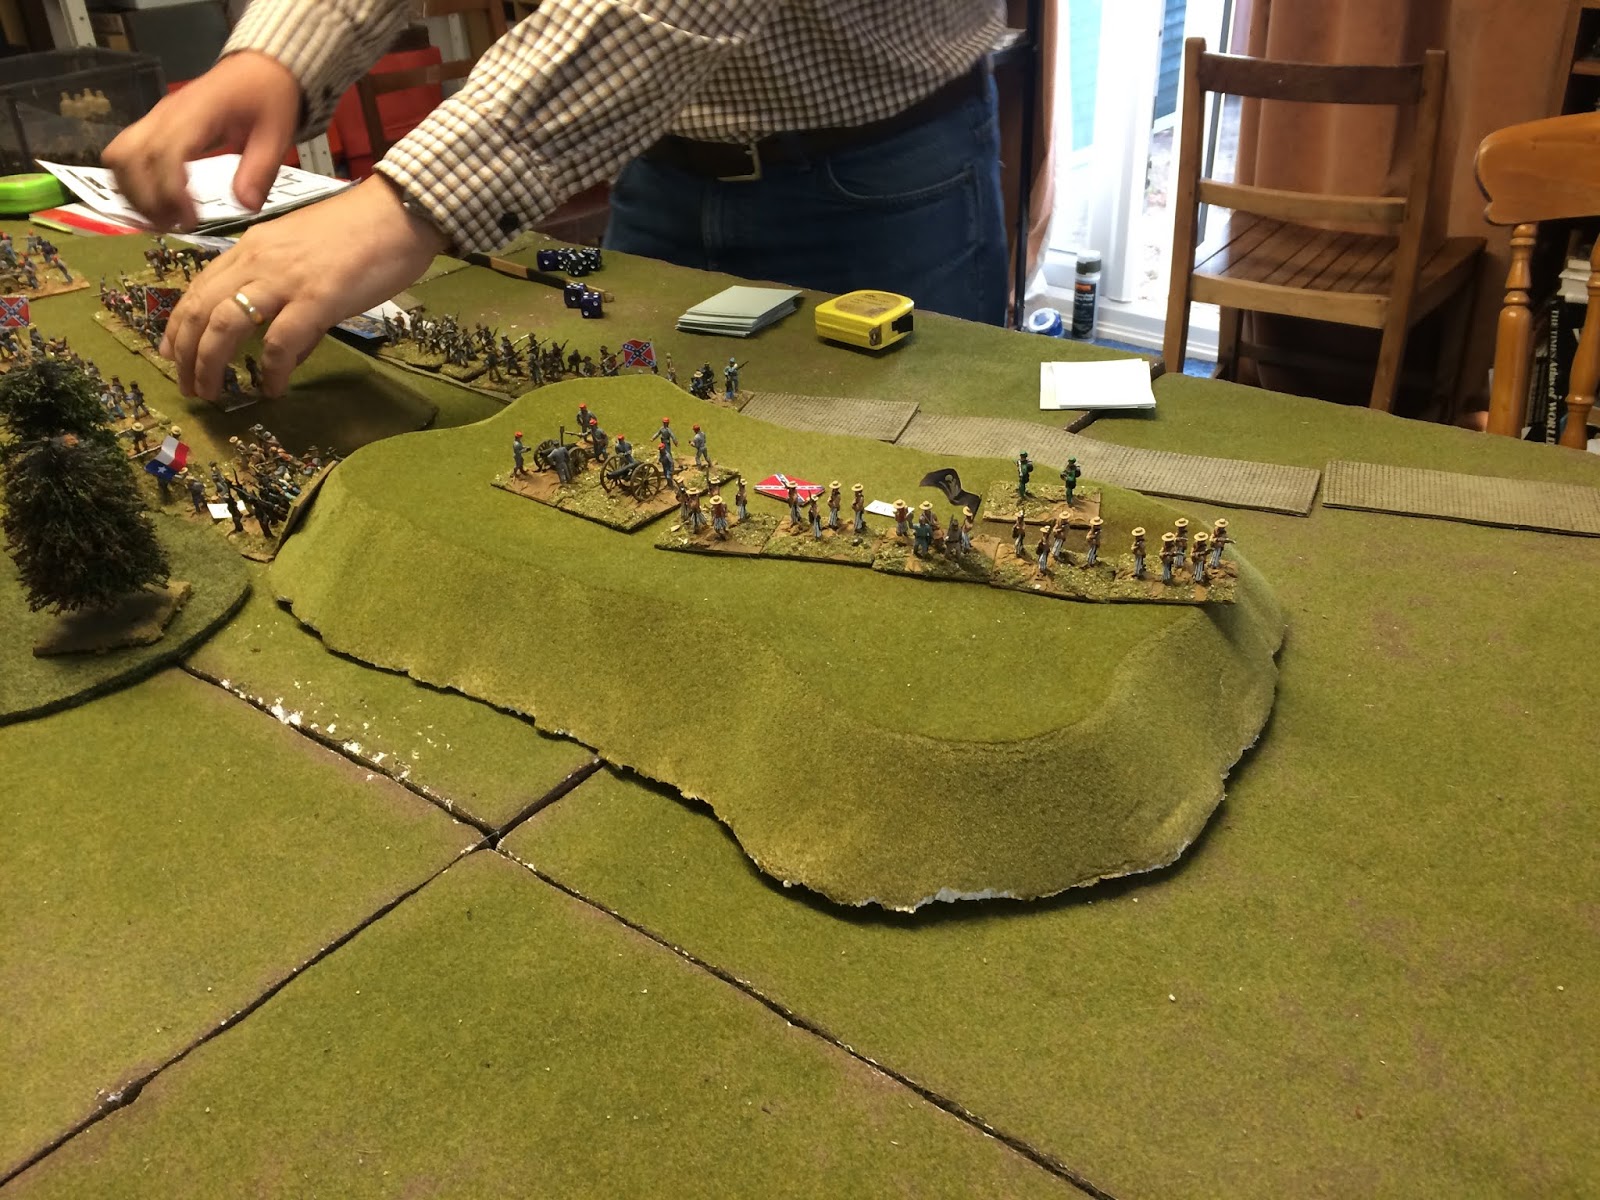
This gave me the breathing space needed though. I formed my own version of the England love-train  and placed a string of units between the knights and the relic. It was now clear that there was simply no way that the knights could fight their way through before the relic escaped, and so a Saracen victory was declared.

Saracen love train

So a successful first outing but its hard to draw too many conclusions. The outstanding turn of shooting by the Levy blunted the knights attack and changed the game in the Saracen's favour very heavily. They seem a flexible faction with some solid melee abilities. The shooting abilities need you to get close, and they can nt really interfere too-much with the enemies plans. Coordination and Brotherhood were my go-to abilities in this game.