Title

Title
Tally Ho!

Thursday, 26 May 2016

Montrose Campaign - Week 3

Dumfriesshire - June 1644. Covenanter win

Scenario

In this battle the Covenanters, as the attackers, had the chance to send up to a third of their forces on a flank march. This could be diced for on turn 2 needing a 4 to arrive (+1 as the Covenanters have a Superior Road Network effect from one of their territories) or automatically on turn 3. Victory is achieved when one side has lost 50% casualties.

Covenanter Forces
8 * Foot regiments in 2 brigades
4 * Horse squadrons in 2 regiments
2 * Field artillery
1 * Forlorn Hope

Montrose Forces
3 * Veteran foot regiments (Irish Brigade)
3 * Foot Regiments (Gordon Foot)
5 * Horse in 2.5 regiments
1 * Field artillery
1 * Forlorn Hope


The Battle

Montrose deployed in a wide arc with the bulk of the infantry occupying the hills near his base-edge. He assumed that the Covenanter flank-march would come on the open left flank, and so placed the cavalry there. On his right he garrisoned the village with the Forlorn Hope and some Gordon Foot. The highlanders were placed in a deep formation near the village ready to attack the Covenanters left.

Montrose Horse awaits the flank attack

Montrose Irish Brigade holds the heights
Montrose occupies the village
The Covenanters setup for a simple plan. On their right they positioned a regiment of horse with a second regiment flank marching. Their centre and left were occupied by infantry with one unit deployed to the left of the village in an attempt to flank it.

Covenanter right wing

Covenanter left wing
The battle opened with a flurry of maneuverer on each side's right flank. The Covenanter Horse moved forward and were soon joined by their flank marchers. Montrose occupied the village and sent a squadron of horse to flank the enemy troops opposite the village.  

You dirty flankers!

A cunning flank march begins
The first major action of the battle occurred when 3 regiments of Highlanders ploughed forwards and attacked the left-most Covenanter foot unit. Achieving a rare 2-1 in combat they were able to break the front unit and came close to capturing Leven himself. Bloodied but undaunted they surged forward and tried to attack the second rank. On this occasion though they could only manage a 1-1, and as we've found in a fight against steady foot the Highlanders eventually run out of steam and loose.   

The Highland charge!

Front-rank is eliminated but casualties are mounting

The attack founders against steady foot
On Montrose' left flank a grand cavalry melee ensued. At first Montrose seemed to have the upper hand as the Covenanter Horse seemed reluctant to charge. Despite this they hung-on for most of the game and Montrose was unable to exploit his early advantage. 

Cavalry slug it out, whilst Montrose watch on (bottom right)
The decisive action occurred in the centre of the field as both sides Foot game to grips. In theory Montrose had a good position with a slight advantage in numbers, higher ground, and a good smattering of veterans. However if Wargames were about theory alone then we'd stop after the setup....

As the firefight began it became all too clear that someone had been peeing in Montrose powder. Despite their advantages Montrose' men were consistently out-shot and cracks began to appear in the line. Although doing ok on the flanks casualties mounted in the centre and it was Montrose who hit 50% routed first. 

The Irish Brigade hold the high ground

Covenanters zero-in on the Gordon Foot 

Montrose holds his own in the village

Oh dear - its a wipe out


Montrose Horse win too late to save the day 
A tough battle for the Foot with casualties heavy on both sides, but the Covenanters superior shooting carried the day.  Once again the Highlanders proved erratic - good against shaken units but unable to match steady foot.

Campaign Situation

With Leven scoring his first victory its now 4 provinces to Montrose and 3 to the Covenanters.


Sunday, 22 May 2016

Hannibals Veterans - Victrix 28mm


The latest recruits from the painting-table are some Carthaginian heavy infantry for my Punic army. These are from the Victrix Warriors of Carthage box set. The set contains enough figures to produce 24 * Veterans in chainmail, 24 * Libyans in linen armour, and 14 * Libyan Javelinmen.  


Hannibal's Veterans

Close-up of the commanders
One thing that is noticeable with this set is how much finer the detail is compared to some of the earlier figures. Below I've shown a close-up of the spears on the Carthaginians and Roman Triarii - the so you can see the relative thickness.  

Close-up of the Veterans

Roman Triarii for comparison


Thursday, 19 May 2016

Montrose Campaign - week 2

Kinrosshire - May 1644. Royalist Victory


Scenario

This battle featured a rear-guard action under cloudy sky's. Surprised by the Covenanter forces whilst on the march Montrose mounted a delaying action whilst his baggage and half his army sought to escape. In this battle a D6 is rolled each turn and once it totals 24 the baggage has escaped. So speed is of the essence for the attackers even though they have a 2:1 advantage.

Covenanter Forces
9 * Infantry Regiments in 2 brigades
4 * Horse Squadrons in 2 Regiments
2 * Medium artillery

Montrose Forces
3 * Veteran infantry (Irish Brigade)
3 * Infantry Regiments (Gordon Foot)
1 * Light artillery
1 * Horse Squadron

The Battle

Montrose deployed his forces either side of the dense wood that filled the middle of the field. This wood was impassable to close-order troops so effectively split the field in two. On his left he deployed the Irish Brigade. On the right the Gordon Foot was given the stronger position protected by the river. Leven massed his forces opposite with guns in the centre and Horse behind them.    

The Irish Brigade on the Royalist left

The Royalist right 
The game began on the Royalist right with the artillery opening a fairly ineffective cannonade, and then the Covenanters advancing to long-range before opening fire. On the Royalist left the Irish Brigade staged a withdraw, seeking to keep the gap beyond musket range.   

An exchange of fire near the river


Covenanters pursue the Irish Brigade 

Irish Brigade withdraw
On the Royalist left the Irish Brigade continued to back-peddle , thus preventing the larger Covenanter force coming to contact. Once safely behind the wood they turned and began to exchange fire on fairly even terms. On the opposite flank Montrose infantry actually got the better of the fire-fight as they enjoyed short-range supported from their own light gun.

Irish Brigade turn and fight

Gordon Foot hold firm 
As the dice clicked-around to 24 the situation was stable for Montrose, with both flanks in reasonable shape. So a victory for Montrose in the second battle. In hindsight perhaps the Covenanters should have been more aggressive and not hoped for so much from their artillery.

For future playing of this scenario we will allow the attacker to deploy a little closer (12" verses 16") but not allow any charges in that first go.


Campaign Situation

With a second victory Montrose now controls 4 territories to 2. As a maximum of 3 territories can be "played" in a given battle they will need to chose their best 3.


Saturday, 14 May 2016

Montrose ECW Campaign - week 1

April 1644, Ayrshire - Royalist Victory

The Scenario

The scenario generator produced a pitched battle in the rain for this first encounter. So a head-on clash with both sides trying to rout 50% of their opponents from the field. Due to the rain the most powerful Covenanter strategic advantage (free volleys) was largely useless. Perhaps the poor weather would be to the Highlanders advantage?


For Montrose the forces available were:
- Irish Brigade (3 * Vet Regiments)
- Gordon Foot (1*Trained, 1*Raw Regiments)
- Gordon Horse (4*Trained Squadrons)
- Highlanders (3*Trained Regiments)
- Medium gun
- Light gun
- Forlorn Hope 

For the Covenanters the forces available were:
- Foot Brigade (4*Trained, 1*Raw Regiments)
- Foot Brigade (3*Trained, 1*Vet Regiments)
- Horse (4*Trained Squadrons)
- 2*Medium guns

The Battle

Deployment for this game was done behind screens, and both sides chose to mass their cavalry on their left flanks. So this meant that both would be facing off against enemy infantry. The Royalist concentrated their Highlanders in the centre. Montrose was lucky to have a Forlorn Hope which can deploy upto half-way across the table - this was position ready to snatch the farm-house just inside the Covenanter's half. 


View from the Royalist right flank
 
View from the Royalist left flank
The battle opened with the Covenanter horse pressing forward in an attempt to turn Montrose' right flank and get behind them.  Montrose responded by refusing the flank with the Gordon Foot and forging ahead with a central attack using the Highlanders and Irish Brigade. The Gordon Horse held back, not fancying tangling with the Covenanter foot holding the hill line. 


Covenanter horse advance - figures are "classic" Warrior Miniatures
On the Royalist right the Covenanter cavalry began their out-flanking maneuver but the terrain forced them closer to the Gordon foot than they would have liked and casualties began to mount. Although morale was good they were unable to mount a telling attack.


Highlanders attack the centre
The central attack by Montrose initially met with mixed success. The Irish Brigade found themselves outnumbered  but through superior morale were able to resist the Covenanters counter-attack. In the centre the Highlanders proved as erratic as usual - one unit broke through but two were quickly routed. At this stage honours were fairly even.


Montrose Horse attacks - so exciting it went out of focus!
On the Royalist left the patience of the  cavalry commander finally bore fruit as he noticed a gap in the defensive line. Steady infantry provides a tough targeted for cavalry but by attacking with 4 squadrons at once he was able to secure a much needed victory and breach the line.


End-game
With the Covenanters flank turned and Highland unit loose in their rear they decided to withdraw and fight another day. In the end a close battle with perhaps luck favouring Montrose on this occasion. Certainly having a Forlorn Hope available and an important target to seize disputed the Covenanter's own cavalry attack.    

Campaign Situation 

First blood to Montrose who now controls three territories - giving some addito0nal reinforcements and a strategic effect for the next battle.

Campaign situation


Sunday, 8 May 2016

Ancient Terrain - Greek / Punic Temple

As I gradually build-up my Punic Wars forces I'm keen to provide camps for the two sides. As well as being decorative it will add some additional objectives for use during the games.

The Roman's are easy as the marching camp is pretty well documented and its visually fairly appealing. For the Punic forces though the "realistic" option is probably gaggle of tents and rough lean-to's, which did nt seem very inspiring. So I turned my thoughts towards a temple as a more appealing item. Details are pretty sparse on Punic religions beyond the odd stele of Tanit, the Phoenician mother goddess and city deity of Carthage.

So I decided that a fairly generic Greek-style might be the best bet. The model is an open temple with alter and a few statues.

The basic constriction of the temple is my usual foam-core. For the pillars I've used 5 inch cake pillars. In this case Wilton Grecian pillars obtained from Amazon at £5 for 4 pillars.

The basic temple with cake-pillar columns

Some old figures destined to be statues

The tympanon being added with recesses to hold the roof

Gluing down the roof

The temple shell completed

For the roof I've used my normal method of gluing individual card tiles down. Its pretty time-consuming but gives a good texture when finished, so is worth the effort.

Adding the tiles one-by-one
 
Some decoration added to the tympanon

The completed temple was painted, washed, and then dry-brushed in a suitable sand-colour acrylic. The flagstone effect was achieved by carving-out the flagstones using a ballpoint pen and then washed with paint.

Completed temple from the front

Better view of the decoration

Side view
 
The alter and statues were done in a grey colour so they would stand-out from the temple itself. The figures are Citadel figures from the late 1970's used for Chaosium's RuneQuest RPG. They are mythical Greek looking at as true 25mm's not really suitable for the battle-line anymore.

The alter and statues 

The whole thing completed
      

Thursday, 5 May 2016

Montrose ECW Campaign - battle report

After a few weeks experimenting with Chain of Command it was back to business with the start of the ECW campaign. As a warm-up we held a practice game to test the campaign rules and armies.
Battle Setup

The Scenario


The game featured a simple pitched-battle between the two sides.

The Covenanters fielded 7*Pike&Shot in 2 brigades, 2 cavalry regiments, a field gun and unit of dismounted dragoons.

Montrose fielded the Irish Brigade (3*regiments), a Gordon brigade, 2 cavalry regiments, a Highland brigade, light gun and a unit of dismounted dragoons - a slightly larger but more variable quality force.


The Game

As usual we used a variant of the excellent Victory Without Quarters rules, modified to be more suitable for multi-player use.
Covenanter right flank

Covenanter centre


Both sides pressed forward with their infantry in the centre, clearly keen to come to grips with the enemy. On the open flank the Covenanter cavalry seemed reluctant to engage so Montrose opened-up a lively with his cannon, hoping to damage them before attacking himself.

Units give fire in the centre
In the centre of the field the lines closed rapidly and began to blaze away at each other. For this game we trialled a new version of the rules where instead of needing a simple 3 hits for a kill with no carry-forward of hits it became 4 hits but casualties were accumulated from turn to turn. So the shooting was bloody but satisfying.


Montrose cavalry attacks

Montrose mounted make progress
On the Montrose right the Royalist cavalry moved forward covered by the artillery. They made decent progress and were able to drive-back their opponents, who shaken by the fire failed to charge. 

Highland charge with Gordon foot in the background
On the Montrose left flank the hairy Highlanders launched themselves at a brigade of  Covenanters, with the Gordon foot in support. Thanks to some smart shooting the Highland attack was quickly blunted and the Gordons were forced to intervene to save them from defeat.

After about 2.5 hours struggle the Covenanter centre had been smashed and the flanks were wavering. With half the units routed they withdrew from the field leaving Montrose victorious.

Verdict  

The idea of cumulative casualties (rather than needing 3 hits for a kill in a single go) certainly sped-up the game and removed the annoyance of constantly scoring 2 hits and never causing a casualty. We managed a big game in just about 2.5 hours so we should be able to play to conclusion even with deployment time in a campaign game.

The highlanders proved less effective than we had wanted so in future will receive the same charge bonus as Gallopers. This gives more punch but if they fail to break-through immediately they will find themselves ground-down by the enemy. 

Sunday, 1 May 2016

Early Imperial Roman Auxilaries


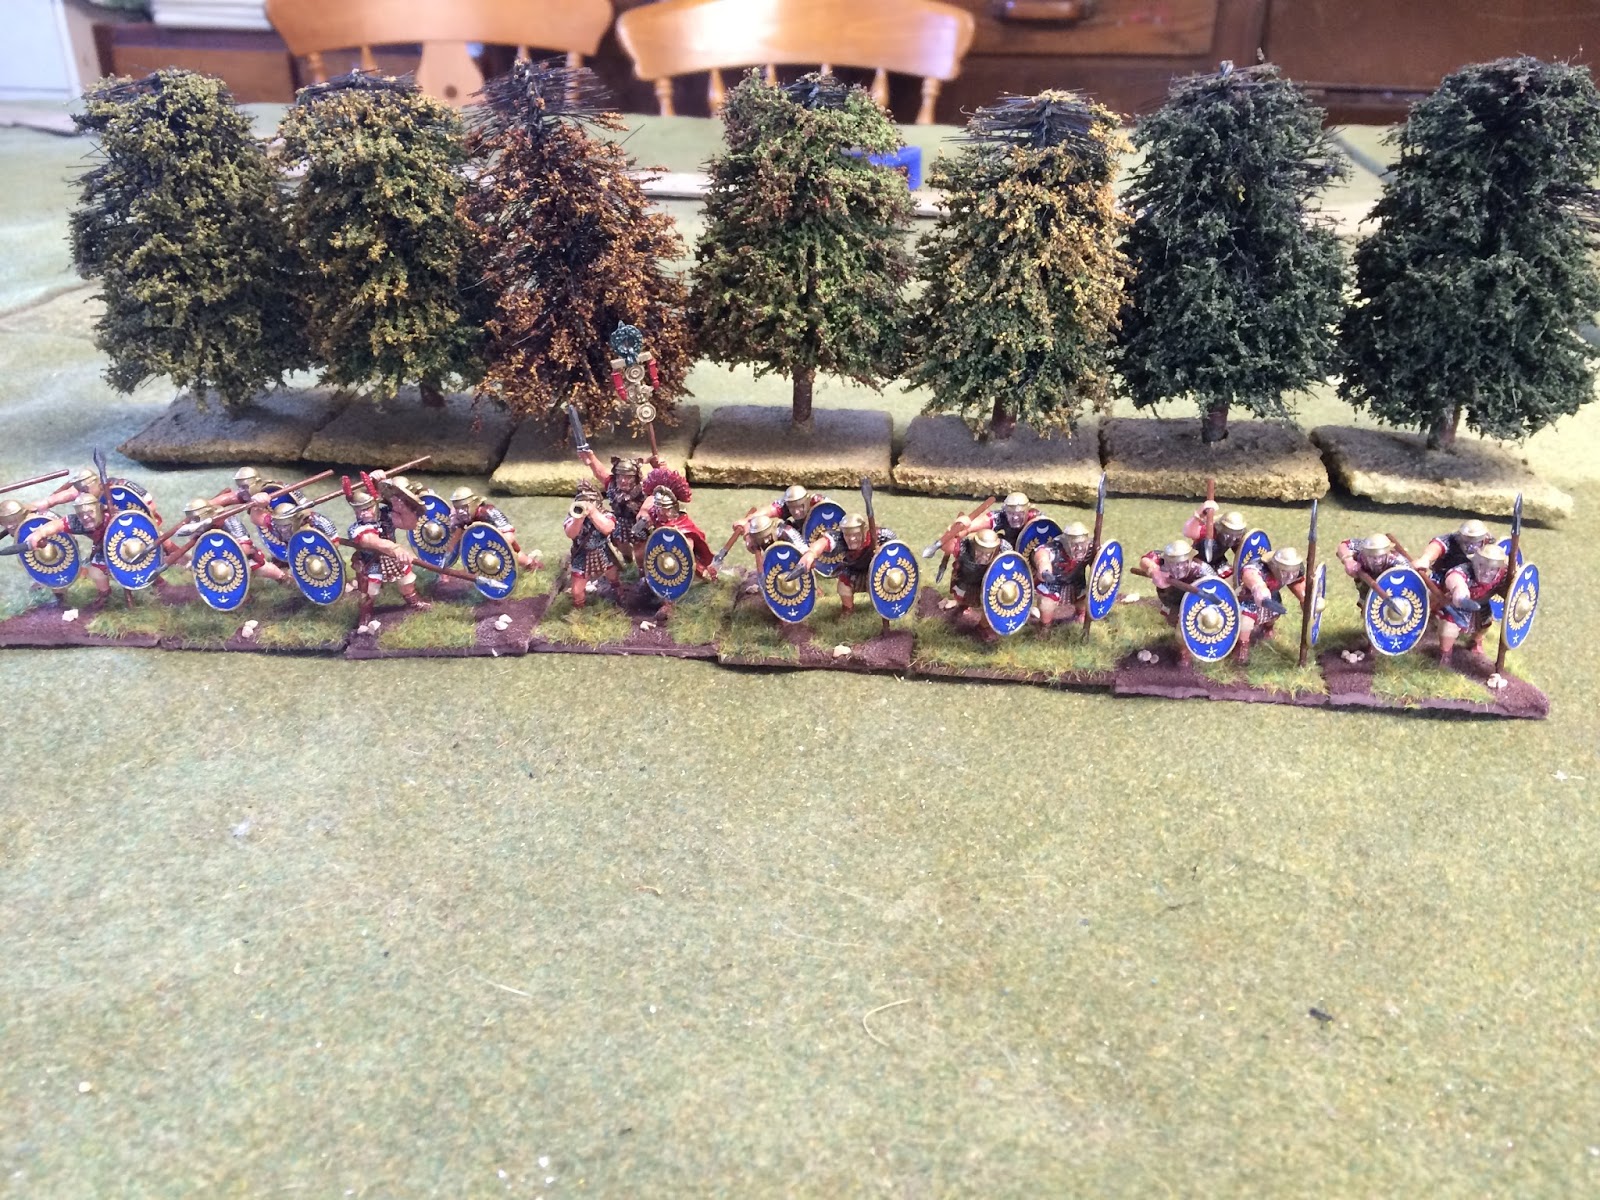
After a couple of years of painting I've finally completed by EIR army with the addition of a couple more units of auxilary infantry. They are Warlord Games 28mm, mostly plastic but with a metal command group.

Roman auxiliary infantry

The command group

Roman auxiliary infantry
 I'm especially fond of the shield colour - its a Cobalt Blue by Folkart I obtained from my local art-shop (Colne Gallery). So I've painted all my auxiliary troops in this theme.

 
Auxiliary Archers

Auxiliary Cavalry