This first week saw the Ottomans and Imperial troops contesting part of the Ukraine, while a second Ottoman army also invaded Polish territory.
Ottomans vs Polish
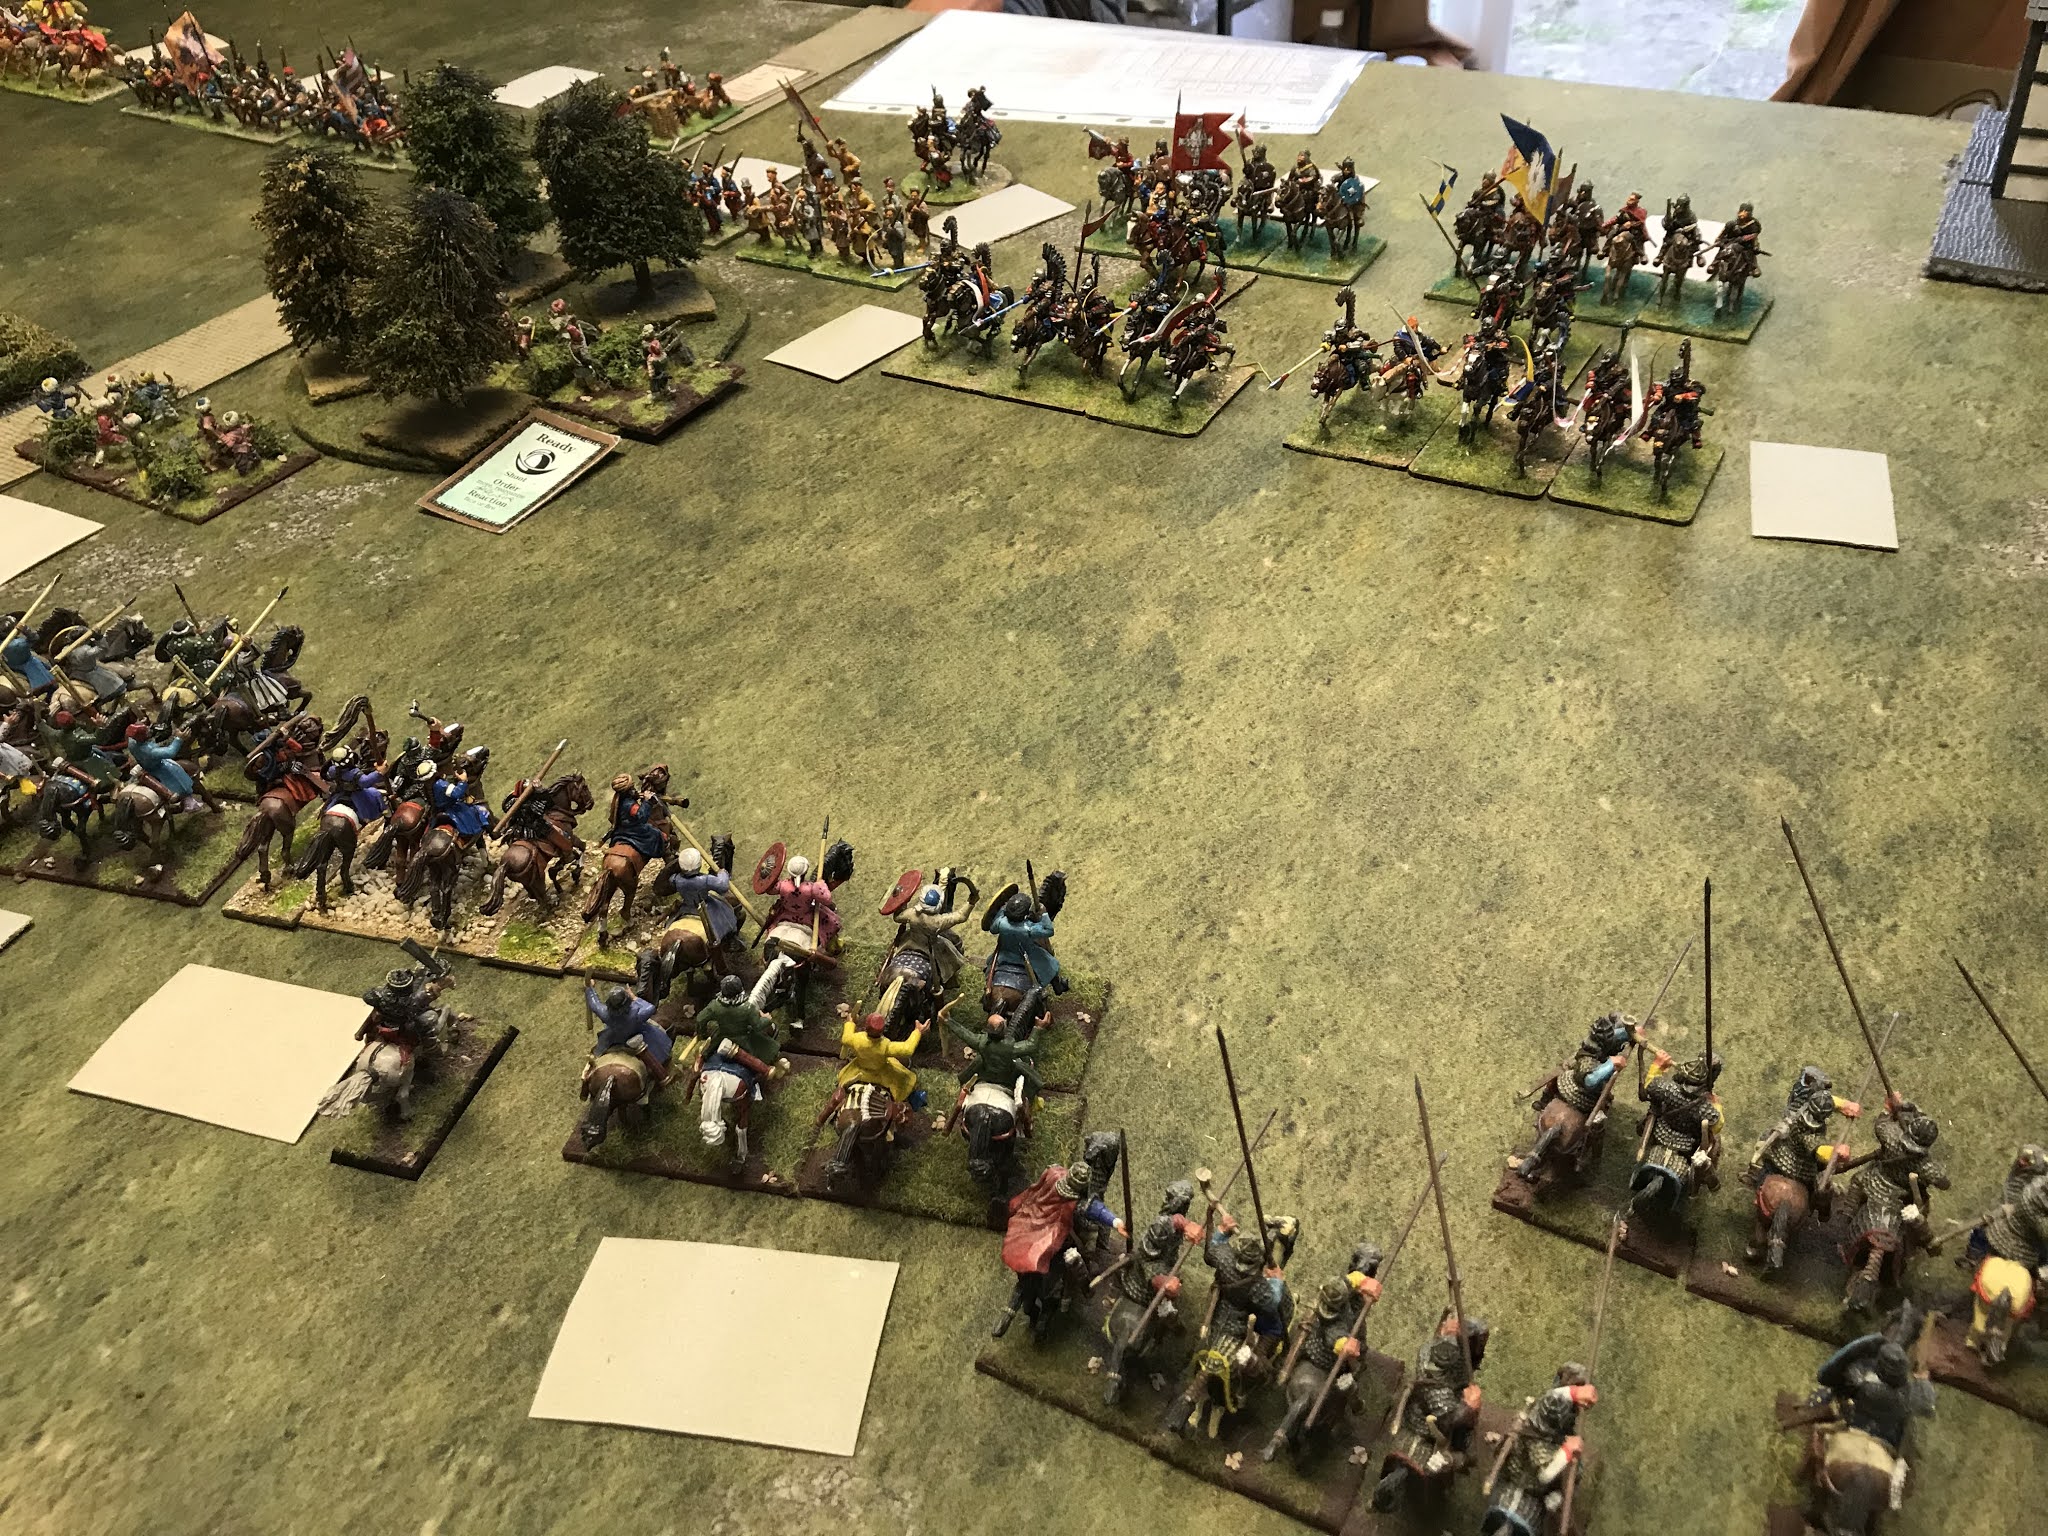
In this game both sides lined-up with their cavalry mostly on the western side of the table and a relatively smaller infantry centre.
![Polish massed heavy cavalry](https://blogger.googleusercontent.com/img/b/R29vZ2xl/AVvXsEj5lZcrHTaQ3WPJSMn7lPrPMrZG97H27lKEpU7SZcrVeUQZTPdxIpEFH0a1psrr6R_SRZwXAaE1cjB6KAfud_p-FLcekEY9DtQfMrDJl9gNOksBPdaBL-MvDMq7MsOdt02ajhApz4KWpIY/w400-h300/1.JPG) |
Polish massed cavlary |
![](https://blogger.googleusercontent.com/img/b/R29vZ2xl/AVvXsEgFCRY28Nl8taIRHtThRHw2Y6zJ9XzmibJHBhunD27Cm08nnLLYzzG9XWtQSkjE1UAe01Z8uHi_Ou3ZLor5UIuCd1EnY5GOTvMs4XV1JijBLsXsCENLEpRZTiZeU-g5Ek5k_CkElS4Qv2I/w400-h300/3.JPG) |
Ottoman heavies ready to receive them |
![](https://blogger.googleusercontent.com/img/b/R29vZ2xl/AVvXsEjHef0pJfnsyzFEBFczaxI3cpMut-iiGc5ebs8xQLCLL_IsHjmvMsauyUeqDvyulg-hdohSaIIyDbunK6cByALfIk75SZ_0PyHkfNFk6aKywE3PRV5nuCaA91swC9mtuT6y0WWAI0Y1J-M/w400-h300/4.JPG) |
Janissaries ready to advance |
The main action was cavalry clash in the west which was won reasonably decisively by the Polish, but not without the loss of one of the Winged Hussar units.
![](https://blogger.googleusercontent.com/img/b/R29vZ2xl/AVvXsEiqGZog5Q4rbONtrJ3jxdxk0AI3y2_o0tbkWkdwqdm3FSemSk8K4yudqeDCRQq40f7L30JrbROqTjT9q5M5OvC5_8-RQCS99ILWVilcrLLSj1jnuscIsQq07rzvPfLZuIxRQKs8LLLfNxM/w400-h300/6.JPG) |
The decisive clash |
The centre was pretty even but with the flank turned the Ottomans conceded defeat.
![](https://blogger.googleusercontent.com/img/b/R29vZ2xl/AVvXsEjBisWUVaLaNpI8GM5it4AiN8S-hdmTBwXrgwp2ij4WoskStuGqZrnW6bI7aH90H4do_OzVg6edDHWRBRsodMDENrCUS_WW3kekN1zpJc0-5cmzNcXaRiQVDv0tmSEtONTuk4Wz_42Ummk/w400-h300/9.JPG) |
Hadjuks in the woods |
Ottomans vs ImperialsThis battle had a more classic deployment of infantry centre and roughly equal cavalry wings. The Imperial forces had a stronger infantry force and so held the advantage here.
![](https://blogger.googleusercontent.com/img/b/R29vZ2xl/AVvXsEiE4aqzcTu75dwV87ovx3DSkav0Je8M957Aux8kku1zw4eKHu_1g5YomEQq9gwdWzPAHnz7G3mpbrDBuy7EkCjMl9qKwC8F7Dh-Ku4fRpbKbRhyphenhyphenbw51sngVejZY1pAVOnINXm86YpKWpzg/w400-h300/21.JPG) |
Imperial infantry squadrons |
![](https://blogger.googleusercontent.com/img/b/R29vZ2xl/AVvXsEjzrEtwOoqAdO26Lh3cHWNJKGyUXWgDC1BEGAUShKJvAhfFIzP45Cnw5M8sx3I4P_oD_wu6sMkFfBQf9ocBW1AEdDVVNgyaeICZL7_LBG2a81sK6qI3qpBvRqJCUv4AFLnt7bBASmcoYZQ/w400-h300/23.JPG) |
Ottoman main line |
Fearing an artillery bombardment the Germans attacked in the centre, whilst holding back their weaker cavalry on the flanks. The Ottomans adopted entirely the opposite plan, going for a bulls-horns attack.
The Imperial attack in the centre stalled and they found their western flank rolled-up by Ottoman horese, forcing them to concede defeat.
![](https://blogger.googleusercontent.com/img/b/R29vZ2xl/AVvXsEgkApiFWkbmalyCOcWXra28Hs54__oN4oS1vrT7FrTY-O-2uB3BCfAYdx8r17R_I6Y_FbEhmSH1N8rn1cnoHNLRQLFxgeuSbdtDsFaRZj6kxCcBOQ7igl6Ammh3oAFzY8rkLEatUchAGgU/w400-h300/25.JPG) |
Germans bounce off the Ottomans in cover |
So the final result was a victory each and a small gain for the Ottomans on the campaign map.
What a great game. The 'eastern' armies of the period are so interesting and colourful and your versions are superb!
ReplyDeleteRegards, James