
The Scenario
Our third battle of the mini-campaign sees the British on the attack following their victory in the first game. In this scenario they are trying to secure a vital town and the supply-dump contained inside.
We found the previous games a little slow and skirmishers too powerful, so we reverted to set we've played before - Muskets and Marshalls developed by Ian over at the Hinton Hunt Blog. The rules can be found here
http://hintonhunt.blogspot.co.uk/p/muskets-marshals.html. This had a major affect on the armies as mapping from Rank and File to M&M suddenly all the British are A class, meaning about half the Allied army was of high quality.
For this scenario the town was divided into 6 zones (buildings) each capable of holding a single battalion plus attached gun. The attackers needed to capture 4 to win the game.
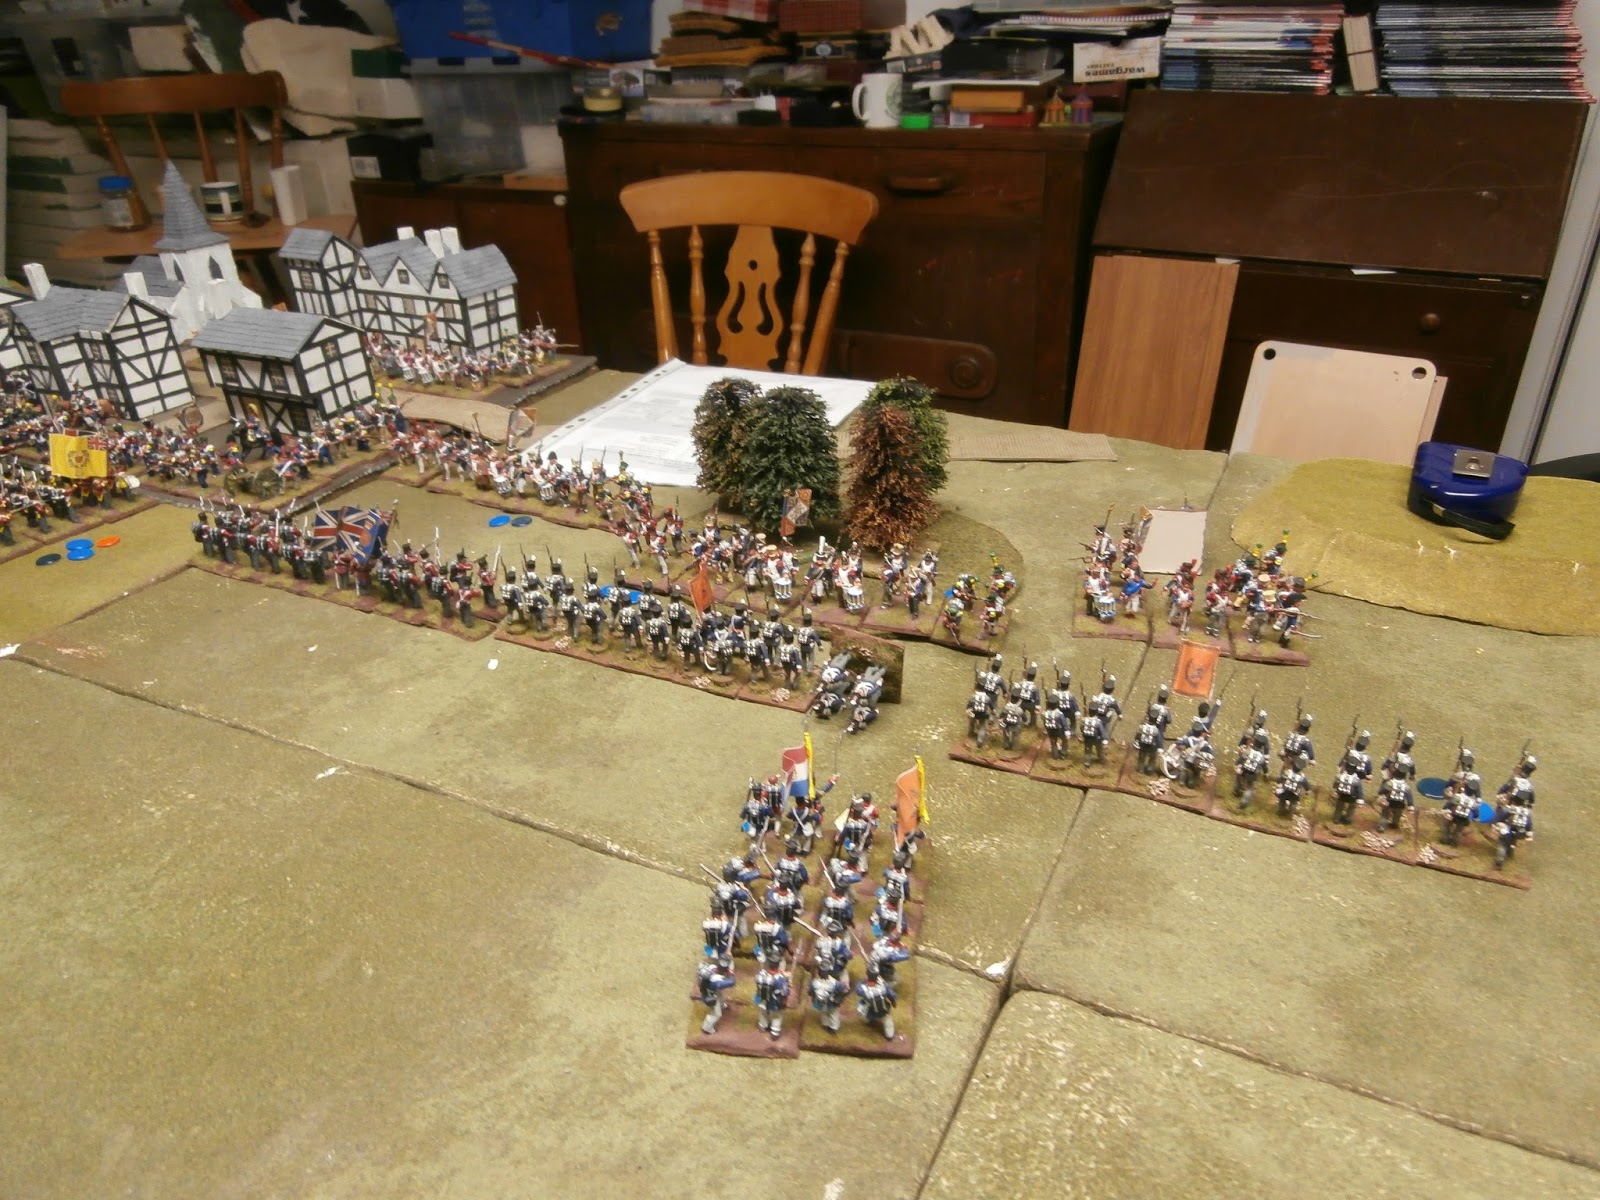
The Set-up
The French deployment was simple and compact. Half the force occupied the 6 areas of the town supported by 2 batteries, with the A class Leger in the front line. A brigade guarded each of the town's flanks, with cavalry and skirmishers out wide to delay the enemy advance.
The Allies deployed with the A class British poised to attack the town head-on and the Hanoverians / Dutch-Belgium's looking to apply pressure on the flanks. The Dutch-Belgium cavalry lined-up opposite the French horse.
 |
| Hanoverians |
 |
| Dutch-Belgiums |
 |
| The British forming the main assault |
 |
| Horse lurking out wide |
 |
| Town and woods well defended |
The Game
The battle opened with a general advance on the Allied side, with the fast-moving cavalry quickly getting in position for an assault. The first cavalry clash occurring in the second turn.
 |
| Dutch-Belgium cavalry advance |
 |
| The Rifles home in on the Swiss |
 |
| Battle is joined |
In the centre a solid wall of redcoats ground forward taking lively fire from the French guns. The Allies gained the initiative and charged their Carbineers into some stationary Chasseurs. However the attack was unsupported and so the French Dragoons were free to join the fray. The outnumbered Belgium's were pushed back in Disorder.
 |
| Coming on in the same old way |
 |
| Belgium Carbineers get mauled |
On the French left the Dutch-Belgium units quickly got into range while a cavalry fight raged on their flanks. Both sides settled into a firefight that would last the remainder of the battle. On the French right the Hanoverians pushed cautiously forward against the French skirmishers occupying a field, but never really threatened the flank.
So the main action was in the centre as the British assaulted the town. The Allies advanced behind screening units and with some long-range artillery support. When the crucial moment came they launched a column attack against each of the three front building zones. Two of the A class British columns successfully charged-in but the third met a devastating musket / canister fusillade and halted short of the target.
The two assaulting columns were thrown back by the defending Leger with minimal losses and so the first assault had failed. With losses mounting the Allies parlayed to be able to recover their wounded and withdraw from the field, and so the battle was done.
When assaulting cover in M&M you need at least two-to-one odds to stand a chance of success, especially against high quality troops. So whilst the British were well marshalled perhaps they should have focused on attacking less of the town and in greater local strength.
Campaign Situation
As the attack failed the French were the winners and have the option to either defend again or pursue the British back to the fortifications battle-field. Next-time the second battle at the crossroads...


Interesting to see how the rules worked in such a dense built up area - is some tweaking in order or do you think they work ok as is?
ReplyDeleteI simply designated the town as 6 zones (3x2) with each treated as a separate "building" but not space between them. The only real decision is where does someone ejected from the front-line end up if the rear line is already occupied. I was going to say either sideways f that's free or routed from the table as the town was righty against the edge. A future one could feature two large farms more central, in which case routed units could end-up behind the BUA
ReplyDeleteIf anything the number of troops that can shoot out of a building (12 per side) may be little high. The defenders in ths case, were A class, but then so were the atackers The defenders had the benefit of artillery in the town too, I wonder how easily a battery could be sited and fired from a built up area? I struggle to think of a Napoleonic example, but at Blenheim, the French in the village appeared to suffer a lot from the British firing in upon them, perhaps because they could not fire out of the village in ordered ranks, whereas Marlborough's men could fire in using their three rank formation. So maybe the trade off for being in a built up area is that you gain in protection, but lose in firepower??
ReplyDeleteWe could consider not allowing the guns unless its emplacements / trenches to distinguish them. I should probably run the numbers and see how a more coordinated attack from two columns would have faired. On the shooting though, only one of the columns was stopped, 2 went in and it was the A-class defenders that really hurt them rather than the number of shooters
ReplyDeleteIndeed one would expect the guard grenadiers to hold a village!
ReplyDeleteIndeed, especially against 1-1 attacks. The French are famously tenacious in defence of their wine cellars
ReplyDelete