Title

Title
Tally Ho!

Tuesday 31 May 2016

Montrose Campaign - week 4

Selkirkshire - July 1644. Montrose Wins

Scenario

This battle saw the Covenanters out-manoeuvred by Montrose and facing a possible double envelopment. As with a Flank Attack upto 1/3 of the attackers forces can be sent on a flank march, but in this variant both sides may be attacked not just one.

Covenanter Forces
8 * Foot regiments in 2 brigades
4 * Horse squadrons in 2 regiments
2 * Field artillery
1 * Forlorn Hope (Vet)
Montrose Forces
3 * Veteran foot regiments (Irish Brigade)
3 * Foot Regiments (Gordon Foot)
4 * Horse in 2 regiments
1 * Field artillery
1 * Dragoons

The Battle

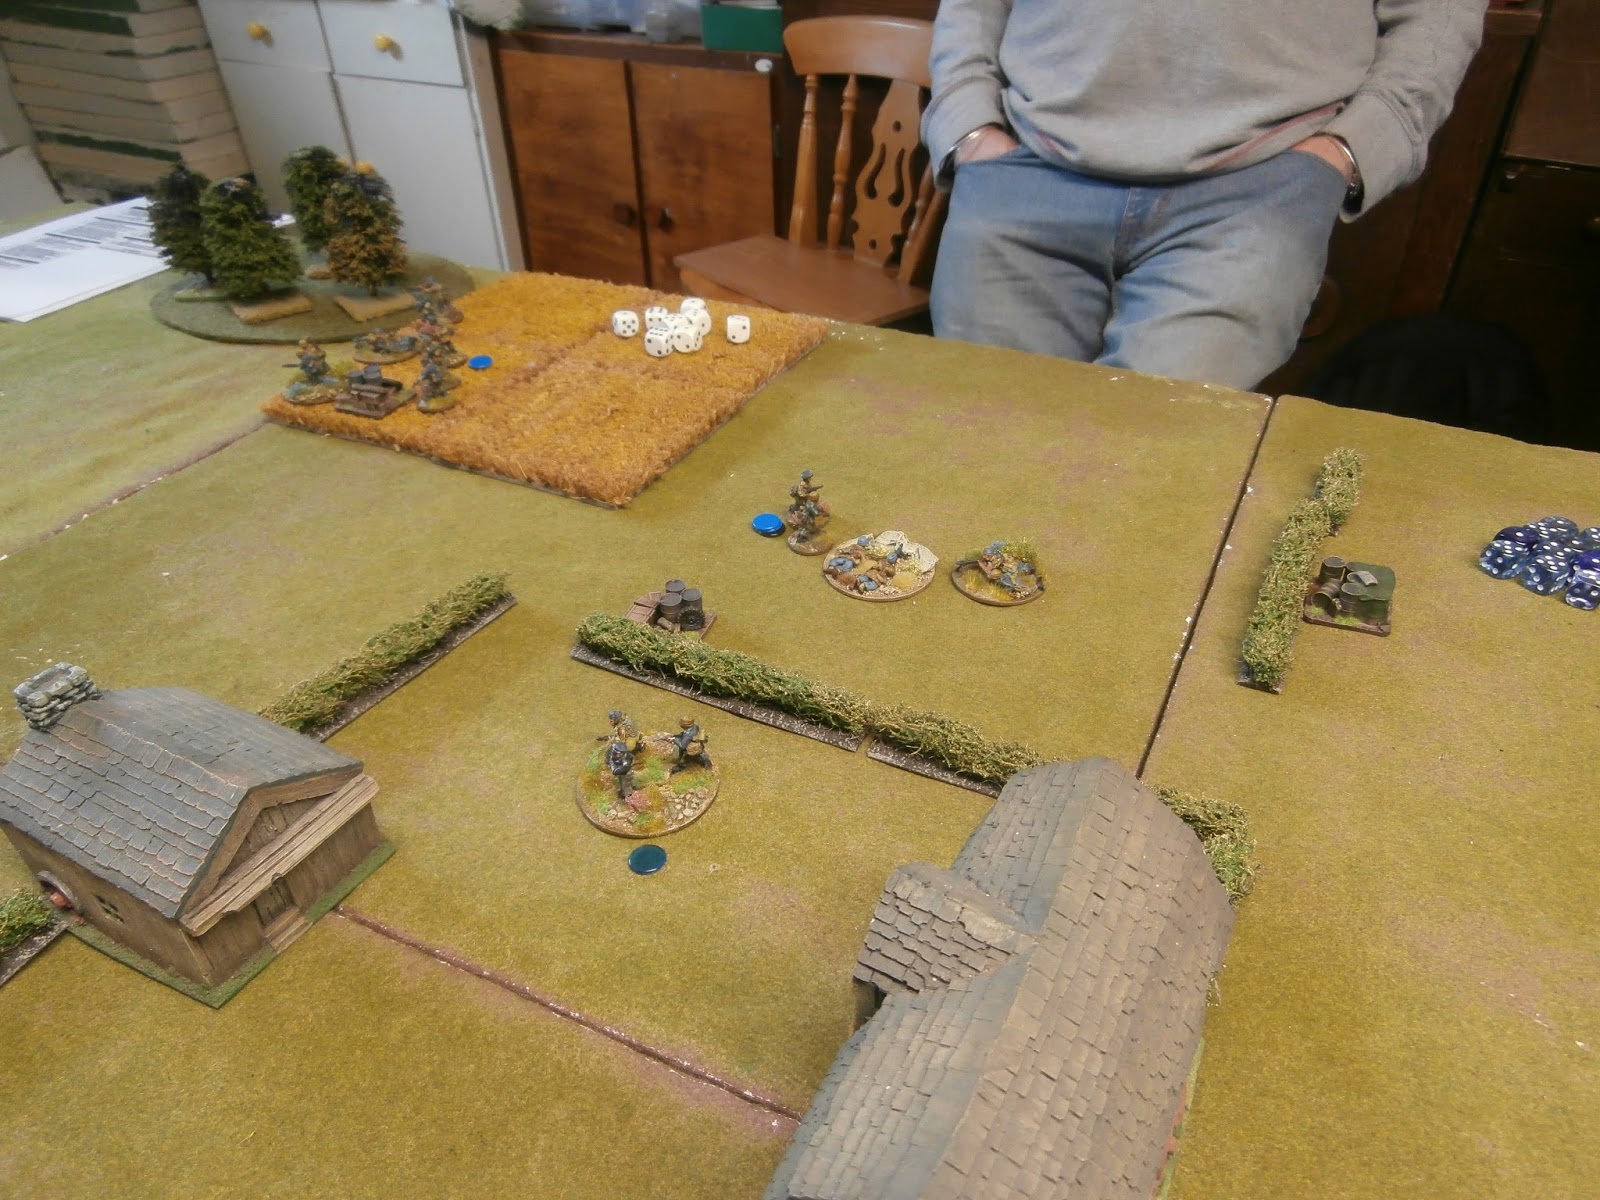
Somewhat fearful of the double envelopment the Covenanters deployed in a slightly deeper than usual formation with guns between the brigades. Cavalry guarded the more open right flank, whilst the Forlorn Hope occupied the manor house. Montrose decided to forgo the flank march and instead focus on a two-pronged attack. The Irish Brigade and Horse would attack the likely corner on the Covenanters right and the Highlanders would  manor house with flanking support.

View from Montrose right flank

View from Montrose left flank. One of the Covenanters clearly visible keeping busy with his painting

The Horse - view on Montrose left
The battle began with an all-out assault by the Highlanders on the Forlorn Hope in the manor house. The Forlorn Hope's shooting was fairly ineffective but Montrose artillery had a rare success causing them to be become Shaken. With a skirl of the pipes the Highlanders fell upon the unfortunate musketeers and quickly routed them. Their blood clearly up they contained their attack and managed to eject the supporting infantry regiment from the grounds of the manor house.
 
The calm before the storm

The Highlanders make a dent in the lines
On the Covenanters right both sides advanced their Horse and executed a charge, as is often the case with cavalry combat it was a to-and-fro affair. Montrose lancers smashed their way through their opposite numbers assisted by some excellent saving throws. Conversely Montrose trotters failed to charge and were pushed-back by their opponents. Honours fairly even in the cavalry melee.
 
If you can nt be good be luck....
Over on the Covenanters left the Highlanders completed their captured of the manor and with the support of the Dragoons and some infantry managed to rout a further two units, turning the flank.
 
The flank attack presses home 
 
 
The flank is turned
In the centre and right Montrose managed to execute his attack on the dog-legged Covenanters line. On the flank itself the attack went pretty well, with the Irish Brigade managing to outnumber the enemy and score significant hits.  However you can nt be strong everywhere and Montrose had deliberately weakened his centre to enable the flank attacks. Unable to withstand the Covenanters advance the centre eventually collapsed.
 
The successful flank attacks were however enough to rout more than 50% of the covenanters, forcing them to withdraw from the field.  
 
The flank attack moves in 

Montrose centre crumbles

The Covenanters right flank vanishes
A close-fought battle with the Highlanders for once proving successful, aided as they were by some poor morale for the Covenanters which meant they were always Shaken when attacked.   
 

Campaign Situation

Montrose scored his third victory of the campaign and so now controls 5 territories to 3.


Saturday 28 May 2016

Chain of Command - bank holiday weekend game

As we've the luxury of a long weekend we decided to run a third game of Chain of Command. This contest pitted Oberst Kurt Stiner's fallschirmjäger against a platoon of Red Army infantry under Leytenant Nigelski

The Scenario 


We opted for a simple encounter scenario fought across Russian farm-land, so clearly before Steiner had made himself unpopular with the high-command.

The Patrol phase yielded a slightly better position for the German's, with them closer to the farm, however the Russians did have a decent flanking position.

The setup


The Battle


The game opened with the Germans deploying squads just behind the farm and in field covering their right flank. The Soviets responded with an infantry squad on their left flank in the woods and 2 * maxim MMGs in cover on their base-edge opposite the farm. In the early exchanges the Germans had the better of the shooting, damaging the Soviet squad on their flank. 
The early phases as both deploy their first units


German right flank opens-up on the Russians


A maxim covers the farm and the corn field
The Germans took the early initiative advancing their central squad into the farm-house and opening-up on the Soviets deployed MMGs. Their early fire was not especially effective though and they soon found themselves under fire from both maxims and a sniper team. Casualties soon mounted under this onslaught.
Germans capture the farm


German casualties mount


The maxims blaze away 
Eventually the pressure on the German squad in the farm-house became unbearable and they became first pinned and then broken. At this point Steiner showed his mettle and dashed across open ground to try and rally his broken squad. It left the gap open for the Soviets though who quickly deployed a squad and advanced it rapidly into the now abandoned farm.
Steiner rushes forward


The soviets stroll forward to the farm 
Sensing a clear advantage the Russians occupied the farm and advanced their flanking squad into a supporting position. They turned a maxim on the Germans in the corn-field and kept-up some pressure on the broken squad. A persistent failure to roll well enough for a turn-end meant though Steiner's squad was just about hanging in there and could not be routed.

In desperation the Germans deployed their final squad opposite the farm and commenced a lively fire. This was sufficient to push back the Soviets in the farm-house but was not enough to save the day as the final Soviet squad moved into a flanking position. We ended the game with a Russian victory - not bad for Leytenant Nigelski's first game    
Soviets occupy the farm


Soviets move into a flanking position


A consolation goal - the Russians lose a squad

 The Verdict

Another enjoyable game of Chain of Command with all agreeing it was a fun encounter, completed in about 3.5 hours. The decisive factor this time was that the Soviet maxims were well sited with good fields of fire - with some infantry and sniper support they accounted for two German squads. German shooting was perhaps a little unlucky.

The real winner was probably the farm-house which acted a bit of troop magnet and accounted for the better part of three squads.    

Steiner looks glum


Thursday 26 May 2016

Montrose Campaign - Week 3

Dumfriesshire - June 1644. Covenanter win

Scenario

In this battle the Covenanters, as the attackers, had the chance to send up to a third of their forces on a flank march. This could be diced for on turn 2 needing a 4 to arrive (+1 as the Covenanters have a Superior Road Network effect from one of their territories) or automatically on turn 3. Victory is achieved when one side has lost 50% casualties.

Covenanter Forces
8 * Foot regiments in 2 brigades
4 * Horse squadrons in 2 regiments
2 * Field artillery
1 * Forlorn Hope

Montrose Forces
3 * Veteran foot regiments (Irish Brigade)
3 * Foot Regiments (Gordon Foot)
5 * Horse in 2.5 regiments
1 * Field artillery
1 * Forlorn Hope


The Battle

Montrose deployed in a wide arc with the bulk of the infantry occupying the hills near his base-edge. He assumed that the Covenanter flank-march would come on the open left flank, and so placed the cavalry there. On his right he garrisoned the village with the Forlorn Hope and some Gordon Foot. The highlanders were placed in a deep formation near the village ready to attack the Covenanters left.

Montrose Horse awaits the flank attack

Montrose Irish Brigade holds the heights
Montrose occupies the village
The Covenanters setup for a simple plan. On their right they positioned a regiment of horse with a second regiment flank marching. Their centre and left were occupied by infantry with one unit deployed to the left of the village in an attempt to flank it.

Covenanter right wing

Covenanter left wing
The battle opened with a flurry of maneuverer on each side's right flank. The Covenanter Horse moved forward and were soon joined by their flank marchers. Montrose occupied the village and sent a squadron of horse to flank the enemy troops opposite the village.  

You dirty flankers!

A cunning flank march begins
The first major action of the battle occurred when 3 regiments of Highlanders ploughed forwards and attacked the left-most Covenanter foot unit. Achieving a rare 2-1 in combat they were able to break the front unit and came close to capturing Leven himself. Bloodied but undaunted they surged forward and tried to attack the second rank. On this occasion though they could only manage a 1-1, and as we've found in a fight against steady foot the Highlanders eventually run out of steam and loose.   

The Highland charge!

Front-rank is eliminated but casualties are mounting

The attack founders against steady foot
On Montrose' left flank a grand cavalry melee ensued. At first Montrose seemed to have the upper hand as the Covenanter Horse seemed reluctant to charge. Despite this they hung-on for most of the game and Montrose was unable to exploit his early advantage. 

Cavalry slug it out, whilst Montrose watch on (bottom right)
The decisive action occurred in the centre of the field as both sides Foot game to grips. In theory Montrose had a good position with a slight advantage in numbers, higher ground, and a good smattering of veterans. However if Wargames were about theory alone then we'd stop after the setup....

As the firefight began it became all too clear that someone had been peeing in Montrose powder. Despite their advantages Montrose' men were consistently out-shot and cracks began to appear in the line. Although doing ok on the flanks casualties mounted in the centre and it was Montrose who hit 50% routed first. 

The Irish Brigade hold the high ground

Covenanters zero-in on the Gordon Foot 

Montrose holds his own in the village

Oh dear - its a wipe out


Montrose Horse win too late to save the day 
A tough battle for the Foot with casualties heavy on both sides, but the Covenanters superior shooting carried the day.  Once again the Highlanders proved erratic - good against shaken units but unable to match steady foot.

Campaign Situation

With Leven scoring his first victory its now 4 provinces to Montrose and 3 to the Covenanters.


Sunday 22 May 2016

Hannibals Veterans - Victrix 28mm


The latest recruits from the painting-table are some Carthaginian heavy infantry for my Punic army. These are from the Victrix Warriors of Carthage box set. The set contains enough figures to produce 24 * Veterans in chainmail, 24 * Libyans in linen armour, and 14 * Libyan Javelinmen.  


Hannibal's Veterans

Close-up of the commanders
One thing that is noticeable with this set is how much finer the detail is compared to some of the earlier figures. Below I've shown a close-up of the spears on the Carthaginians and Roman Triarii - the so you can see the relative thickness.  

Close-up of the Veterans

Roman Triarii for comparison