Title

Title
Tally Ho!

Friday 30 December 2022

Christmas game 2022 - Nine Years War; Jacobites vs Williamites

 For this year's all-day game we opted for a game set during the period of the Nine-Years War in the late 1600's using Barry Hilton's Beneath the Lilly Banners. The scenario was one of the authors so I'll quote him.

"This scenario is based on the presumption that Bonnie Dundee not only won at Killiecrankie, July 27 th 1689(which he did) but that he lived to tell the tale (which he didn’t). He drives the remnants of Mackay’s army out of Scotland and crushes Williamite resistance amongst the population of the cities. During a period of consolidation a sizeable force of Irish Jacobites is landed on the west coast of Scotland under Patrick Sarsfield and a French fleet runs the blockade to deposit a small but well trained brigade of infantry at Leith. Rebellion which is of course contagious, breaks out all over England and King William enters a crisis period in which his largely continental army comes to be viewed more as foreign invaders than as liberators from absolutism. 

As the English Jacobites begin to emerge, many volunteer units and loyal regiments flock to the Stuart standard. These enthusiastic but untrained bodies form the bulk of the English contingent. Dundee marches south into England with his Highland army and on the way gathers many of these new volunteers as well as linking up with Sarsfield’s Irish and the French brigade. 

In the early autumn they besiege the town of Nantwich in Cheshire. German mercenaries loyal to William garrison the town. The wily old Marshal, Schomberg is detached from firefighting local insurrection in the Home Counties to deal with the Jacobite army and destroy the challenge to King William’s power. He marches north at the head of a well trained and balanced but numerically inferior Williamite army, to destroy the Jacobite rabble and raise the siege of Nantwich."


The Williamite forces deployed with cavalry on their east flank, guarding the road where further cavalry reinforcements were expected. Centrally was the mass of their infantry with a smaller force guarding the west flank. 

Williamite horse awaiting reinforcements

Williamite west flank

The centre


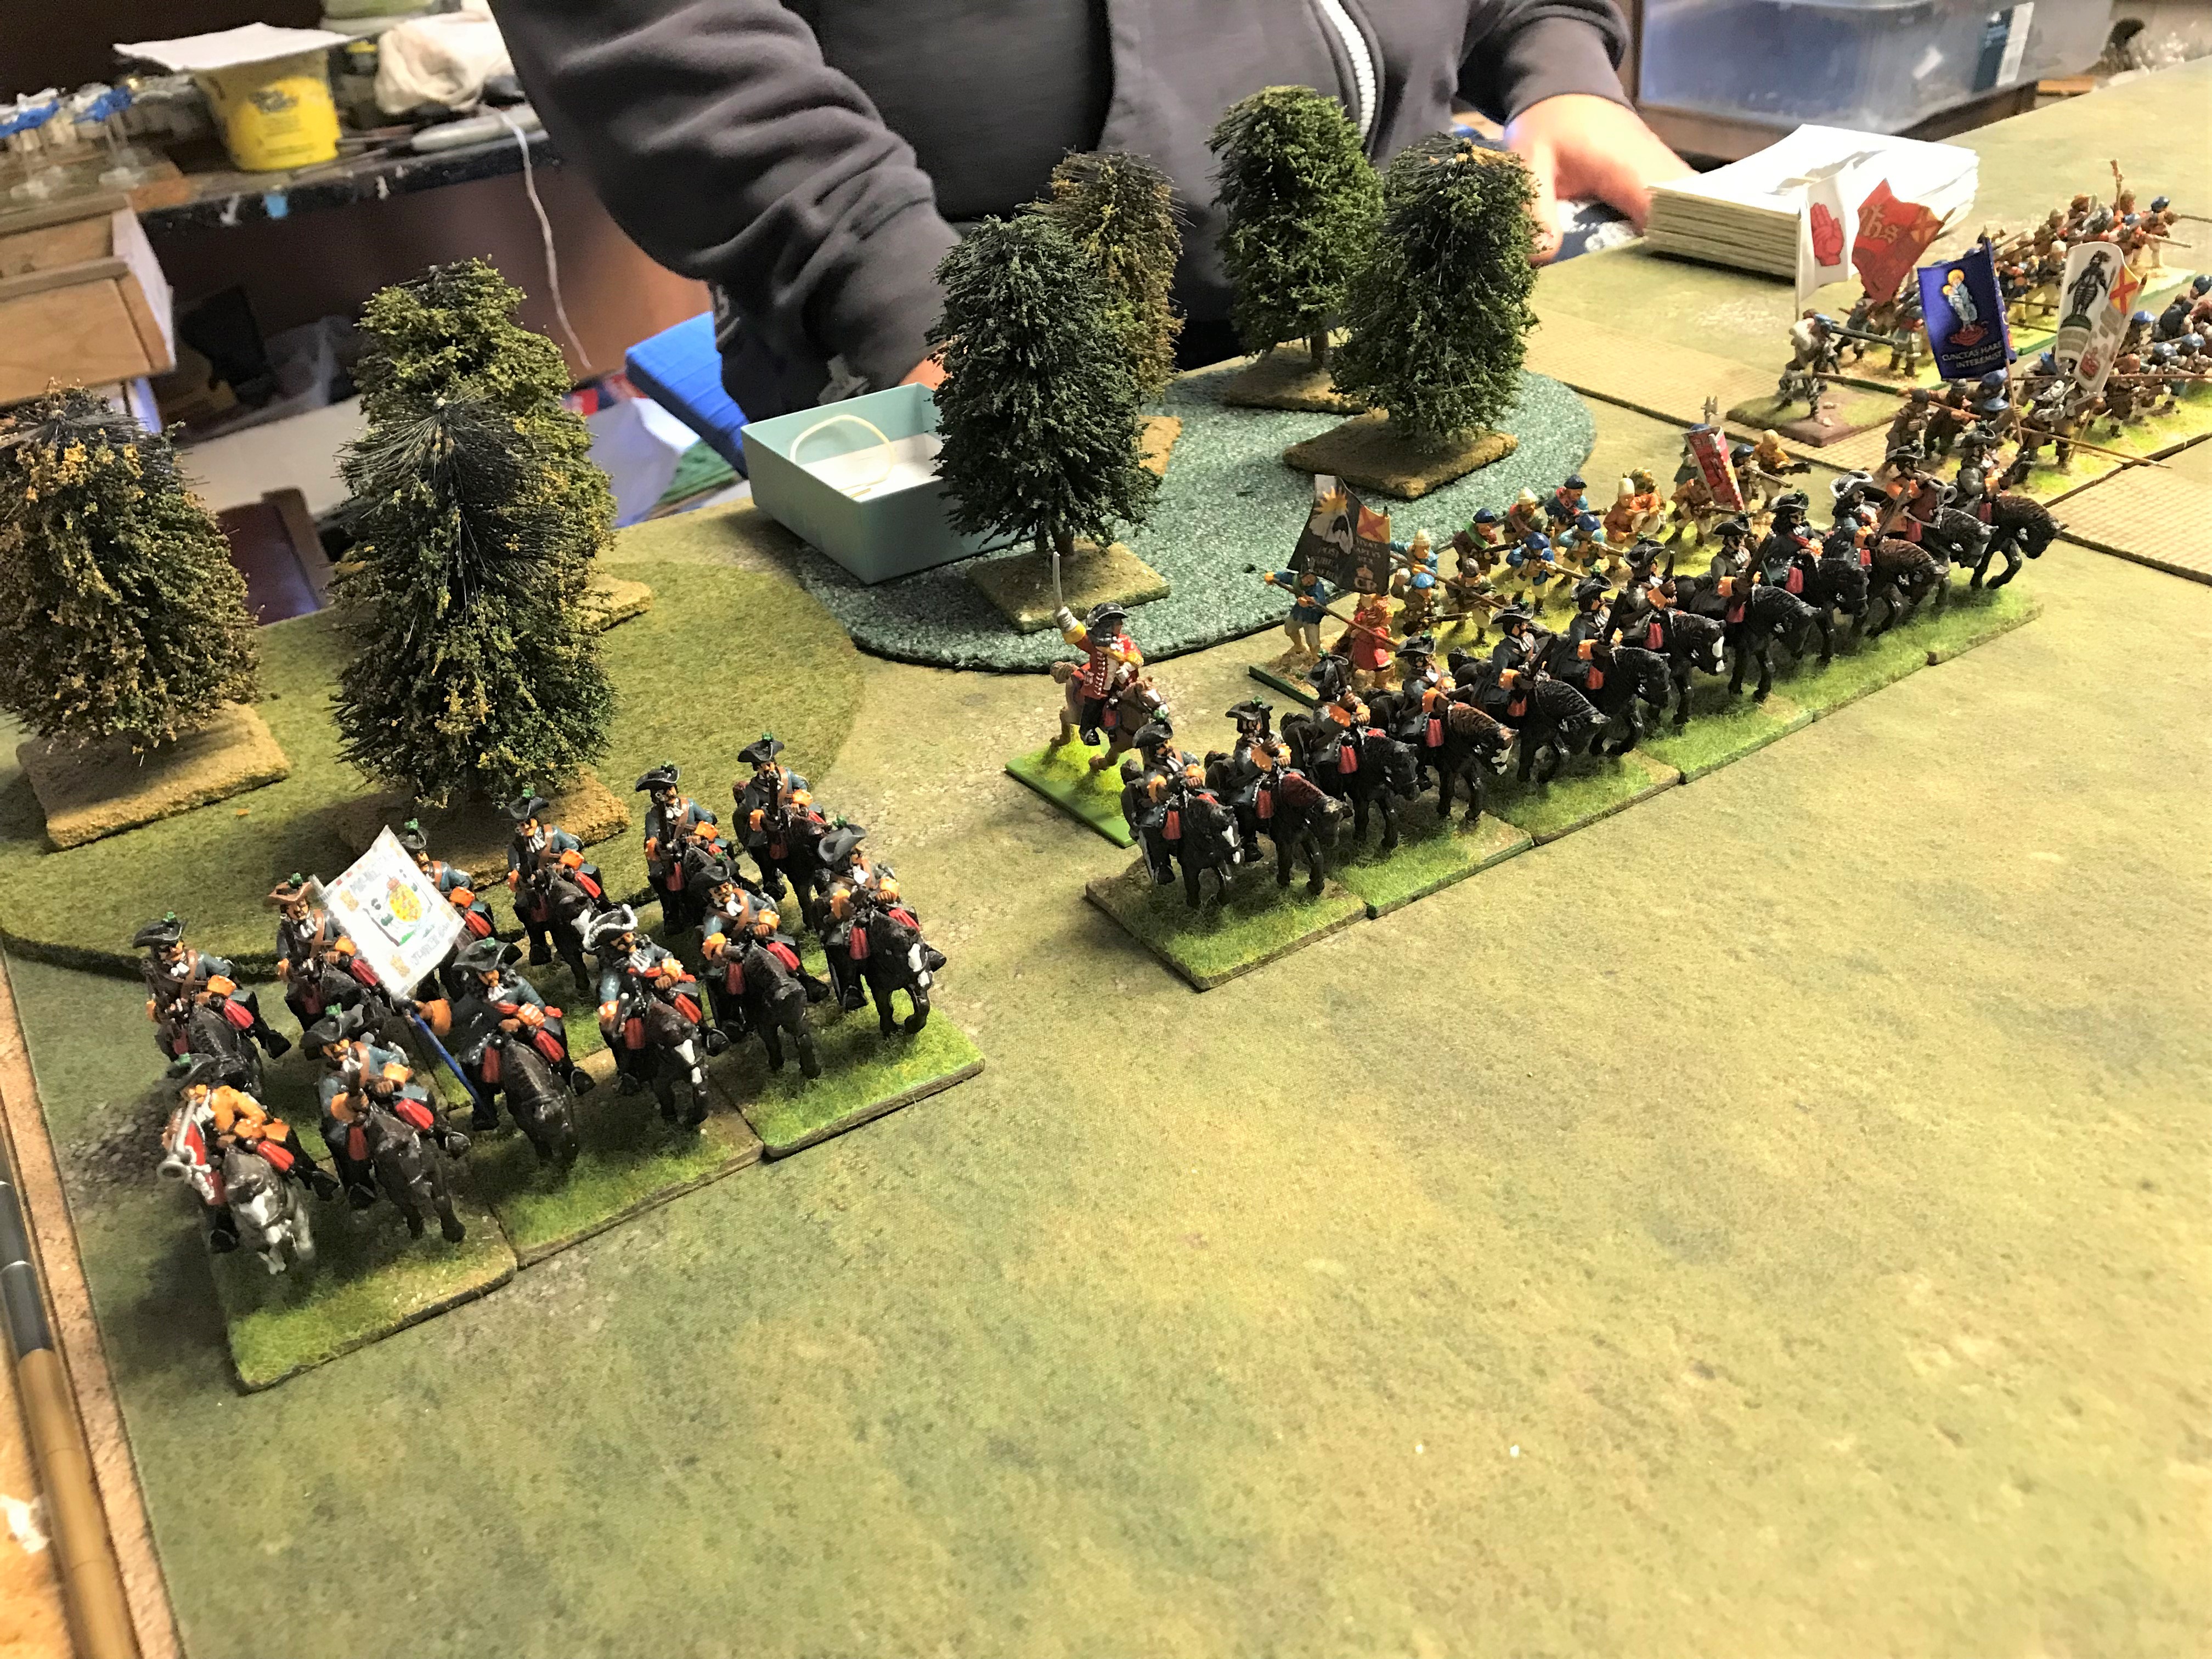
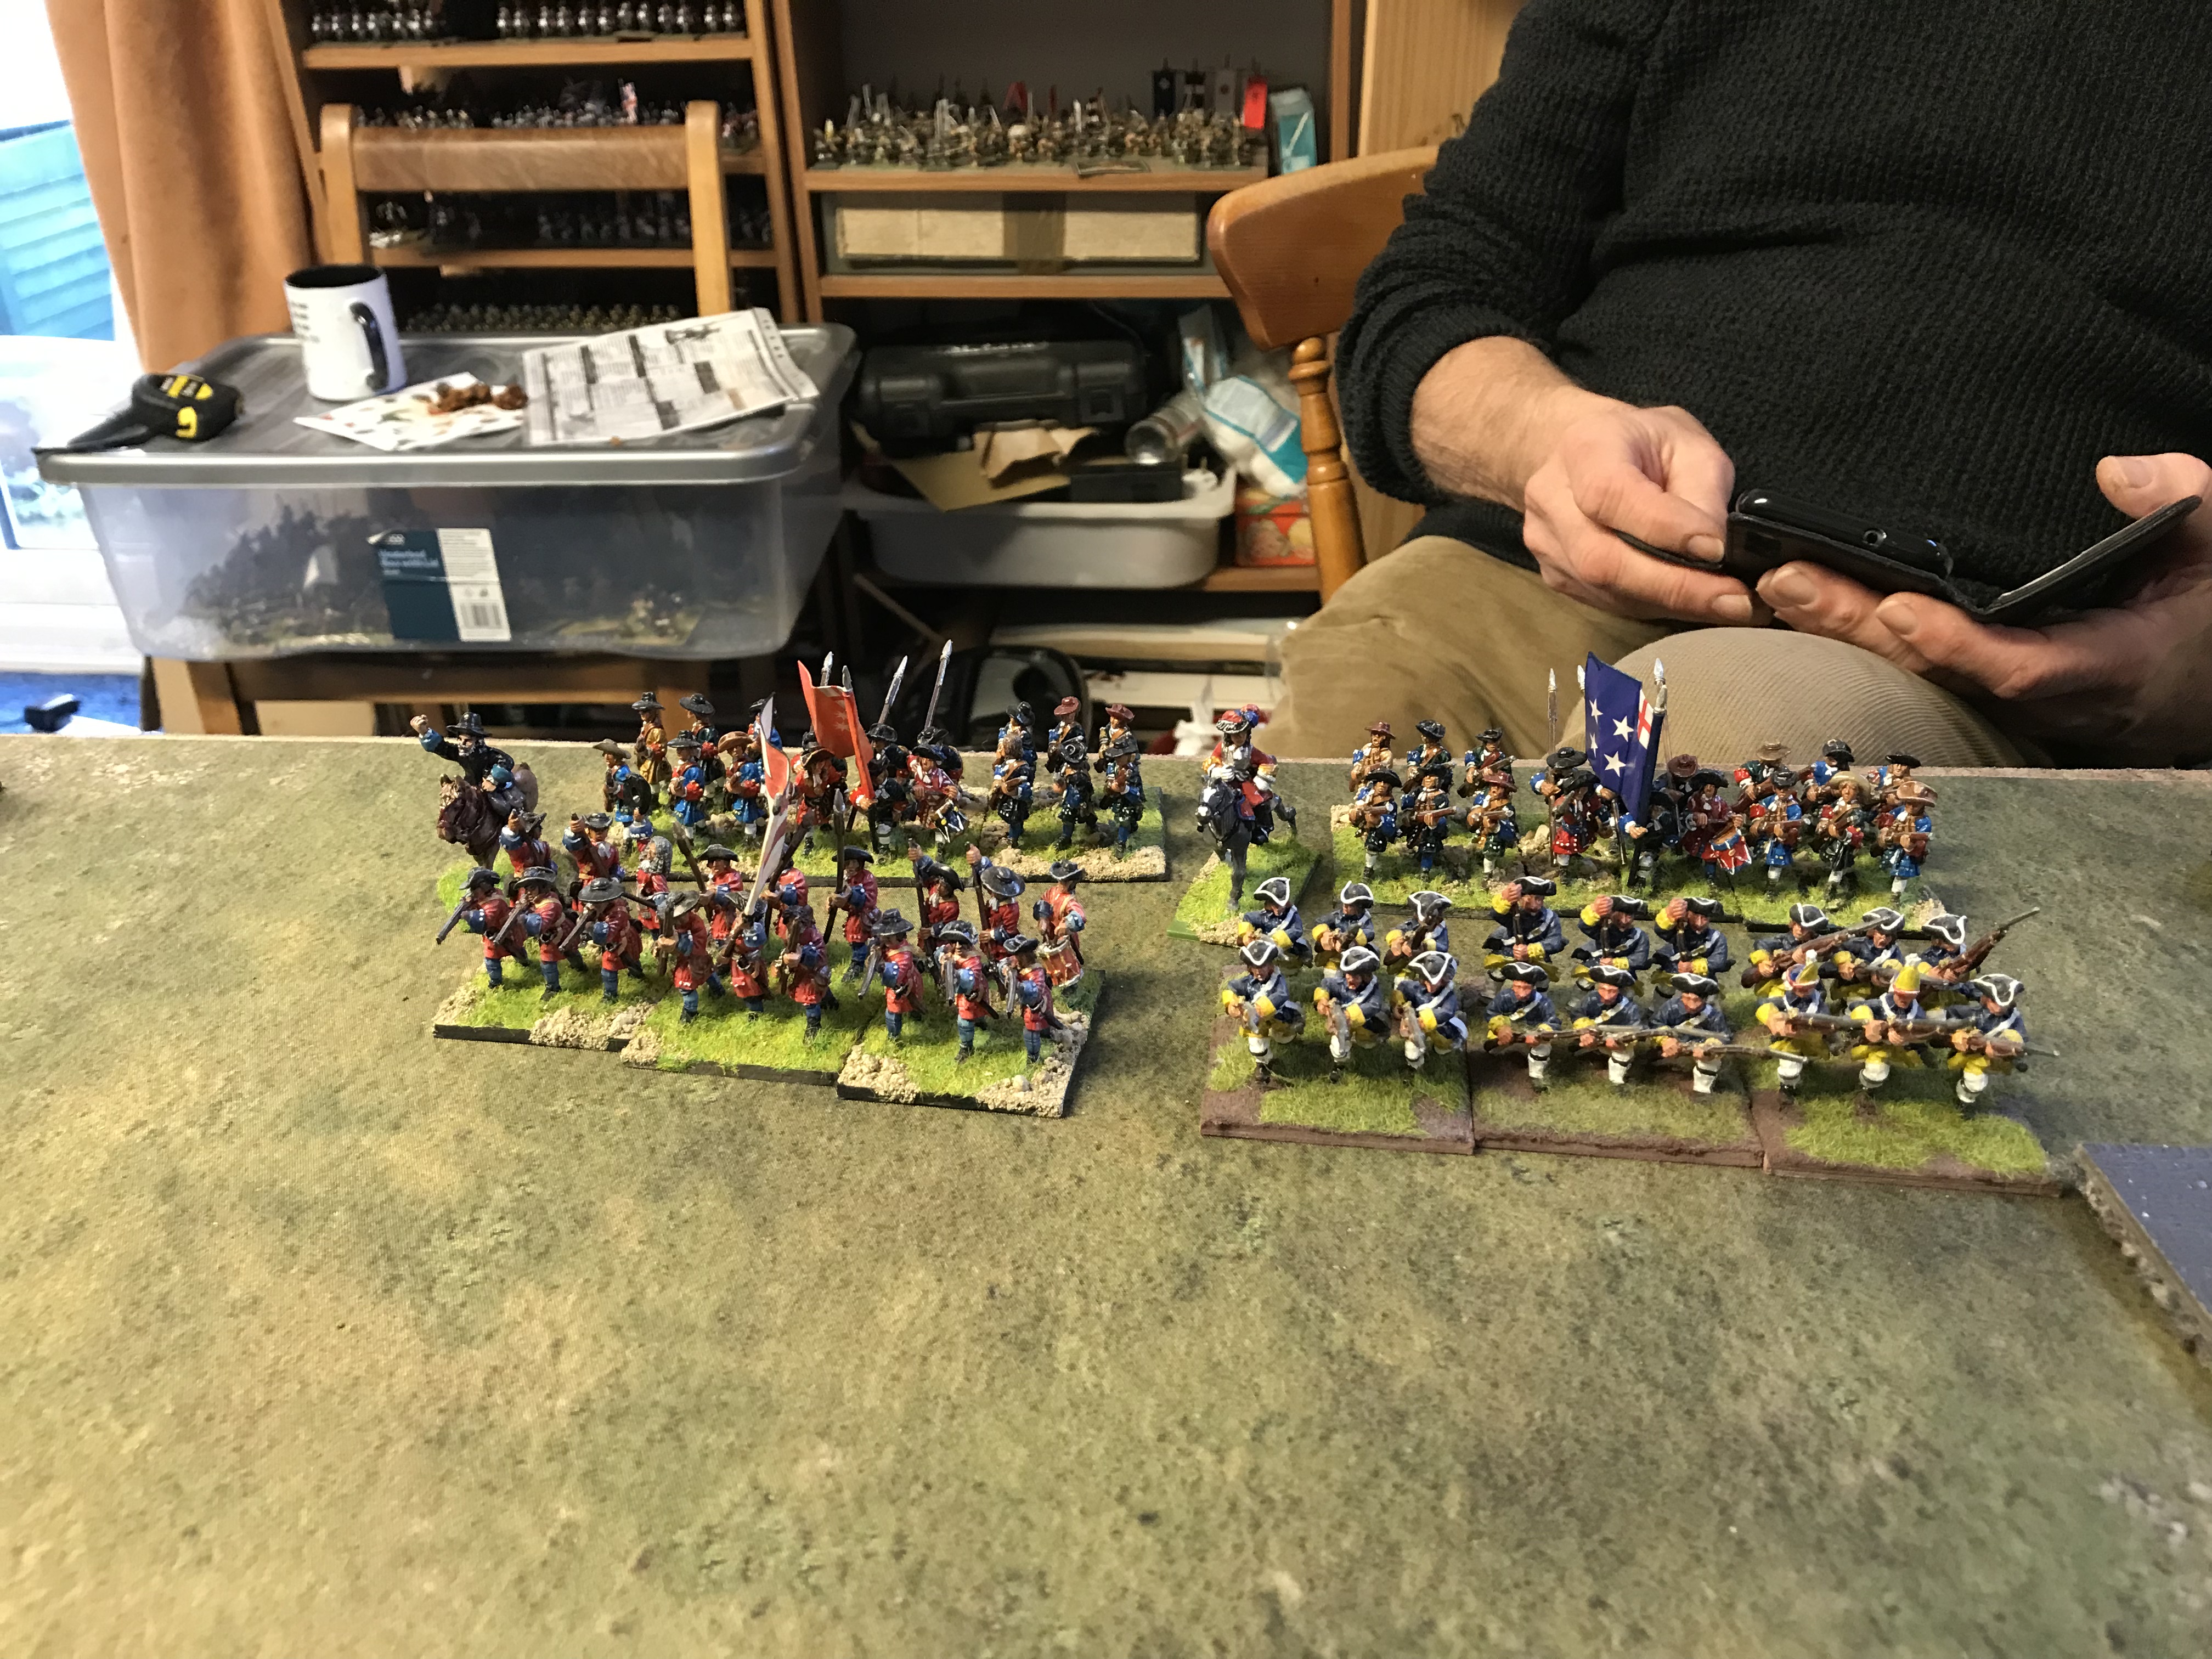
James' army deployed with English infantry in the centre. On the east side were the English cavalry,  the Irish and the Highlanders. On the west side the French deployed opposite the Williamite refused flank.  I took command of the English foot and the highlanders.

Jacobite horse 

The plucky highlanders

The French foot

More Jacobite horse, here supporting the French

The action began with a series of cavalry attacks in the east - the outcome was pretty even but the threat of Williamite reinforcements remained.  In the west it turned-out the French commander had overdone things the night before and so no orders to attack were given, leaving just the Jacobite horse to harass the enemy for the first 5 turns of the game. 


Centrally both sides advanced to the cover and the highlanders were pushed forward to attack the Williamite eastern flank. Some Williamite cavalry reinforcements arrived to tip the balance in the east, but were quickly entangled with the Irish.


Jocks on the move


This allowed a series of attacks by the highlanders which broke the eastern side of the Williamite centre.  Some accurate fire from James' English troops pushed back the other parts of the Williamite centre. 

So the result was declared to be a Jacobite victory - the flanks were pretty even but the Williamite centre had been defeated. Two events really made a difference in this game; firstly the French were so delayed they never fired a shot so so put no pressure on the Williamite west flank and secondly most of the Williamite horse never arrived so the Jacobite east flank was unmolested for most of the game.       

The French, still not moving

As for Will-I-am, he was gutted at the loss...


Saturday 24 December 2022

ACW campaign week 10 - what's for breakfast?

As we had 4 players this week we opted to play a single game. The attackers were trying to storm a fortified camp while the guards tried to hold them off long enough for help to arrive. We played 36 points of Union vs 24 points of Confederates.


The Union went for a fairly elite force and massed mostly in the centre and west if the field. The Confederates had to place small unit of camp guards into each of the 6 zones making up the camp. The reinforcements were Aggressive / Poor Shots as they anticipated more fighting than shooting.    


The Union advanced through the woods with their native unit while the artillery pounded the camp iwth accurate fire that severely weakened the front troops. Centrally they chose to shoot not attack in the hopes of blasting the lead units of defenders.     


As the reinforcements began to arrive the Confederate fire from the camp focused first of the natives, destroying them in quick order. It then focused on the leading Union line infantry, stopping them in their tracks.    


With the artillery clearing out the front of the camp the attacking Federals were able to establish a foothold in the camp but were thrown back and then eventually routed by the arriving reinforcements.


A  second attacking wave was also sent in but bounded off the now well entrenched Confederate reinforcements. The game ended with the Union having looted only 1 of the 6 zones and having taken heavy casualties.   


Sunday 18 December 2022

ACW campaign, week 9 - fools gold

 This weeks scenario is the second taken from Kings of War. Both sides get 5 objective markers - 2 x Hon, 2 x 1 Hon and 1 x 2 Hon. You each place counters in the enemy half of the table face down, with the scores revealed after 5 turns. You score full Hon for objectives in your enemies half and 50% for objectives in your own. So you can bluff the enemy as well as needing to balance attack vs defence.


Game 1 - Paul vs Nigel


The Confederates adopted an initially defensive posture, looking to see where the Union might attack. 


The Union moved forward, but the attack was a bit piecemeal and that allowed the Rebs to focus their fire and destroy a couple of units. They in turn pushed forward but time ran out before they could take much territory. 2-0 Confederates


Game 2 - John / Richard vs Stu / Adam    


This was a larger game with 32 points a side. Both sides stacked the east side of the table, with strong forces in the centre. 


The Rebs got the first move and quickly advanced to capture the central house. This created flanking fire on the planned Union attack, which dissuaded them from advancing for a few turns.


In the West the Rebs native unit charged forward and broke through a unit of Union line advancing on that side. 


Back in the east the Union tried to reposition for a central attack but found that route blocked. So they tried to switch back to the well defended east and finally decided to advance. They marched into some well entrenched defenders and came to a stop in cover.


Another Confederate win 2-0.


Sunday 11 December 2022

ACW campaign, week 8 - dominate the field

Its been a couple of weeks since we played these games so the precise details are a little hazy, but luckily we got the scores at the time. This scenario was not one from the book but instead was inspired by Kings of War's Dominate! scenario. The aim here was to have the most units in good order within 8 inches of the central objective.


The most notable event was our first officer death, with Adam both making Captain and dying in the same battle. Fitting he was at the head of his beloved Natives but fell trying to prevent thiam routing. 


Wednesday 23 November 2022

ACW campaign, week 6 - race for the bridge

Another interesting scenario this week as both sides rush up opposite sides of a river looking to secure a bridge. The defender has a smaller force but starts with some troops guarding the bridge.


Game 1 - John vs Paul

The attacking Union forces went for numbers, fielding five line infantry and two skirmishers. The defending Rebs gambled on just two units of veteran lights and a single gun holding the bridge. 


The Union company advanced rapidly with their skirmishers coming quickly in range of the gun. This was soon dispatched with a few turns of fire. The Confederate reinforcements were clearly confused as to their orders as they spent several turns inactive before finally making progress towards to bridge.   


Sadly for them it was too late and the Union stormed over the bridge to a maximum points win before they were halfway to the bridge.


Game 2 - Roy vs Adam


The Union again attacked and went for the same forces as the first game. The defenders went for a larger force with some line defending the bridge, some artillery in their deployment zone, and a mixed force of natives / line looking to reinforce the bridge.  


Both sides advanced smartly towards the bridge although the Union suffered some delays in massing their forces.   


The Confederate gun had a mixed game - initially damaging some federal troops it spent the mid-game unable to fire or lacking targets. Once in position the attackers spent several turns softening-up the defenders and preparing for an attack. 


With the Rebs reinforcements rapidly approaching the bridge the Federals launched an assault that sent the defenders reeling back from their trenches and then a volley routed them completely. The natives attempted to counter-attack but were also pushed-back by accurate fire. 

The game ended with the Union occupying the trenches and having caused heavy damage to the Confederates. They had however been unable to cross the bridge before time ran out and so honours were split.