Title

Title
Tally Ho!

Tuesday 27 February 2018

Kings of War - Elimination

Last weekend I visited Fishponds for the penultimate battle in our Kings of War campaign between my fantasy Persian's and the Dark Elves (Kin). The scenario was an Elimination battle set around a small watering hole. 1 VP is awarded for routing each of the enemies most expensive units with an additional VP for the loot marker in the centre.

 I was tempted to reclassify the Mamakil as an elephant horde, but with the scenario focused on the enemies most costly units this seemed to be asking for trouble. So instead I went for 2 Hordes of Kingsguard to make them and the Flying Carpets my most expensive units. This left my Knights as an attacking force I could afford to loose.

The Elves fielded some Herd units for additional speed/ mobility and also a battery of three artillery in anticipation of the Elephant Hordes. Next time perhaps....  

Table from my left flank 

Table from my right
I opted for a simple plan; I would hold in the centre where my target units were, refuse the right flank, and assault on the left with my cavalry. The centre had the bulk of my shooting units to protect the infantry Hordes.
Cavalry ready to attack

Kings guard and archers hold the centre

The refused right
The Dark Elves decided on a similar plan but were strong on their right and weak on their left. So this meant our main attacks were squared off against each other, with the Elves probably having the stronger force.
Elves right

The weak elves left

Elves centre

Sticking with my plan I immediately attacked with my cavalry, seeking to closedown the space available to the enemy and get my Scouts in their faces to limit their room for manoeuvre. Seeing little opposition on my refused right I also advanced here, seeking to flank any attack from the Elves on my centre.

My horse attack against the odds

My right wheels into a flanking position

On my left I quickly became somewhat bogged-down against the greater Elvish numbers and my Knights suffered heavy casualties from accurate artillery fire. In the centre though I enjoyed much more success killing the deadly lizard-mounted elvish knights with my infantry Horde and moving to the flanks to the main line.  

Heavy traffic on my left

Blackguards ready to roll-up the line

In a move that would grace any Armati battle they proceeded to roll-up a unit of Dark Elf spearmen and munch through a third unit to capture the central hill and its victory marker.

Looking bad for the elves

Flanked - Armati style!

On my left things were rocky for the cavalry as they got pushed back across the line and broken one by one. However they bought the time needed for my Jinn to launch a flank attack into one of the Elvish units with a bounty. They did nt kill them but brought them to the edge of routing.
My horse are almost spent

Blackguards zero in on the hill

Jinn attacks the flanks at the top

With the game entering the final moves I unleashed the flying carpets into the flank of the remaining Elvish spears to clear the centre and my Hero's attack was enough to finally rout the badly damaged bounty unit. In the final act of the game the Elves were able to flank and rout my unengaged infantry Horde.

Flying carpets on the move

My horde is taken in the flank

So the game ended 3-1 to the Persians. Unit of the day was certainly the Kings Guard Horde (Black Guards). They routed three enemy units and accounted for 2 of my 3 VPs.

All very peaceful now 


Saturday 24 February 2018

Strike Fast ECW Campaign - week 3

In the first two weeks of the campaign Cromwell had been able to neutralise the Royalist forces in Dumfries and Ayrshire. So this week the English attacked the Covenanter army defending the Borders region.

The field from the Scots right 

From the English right

The Covenanters found themselves with a decent defensive position having a low ridge either side of a small village on their baseline. They opted to mass their Horse on their left and refuse their right flank with guns in support of the infantry.  

Massed Scots Horse

Scots holding the village

More Scots holding the ridge 

The English opted for a more unusual formation. On their left they deployed Horse with dragoons in support, in the centre a regiment of Horse mingled with the foot, and their right the veteran Ironsides with foot in support. Seeking to stretch the Scots defence they placed their victory objectives out wide on each flank.

The unopposed English left

NMA and Horse hold the centre

More troops in the centre 

The English right in an unusual formation
The battle opened with the English Horse in the centre immediately attacking the Highlanders in the front rank. One squadron routed some Highlanders but second squadron bounced back.
English sweep away the Highlanders
On the English right they were immediately attacked by the larger Scottish cavalry, forcing the supporting foot into pike stand. Their blood up, one of Scottish horse regiments charged headlong into the English pikes and were sent reeling back in confusion. Although outnumbered the veteran Ironsides were able to push back some of the remaining Scots lancers.

You;'ll have someone's eye out 

Ironsides make headway 
In the centre of the field a unit of English commanded shot seized a small farm, fired a smart volley into the on coming Scots storming party and overwhelmed the dazed Covenanters in the blink of an eye. They then pushed them straight back through their supporting foot and attacked them too for good measure.

Scots are roughly handled by the commanded shot
Centrally the Scots enjoyed more success, as the Highlanders stationed their charged into the new model army foot and began hacking away at them. The Scots also enjoyed an unexpected bonus as the Dragoons stationed in a wood guarding their right roundly defeated the English storming party.  

Centres clash

Dragoons throw-back the storming party 
With the bulk of both sides committed to the fight there began several turns of grinding combat across the line. Eventually the English Horse overcame their less experienced Scots opponents to secure their right flank. In the centre the Highlanders were slowly gaining the upper hand but too slowly to make the much needed breakthrough.    

Ironsides finally overcome the Scots

Commanded shot still going

NMA under pressure
Back on the English left the unopposed Horse and Dragoons were finally got into a position to outflank the Covenanters position, forcing them into pike stand in front of the advancing English infantry. By now the casualties on the Scots flanks were mounting and despite their success in the centre it was clear they could not win. So an English victory was declared.  

The flank move finally arrives 

Royalists forced into pike stand
 
So with that victory the English had secured significant foothold in Scotland


Sunday 18 February 2018

An ACW interlude

Image result for longstreet rulesAs we had a number of players away this week due to half-term holidays we decided to have a quick game to test out some rules that Mike has been preparing for a future ACW game. So it was we set about a couple of small games of Longstreet.

The rules use activation cards to drive the action, which each side having about 20, with a hand of 6 being dealt and the rest in a pile. They can be used in three ways:
1. Any cards may be sacrificed to shoot all units, move all units, or charge all units.
2. They can be used to mitigate casualties, based on a score on the cards.
3. They may have a special effect on you or the enemy as printed on the card, such as movement or combat. Some are unique to each side.

You may spend any amount of cards in a round, with the undealt pile topping-up your hand at the end of a turn. The rub though is once you have used-up all the pile you reshuffle and remove 6 cards. If a player runs out of cards completely they loose.

So the knack is knowing  how quick/slow to use-up your cards and to balance long vs short term gain. There is no command friction as such as all units can move, shoot, and fight in a turn.

We played through 2 short games in both cases a slightly larger Union force attacked a Confederate force that was somewhat superior in artillery. The first was a bit of a debacle for the Union as the Confederate artillery thinned the ranks then, they there were met with a devastating volley assisted by very good cards.
Confederate position in the first game

Union attack met with heavy fire

In the second game the Union concentrated their forces and were able to win the game by forcing the Confederates to burn through their cards too quickly.

Union storm a ridge in the second game

Confederates at bay

Rebel yell!

Zouaves attack
The cards certainly add a certain randomness to the game, which is what you need with both sides essentially the same and it does look good in 28mm.

Sunday 11 February 2018

Strike Fast ECW campaing - week 2


Following last week's victory in Dumfries, Cromwell choose to press his advantage against the Royalist and continue up the west coast into their territory around Ayrshire.

For this game there were low hills on one end of the table, a small village in the Scottish centre, and a fortified farm within reach of the English. With the hills an obvious feature both sides deployed all their horse on that flank (the English right) and refused the other (the English left). Once again the Scottish had their aggressive Highlanders to the fore, with the Irish and Royalist foot in support.         

Long-shot from the English left, with the farm in the foreground

Long-shot from the English right showing the massed Horse

Scottish Horse ready to attack

Scottish centre with Highlanders in the lead

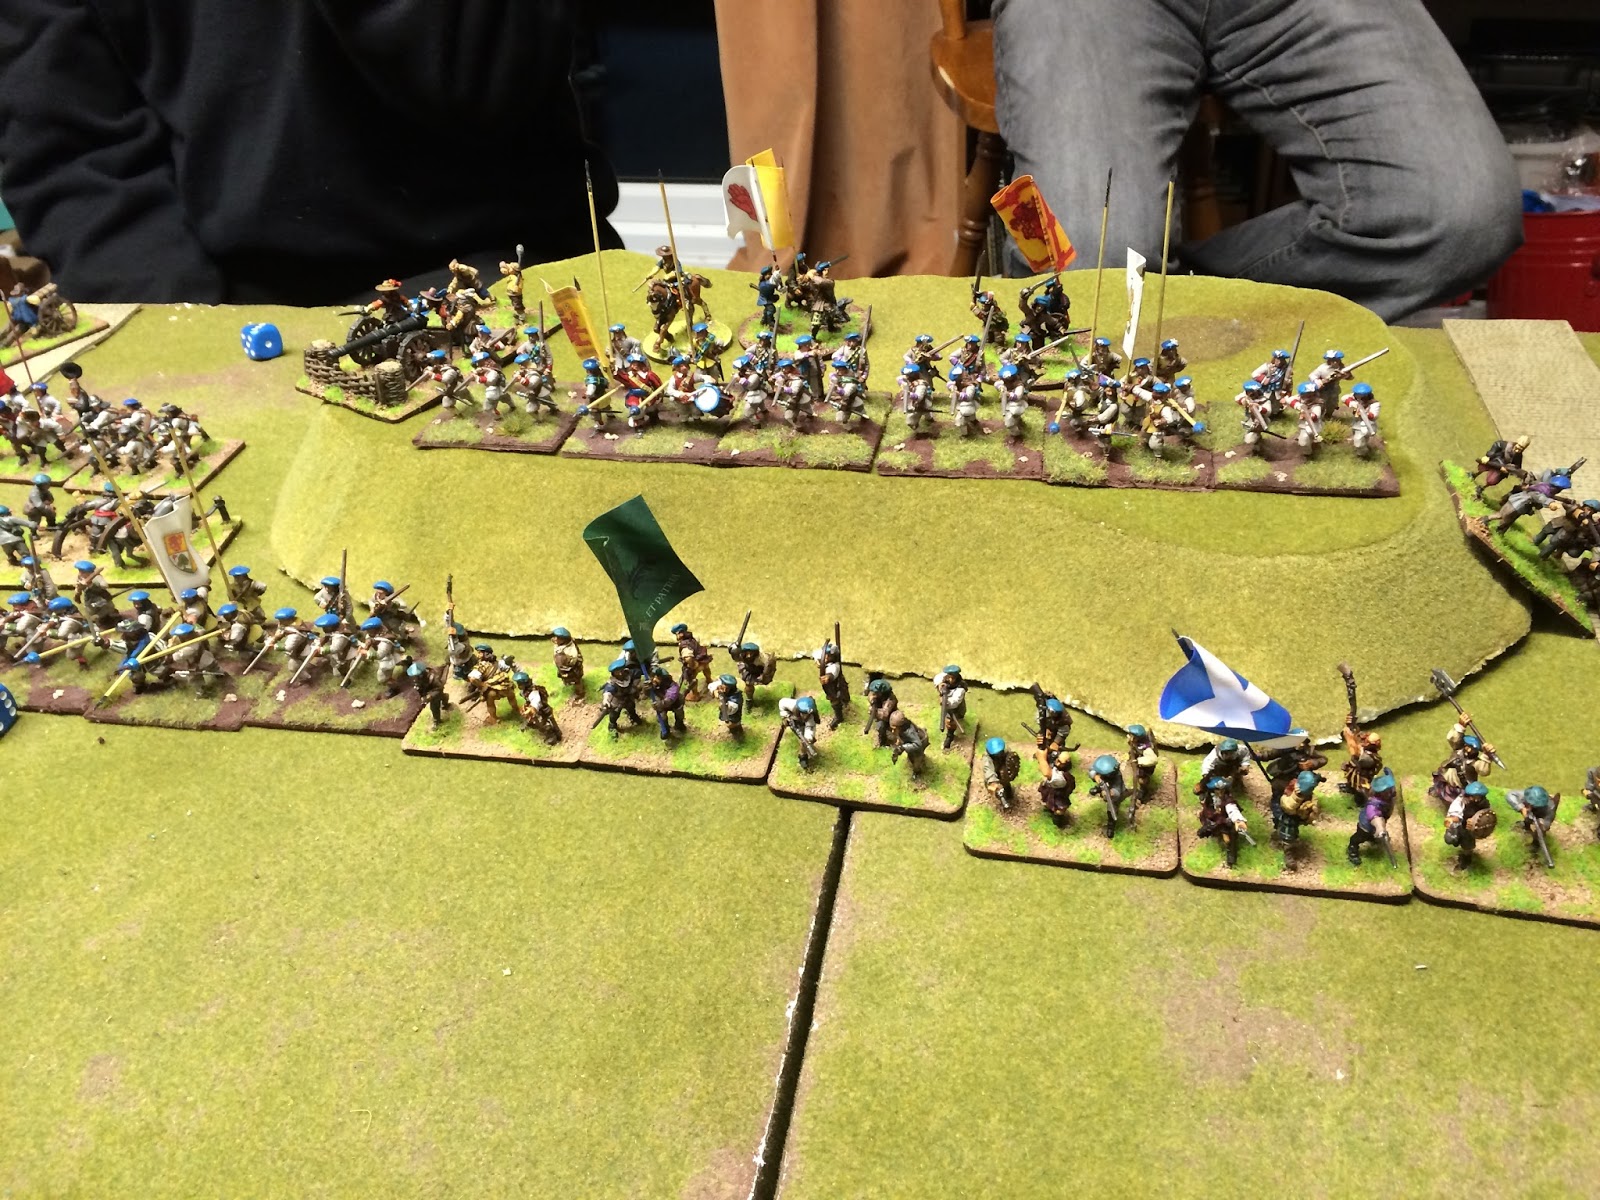
Scottish right that would soon attack the fortified farm

The English refused flank

Veteran New Model Army foot in the English centre

The first move saw both sides quickly grabbing the built-up areas within their half. The Scottish pushing several units of Highlanders into the village, whilst the English Dragoons and Storming Party seized the fortified farm.    

Hairy-arsed Highlanders - scary

English Storming Party takes up residence

With the English well ensconced in the farm the Scottish made the first of several attempts to capture this strongpoint and turn the English left. The first assault by a Highland regiment was easily beaten  back by the English Storming Party.    

Scots attack is thrown back
The village safely in Scottish hands

On the English right the MOA cavalry battles commenced as both sides pushed forwards. The luck was with Cromwell though as he gained the initiative and most of the Scottish Horse failed to counter-charge, placing them at a disadvantage in the ensuing melee.  

English Horse advancing across the rolling hills

The cavalry clash.

Caught at the halt by the Veteran English troopers most of the Scottish Horse were quickly routed from the table with the Ironsides in hot pursuit. One unit of lancers faired better though, catching some English off guard and pushing them back.

The English put the Scots to flight.

Cromwell clears the flank and pushes the Irish into pike stand

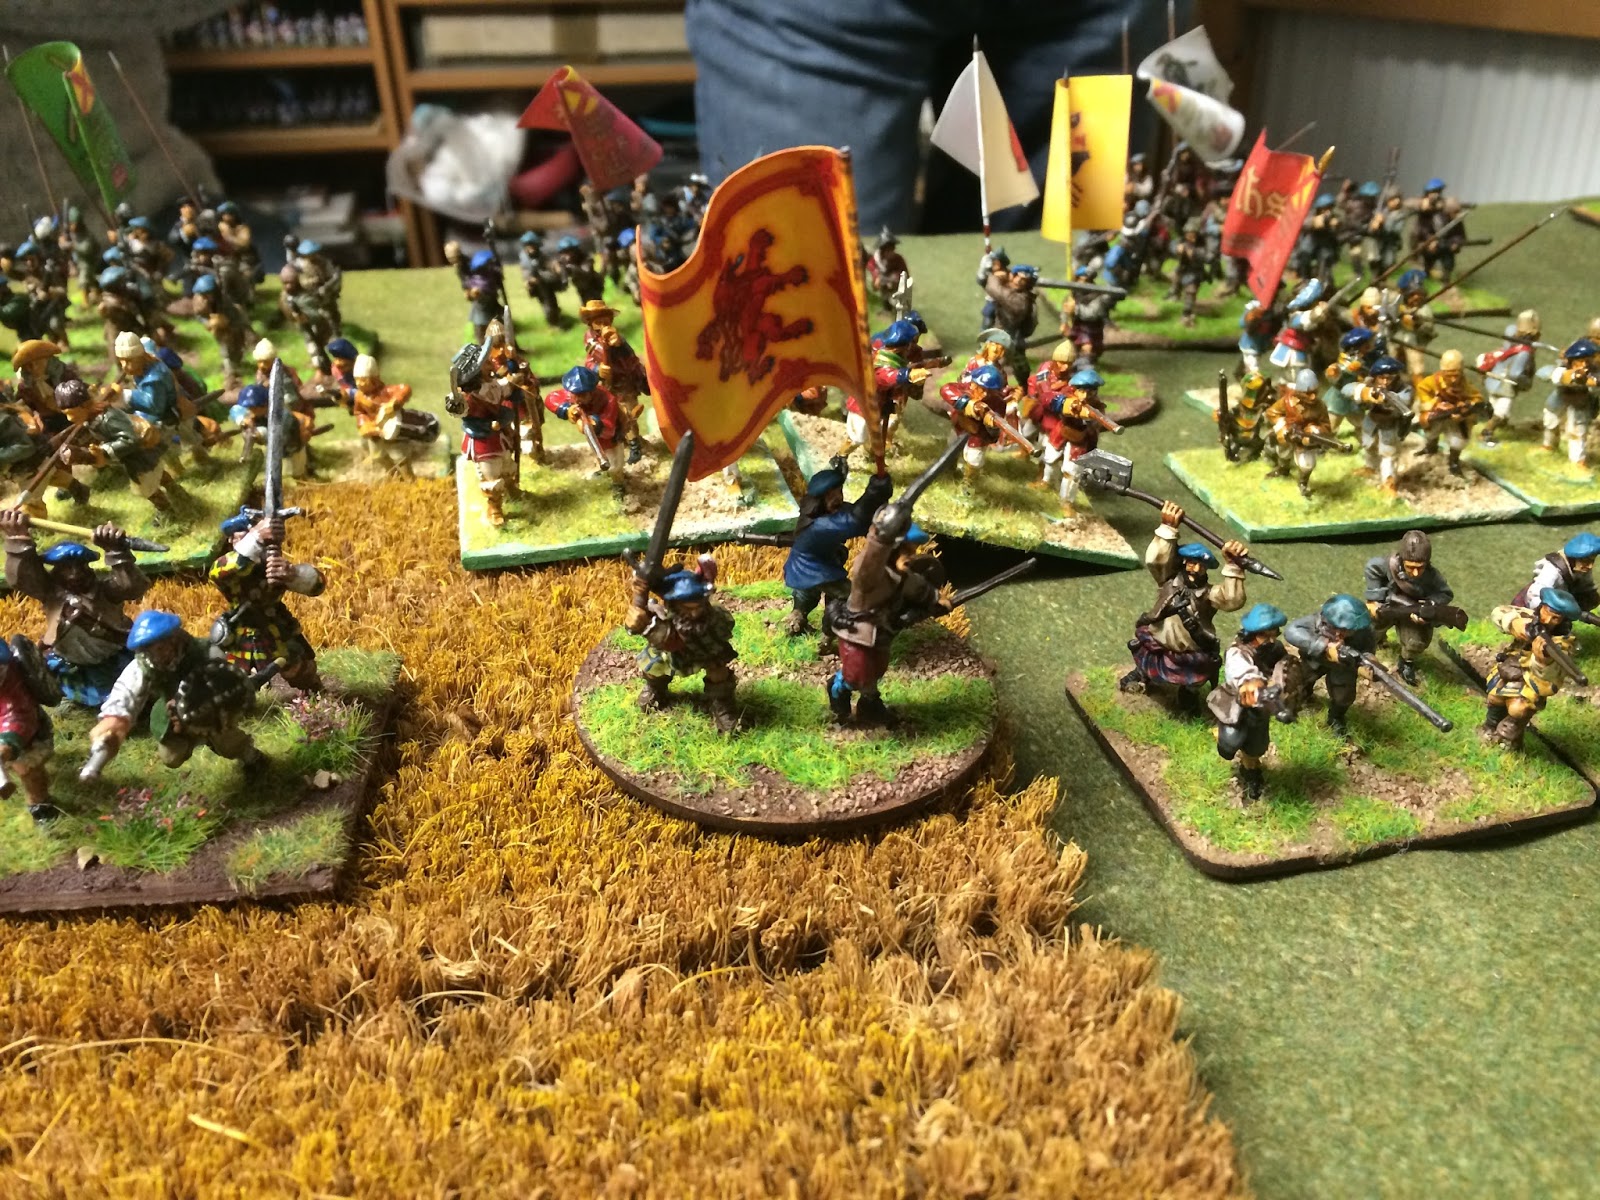
Seeing that the cavalry melee was not favouring the Scottish they launched an immediate infantry attack across the line in the hopes of breaking through the English. In the centre the Highlanders met with some success, mostly winning their tussles with the NMA foot and pushing them back in disorder. On the English left the Storming Party held-firm in the walled gardens. The Drogoons came under pressure but were relived by some English foot who pushed the attacking Highlanders back.

The fearsome highland charge throws back the English 

The farm proves a tough nut 

Now came the crucial phase of the game. As infantry casualties grew for the Scottish, Cromwell was able to regain control of his Horse. They mopped-up the remaining Scottish lancers and forced some Irish foot intro pike stand right in front of Cromwell's commanded shot.


Scottish left in big trouble

Despite the good progress made by the Highlanders the loss of all the Scottish Horse and several infantry pushed them to breaking, as the English Dragoons managed to steal an unguarded victory objective. So a 12-4 win for the English.

Highlanders still pressing the English

A dreadful shoving match

Scottish lancers handle roughly in the rear

Dragoons snipe a victory marker to win the game

So an interesting game, where the terrain led both sides to load the same wing with all their Horse. The English plan was to win the cavalry battle and then threaten the flanks. The Scottish hoped to force a stall-mate on the flank while their Highlanders won the day.

This nearly worked and they proved effective against the Veteran English foot. Two factors worked against them though - firstly their Horses failure to charge led to a more rapid collapse then they hoped and secondly the stubborn resistance in the farm  stopped them turning the English left.