Title

Title
Tally Ho!

Saturday 24 November 2018

Vanguard Basilean's - first look tactics

This weekend I tested my new KOW Vanguard Basilean force. The figures are not yet complete so some mythic Greeks stood in. Below is a quick AAR from our first battle and some tactical reflections.

Introduction


For this first game I chose a mixed force to test-out several options and see what worked. My opponents were the dastardly Nightstalkers:
3 * Crossbowmen (Grunts)
1 * Sargent (Warrior)
2 * Paladin Defenders (Warrior)
1 * Ogre Palace Guard (Monster)
1 * War Wizard (Caster)
1 * Panther (Support)
1 * Veteran Sargent (Command)
The Faction special rule (Iron Resolve) allows you to roll the saves for a model at armour 3+ for the cost of 2 power and may be used any number of times a turn.

The Battle


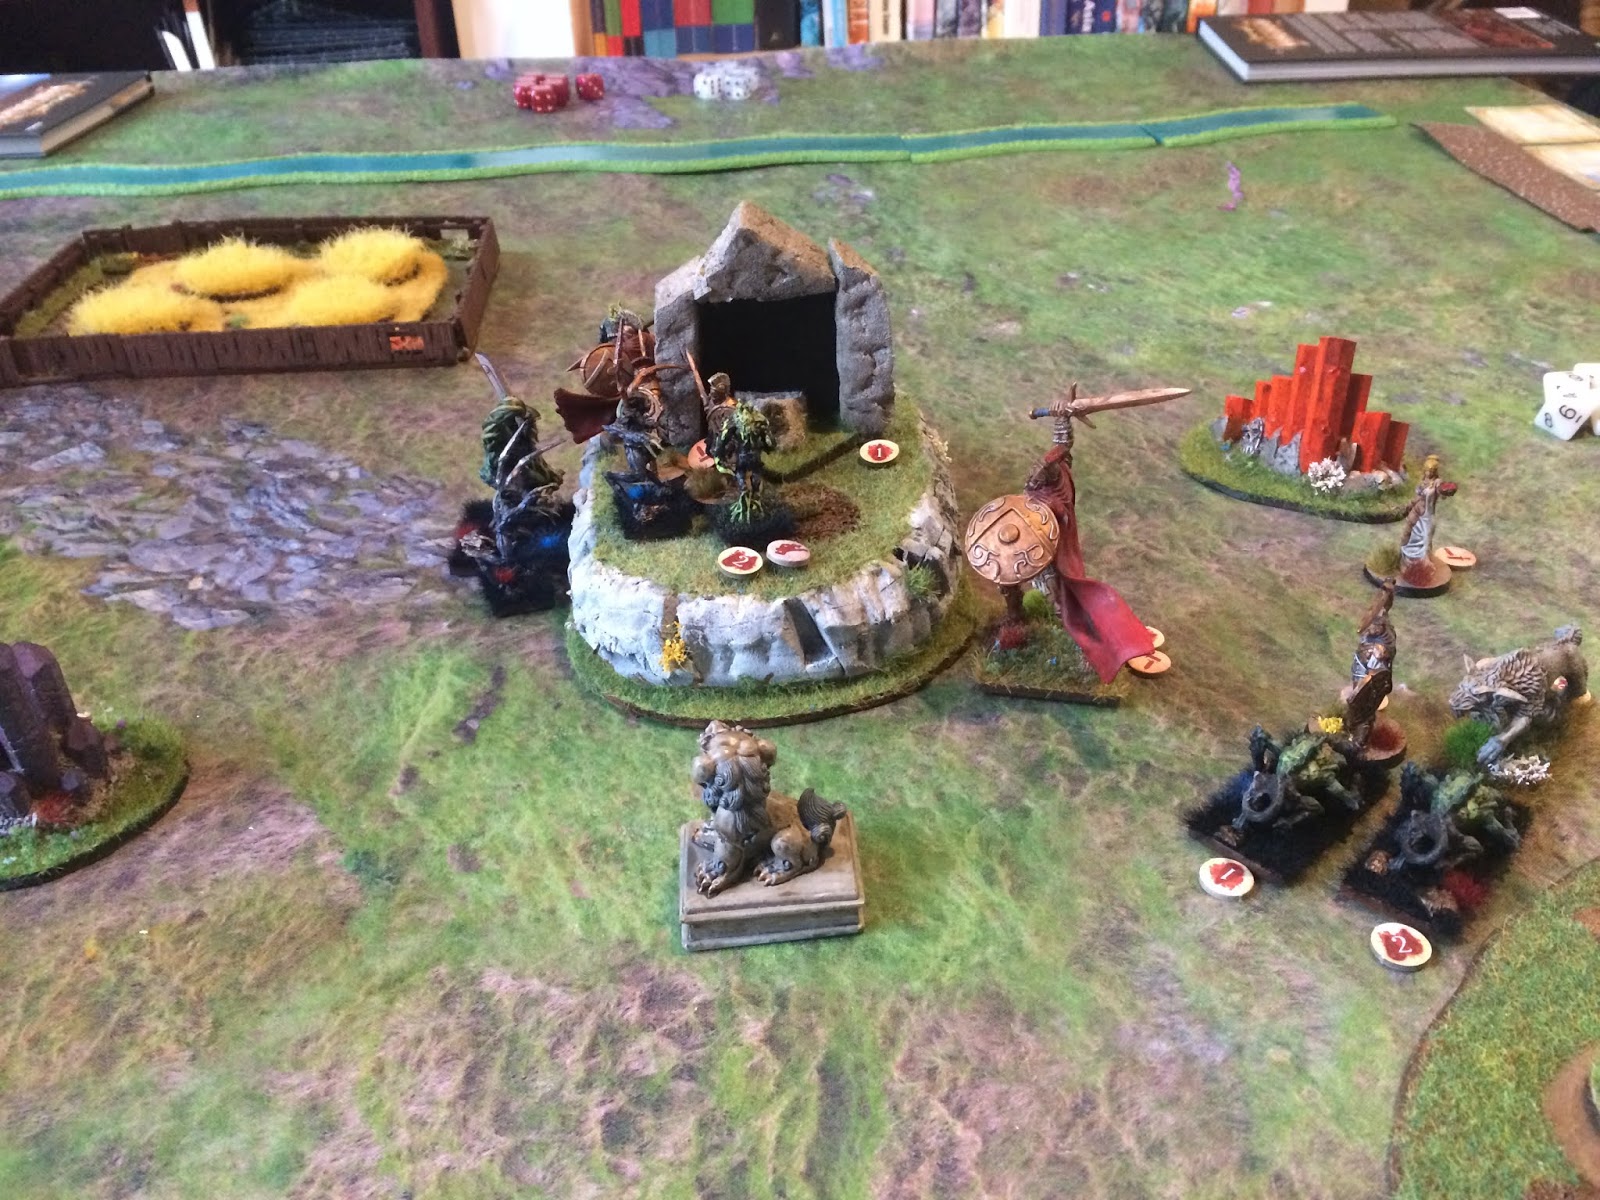
I opted for two "pods" - the Crossbows and a Sargent would hold the flank, with support from the Panther. The Ogre, Defenders, Vet Sargent and Wizard would push up to hold the objective. In this case its a Portal and contact gives you victory points each turn.

Basileans deployment

The Nightstalkers plan seemed similar, with their faster troops threatening my flank and melee troops pushing towards the objective.


Round 1 was a bad one for me with the Crossbows being charged and annihilated by the fast-moving Shadowhounds and a Shade. This  forced me to commit my Panther, Sargent, and Ogre to shore-up the flank.

Crossbows evaporate

I pushed my Paladins and Vet Sargent onto the objective with the hope of hanging-on long enough to grab some victory points. Although outnumbered they proved surprisingly resilient and were able to hold the Portal for the remainder of the game.

Paladins and Vet Sargent hold the Portal

So the Basileans racked-up a 10-0 win without ever feeling like I was actually winning at any point!

Still clinging-on

Tactical Reflection

Crossbowmen:  These were a disappointment dying without causing any causalities or firing a shot.  With a 12" range and unable to move and shoot (Reload) they will always be vulnerable to fast opponents and seem likely to be mashed regularly unless very carefully positioned.

Sargent, Paladins, and Vet Sargent: These guys performed well and would form the core of future armies. They are loaded with survivability tools; decent armour (4+ or 5+), Parry (reroll a hit), and Defender (Brace as a short action). Backed with a little healing they are hard to shift and Parry is very useful as you can cancel an Exploding 8's attack. 

Ogre: He did ok and certainly hits hard for a 30 point model. He became bogged-down fighting the Shade (which has a nerve of 3+) but would munch-through lesser foes.

Panther: This was not used at its best but has good melee (4+ to hit) and with 3 wounds can hang about a bit if needed.

Iron Resolve: At 2 power this allows a model to roll all their saves at 3+ for that turn. This is A-MAZ-ING and saved me on several occasions, especially against high Crushing Strength. I found that Parry + Iron Resolve = banging your head on a wall for their opponents.  
       

Sunday 18 November 2018

Crete 1941 - week 5, attack on the airport

The fifth game of the campaign marked the beginning of the end-game as the Germans launched an attack on the village guarding the approach to the airport. The British occupied the village, with a low hill guarding the left flank. Walled fields and vineyards formed the centre of the table and a dried-up stream bisected the board.


Tower in the German position


The Germans deployed a strong base of fire on their left flank, with infantry across the line to threaten all parts of the British line. The Commonwealth forces deployed into the village and the woods guarding their left flank, supported by the Matilda.  

The Germans deploying the attack the British right


German base of fire
The Germans pushed forward on the flanks under cover of heavy mortar fire, aiming to launch and assault against the British.


Germans sneaking through the vineyard

The British had some success in delaying the Germans but themselves suffered under the intense mortar bombardment that had zeroed-in on their positions. With the British partly pinned the Fallschrimjager moved forward along the dried-up riverbed.    


With their right under threat the British deployed their Bren-carrier to block the German advance. This was highly effective in delaying the Germans who's moral failed when they attempted to storm out of the vineyard.

Bren-carrier blocks the way

German attack stalls

The German mortar fire continued to pin and weaken the British defenders, enabling the Germans to mass their forces for a likely attack.


As the evening drew to a close the Germans were poised to launch an attack but had yet to do so. Later it was clear that we were probably within 2 moves of the end of the game so I took the decision to solo-play the last couple of decisive moves.

This saw two assaults on the British defences. The Fallschrimjager attack was repulsed but the defenders badly mauled. The other attack was however successful in seizing the objective.

An attack goes in 

Germans bounce-off 

Saturday 10 November 2018

Crete 1941 - week 4, attack on DZ Sturm

The fourth game of the campaign saw the British once again on the attack, in this case seeking to capture the second of KG Sturm's DZs. The British began on a hill-line overlooking a wooded valley in the edge of the DZ. A farm guarded the Germans left and the gully bisected the table on their right.  
View from the British left, gully in the foreground

View from the British right - farm just visible

In this game the Patrol Phase was crucial as some clever manoeuvring allows the British to outflank the Germans on their right and secure Jump-off Points in the gully.  In response the Germans deployed most of their troops early to establish a strong defence. The British were more coy though, establish a strong base-of-fire with HMGs and mortars on the ridgeline but holding most of the infantry off table so they could pick their fights.    

Germans our early and in force

Farm's defenders

British HMG sections

The British launched a furious fire assault on the German right with HMGs, mortars and flanking fire from the safety of the gully. This first pinned and then began to wear-down German defenders occupying the wood-line.

Germans take a beating

Always a restless commander, Hauptmann Koch decide to counter attack rather than be bogged-down. The Germans therefore sought to advance from the farmhouse on their left in the hopes of securing the Jump-off Point. However with troops in reserve the British quickly countered the thrust and it stalled as the infantry became pinned as they moved through the woods.    

German attack stalls

The Germans position was now largely hopeless. They were flanked by British infantry preparing to assault them and pinned-down by HMG / mortar fire. So with the evening drawing to a close the Germans surrendered rather than take a losing situation into a second week of play. 

Flanking fire
The final action was an assault by the British on the Marder II, damaging but not brewing-up the tank destroyer.
Charge!

So a good and decisive win for the British. a good Patrol Phase helped but also an infantry / HMG heavy list worked well for this scenario. The German decision to deploy all their infantry immediately may also have left them unable to respond to the British attacks.     


Saturday 3 November 2018

Crete 1941 - week 3; Attack on Hill A continued

In the first part of their attack on Hill A the Germans were able to capture the summit of the ridge. In part 2 they had to attack down into the valley beyond to clear the British from their new defensive positions. The terrain was fairly open with a small farm house and a ruined temple the main features.

View from German right

View from British right

The ruined temple

The Germans initially deployed a strong force of Fallschirmjagers on the British left, aiming for the cluster of Jump-Off Points on that part of the table. A strong base of fire was established on the ridgeline with HMGs, mortars, and a recoilless rifle. The Marder II was also deployed in the first turn.  


The British countered by deploying support weapons in the farm, a solid line of infantry in the centre  and more infantry covering the gully on their left.


After an initial advance the German attack on the British left was stalled by the arrival of a Matilda to shore-up the defences. This left a section of Fallschirmjager isolated in the gully and forced to Go-to-Ground under heavy fire.


Germans isolated in the gully
With the British defence fairly well set, the Germans began a period of fire combat where they sought to pin the defenders and create an opening. Accurate British mortar fire severely damaged the  Germans base of fire but at the same time there was attrition amongst the infantry ranks. With the main assault on the British left badly stalled, they advanced some troops against the right in the hopes of sneaking an objective marker.  

Germans move forward on the British right

Attack stalled
The end game was a chess match - the British mostly waited on Over Watch while the  Germans sought  a lucky round of fire that pinned enough defenders to allow an assault. In the end of coarse this happened over on the British right with a Fallschirmjager section managing to capture an objective after about 6 hours play (2 evenings).
 
Success


Easily our longest game to date and a cagey affair from the German attackers. In the end the superior assault rating of the veteran Fallschirmjager was the difference as with enough rounds of shooting they would likely always get an assault somewhere against a pinned opponent.

Marder II