Title

Title
Tally Ho!

Sunday 29 January 2017

Its all Greek to me

The latest troops are from the ancients models donated by Stuart the Elder to club stocks  - some Greek hoplites and a general. All figures are Crusader Miniatures with Warlord Games transfers

Greek hoplites

Close-up of the Greeks 

The boss looks on 

The temple in the background is one I made a while ago
http://cirencester-wargames.blogspot.co.uk/2016/05/ancient-terrain-greek-punic-temple.html

Saturday 28 January 2017

Dacian Wars Armati Mini Campaign - week 3

We began the evening with the troops already deployed for the first game from last week's session, so by playing slighter later than usual we were able to complete two games within the evening. We also road-tested by new movement trays for the first time. With the trays my units are about 30% wider than the Armati rules recommend, so we may need to do some maths at some point to ensure that does nt interfere with the all-important wheeling times / distances.  

Game 1 - The Pass

Following the Roman victory in the last game the Dacian's fell-back towards their capital and occupied a position with flanks covered by rough ground. The Roman's deployment was similar to the previous game with cavalry and auxiliary infantry seeking to stall on one flank whilst a solid mass of legionaries attacked on the other. The Dacians adopted a more balanced deployment with cavalry and skirmishers flanking a solid mass of tribesmen. In classic style both sides planned to attack on their rights and hold their lefts.

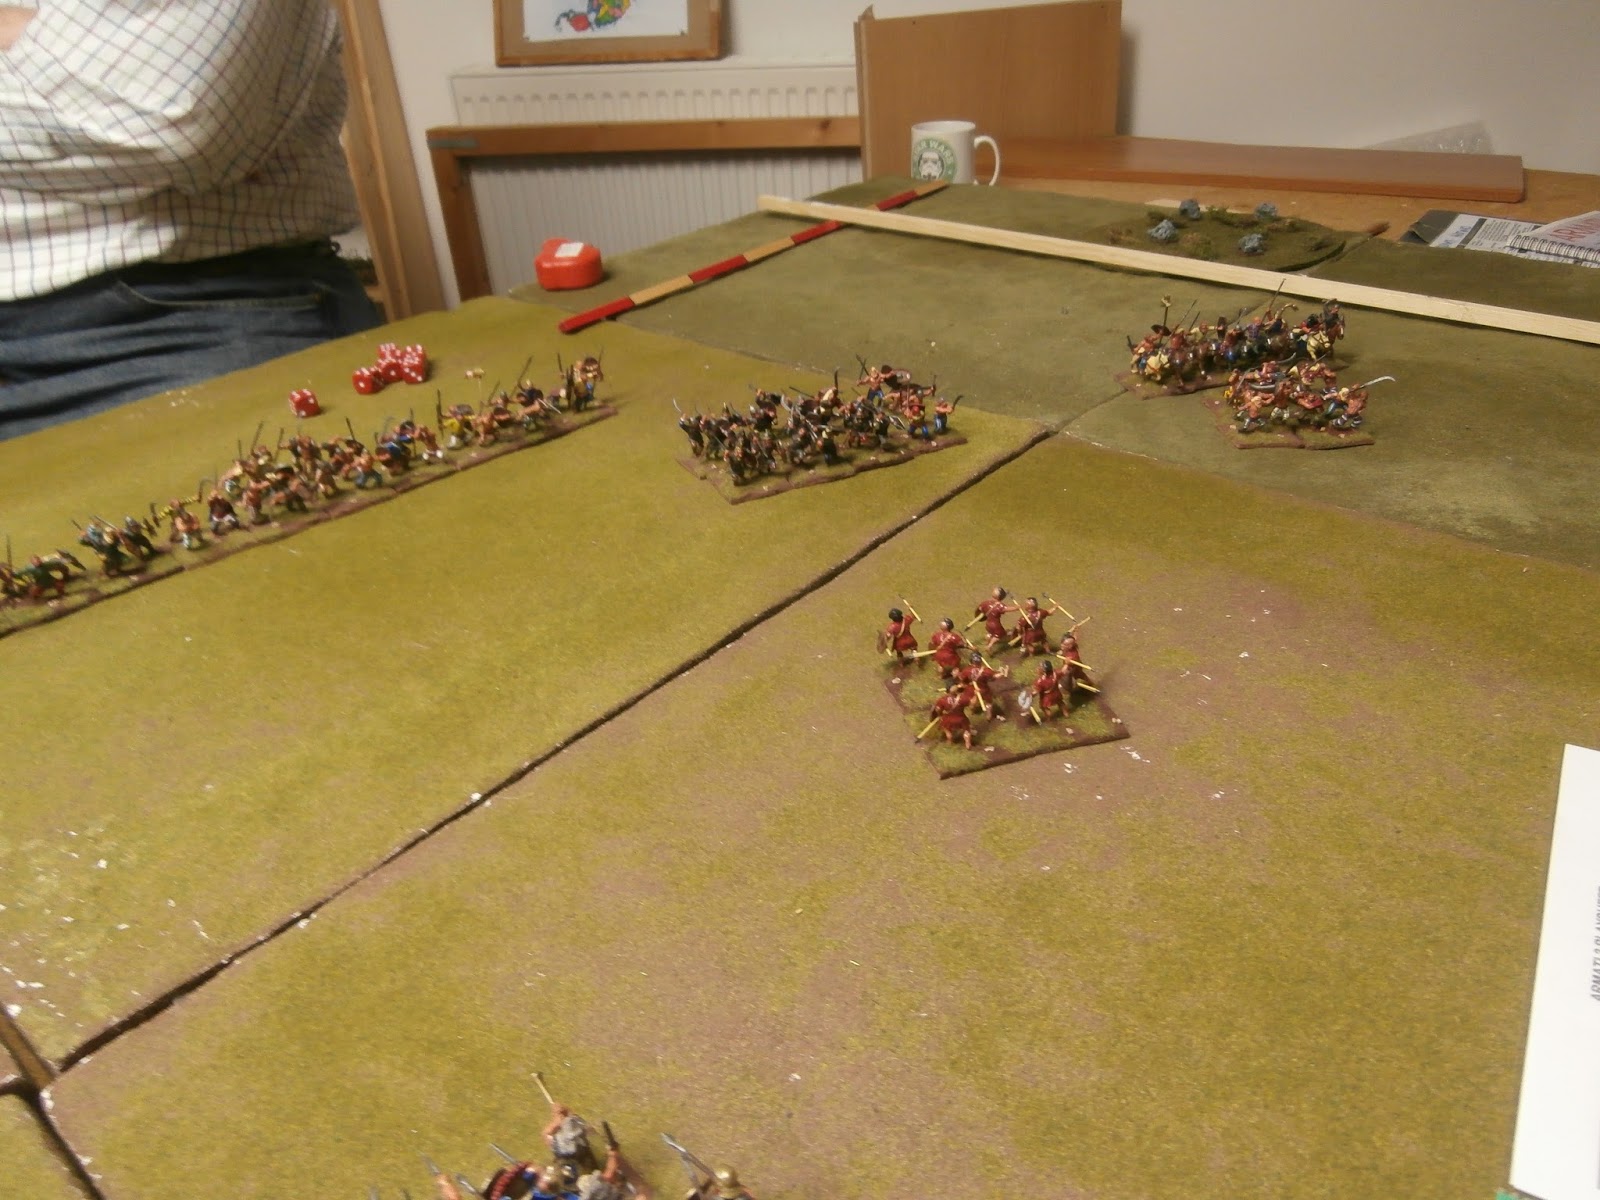
The Dacians right - cavalry and Falxmen make ready to attack

The Roman right with only a single unit of enemy skirmishers opposing it 
Seeing their was a race against time the Roman Right advanced quickly towards the enemy lines with the aim of cutting-through before the weaker left was overrun by the Sarmatians and flaxmen opposing them. A quick review showed the timing would be tight. Cunningly the Dacians had deployed a single large Heavy Division in their centre thus enabling them all to be designated the Reserve Division and so wheel at double speed within the deployment zone.  

Roman right presses forward

The Dacians begin their lengthy wheel
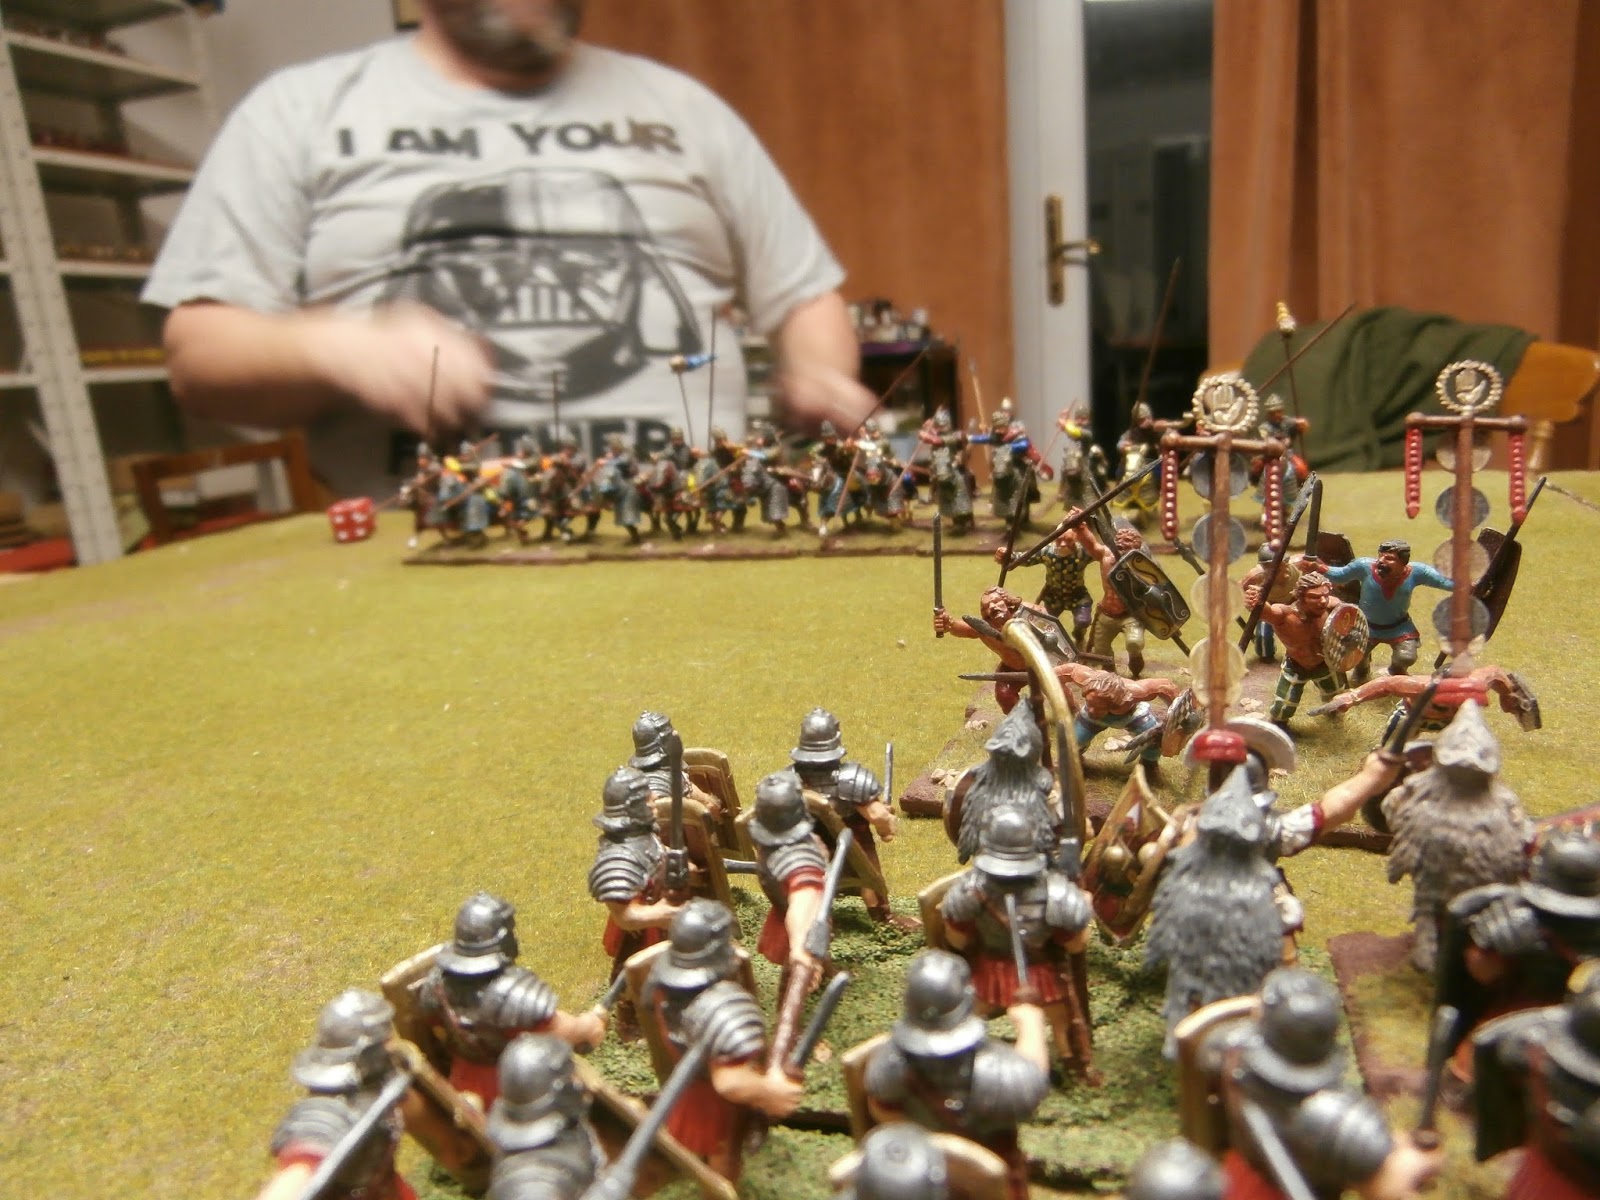
First action was when the Roman's were attacked by the single unit of Sarmatians holding the Dacian's left. The cataphracts were able to sweep aside the auxiliary infantry but the legionaries were made of sterner stuff and brought them to a standstill.

Heavy metal clashes
Meanwhile on the Roman left they had come to grips with the Sarmatians and Dacian's attacking there. Thanks to some decent rolling and a few well placed infantry charges they were able to slow the cavalry's advance and buy time for the main assault.

Delaying action from the Roman auxiliary and mounted
The Roman legionaries crunched into the main Dacian line and began to grind-down the tribesmen as well as the now isolated Sarmatians protecting their flank. Despite a few successful Dacian break-offs the Romans made good headway against the lightly armed tribesmen. Due to their superior manoeuvrability they had managed to isolate the end of the Dacian lines and so avoid fighting against greater numbers.

The Romans begin their bloody business against the main line

Sarmatians surrounded 

The main Dacian line still wheeling 
With the Dacian's flank attack somewhat stalled the Romans pressed home the advantage and broke through, forcing their enemy from the field.

Romans breach the line

The end is nigh
The battle ended with a 5-3 victory to the Romans. Again the ability of the Romans to focus on a part of the enemy and achieve a significant local superiority proved crucial to their win.

Game 2 - The Assault on Sarmizegetusa

 For our second battle the depicted the Roman's attack on the approaches to the Dacian's incomprehensively named capital city. This time the Dacian's deployed in a more attacking formation with all the cavalry on the left flank and Falxmen / skirmishers on the right. To their backs were a wood that could offer shelter to the tribesmen. The Roman formation was more balanced with legionaries forming the centre and axillaries / cavalry evenly split to the flanks.

Roman left - axillary infantry and mounted

Roman centre - the hard lads

Roman right - more auxilaires

Dacian right - fast-moving Falxmen


Dacian left - Sarmatians make ready 
The Romans began with a general advance across the line as they sought to close with the enemy. The Dacian's sense a possible opportunity on both flanks and so also advanced whilst seeking to hold out in the centre.

The Dacians enjoyed some success on the flanks but their centre was unable to stand against the legionaries who cut their away across the field in typically bloody fashion. So whilst it ended 5-3 again, the Roman's had several badly damaged units and so could have lost with worse dice.

The conclusion

So the mini-campaign ended with a convincing Roman victory following their early set-back in the first game.

Whilst we have nt yet grasped the full subtly of close-combat manoeuvring we've certainly got the basics of the game. It has some characteristics in common with DBM but the command system is much more predictable and based around formulating the plan that exploits your strengths.

Certainly for the Romans loading one flank with tough legionaries and delaying on the other is always likely to be a winning plan against the slow-moving Dacians. Our next campaign will be a full one pitting the Carthaginians against the Romans - both armies with tough infantry and good command capabilities.


Tuesday 17 January 2017

Dacian Wars Armati Campaign - week 2

In the first week of the campaign the Roman advance was halted by a Dacian victory, forcing them back onto their fortified camp, with the Dacians in hot pursuit. So for our second game we added some terrain, mostly in the form of a large Roman camp in the centre of their deployment zone.

Deployment and plans


For this week's battle the Romans adopted a different strategy than previously. On their left they massed all the infantry and cavalry to mount a single determined thrust, relying on deploying deep to prevent themselves being swept away by the Dacians / Sarmatian charges. On their right was a sacrificial command of entirely non-key Auxiliary troops who would delay the enemy long enough for the  legionaries to do their bloody business.
The Roman left - mostly non-key Auxiliary troops

The heavy metal - legionaries and cavalry ready to attack

The Dacians adopted a more balanced approach. They massed the bulk of the tribesmen in the centre with more mobile forces of Falxmen and cavalry on the flanks. The fearsome Sarmatians were located on the Dacians right with a large force of skirmishers to their front to soften-up the enemy.
Dacian right - Sarmatians lurking at the back 

Dacian centre / left - tribesmen sir, thousands of um'

The Battle   

The Roman plan was a simple one - to rapidly engage the Sarmatians and tribesmen with their best troops whilst hoping to hold-off the remainder of the Dacians through a delaying action, aided by their poor movement when wheeling. The Dacians immediately spotted the danger and so threw their skirmishers forward, held the right (Sarmatians) and tried to engage with their mobile left flank units as quickly as possible.
Roman attack begins 

The Dacians start their slooow wheel
The Dacians met with some initial success as their Javelinmen were able to score hits on three of the Roman legionary units, a good result that could hurt the Romans later. 

Pesky Dacian skimishers
Undaunted the Romans pressed ahead on their left flank, with the cavalry managing to engage and destroy a unit of Falxmen without suffering any casualties, having first dispersed the skirmishers protecting them. The Legionaries shrugged-off the casualties and continued towards the main Dacian line, pushing the skirmishers ahead of them without any further damage.  

Roman cavalry catch the Falxmen

Legionaries grind forwards
Emperor's eye view
On their right the Romans quickly came to blows with the Dacians and Sarmatians, commencing a tussle to decide the game as both sides had primarily key units engage. The early rounds were fairly even with casualties and fatigue mounting across the line.

Sarmatians wait in the distance

The lines clash 

Sarmatians engage the Romans
A key advantage for the Romans is that they can withstand more damage and fatigue than the weaker barbarian units. After a few turns of combat this began to tell as they breached the Dacian lines killing a couple of units. This opened-up the all-important flanks and allowed the Romans destroy sufficient key units to break the Dacians. 


The Romans see-off the outnumbered Sarmatians

The Dacian centre crumbles.
Observant readers will notice that I've not mentioned the Auxiliary assigned to slow the bulk of the Dacian army and create a (hopefully) winning flank on the Roman left. Unfortunately most of my photos did nt come out so apologises for a mainly textual description.

The Auxiliary deployed to protect the flank of the main advance and also in the area of the camp. They were able to keep-up a good barrage of fire on the advancing Dacians and prevent them wheeling rapidly to engage the flanks of the main Roman attack. Although were mostly destroyed by Dacian charges, they did score a couple of valuable kills and buy the time needed for the Legionaries to win.    
Dacians home-in on the Auxiliary troops
So the final result was 6 Dacian key units killed to 2 Roman. A Roman win that forced the Dacians back onto the defensive in the campaign.  The game lasted about 2.5 hours and was played to conclusion over about 10 turns 

Reflections

Now we are becoming more familiar with the rules the games are progressing rapidly with long movement distances and quick mechanics. We certainly felt the Romans exploited their superior initiative and manoeuvrability to gain an advantage. Despite the 6-2 result the Romans had several units within 1 hit of dying so it was closer than the raw numbers make it appear.      

Campaign situation


Tuesday 10 January 2017

Dacian Wars Armati Campaign - week 1

This week we began our Armati odyssey under Roy's patient tutelage with the opening battle of our mini-campaign, which featured two 75point armies meeting in a pitched battle on a fairly open field.

Once I understand Armati better I'll post a better review but a few initial impressions at this point. Armati is a fairly old set of rules by modern standards - I have Edition 2 from 2003 but the original is from the 90's. Its from the pen of noted designer Arty Conliffe (Shako, Tactica, Crossfire etc). The guts of the combat are pretty simple with units rolling off against each adjusted by a few factors, but most of the variations are captured in Fight Values (FVs) that vary depending on the situation the unit is in e.tg. frontal combat, flanked, or rough terrain.

The core concept though is C&C and manoeuvre. There is no command friction as such, but limits on how many groups of units you can control depending on your army. Also moves other then straight forward tend to be pretty restricted so you need to plan ahead and can nt rapidly react to the unexpected without well-placed reserves.

The Game

Both sides deployed with a little assistance from Roy as it was our first game. The Romans deployed towards their left of the deployment zone with a solid core of Legionaries forming their centre. The limited cavalry protected the Roman's left and the Auxilia, bowmen, and skirmishers protected the right. A single unit of Legionaries in column was held in reserve.

The Dacians formed a solid block covering most of the central section of the table with Sarmatian cavalry on their right flank supported by bows and falx men. The Dacians left was more lightly held by skirmishers and cavalry.

Sarmatian cavalry supported by falx - the heavy rumble of the cataphracts is causing camera shake! 

The Dacian centre
Two opposing plans were at play in this battle. The Roman's aimed to smash Dacian foot and so destroy enough core units there to rout them, whilst delaying with non-core units on the flanks to give time for this. The Dacians sought to hold back in the centre and win on their right so they could flank the Roman infantry. 

View from the Roman right flank

View from the Roman left with our tutor looking on at the assembled hordes
The battle began with the Romans advancing across their line and the Dacians advancing their flanks to try and envelope the Romans. On the Roman right their forces proved more successful than they had expected as they scattered the Dacian skirmishers and were able to block a cavalry move around the flank.

On the Dacian right the action favoured them as they had perhaps hoped. The Roman cavalry scattered the Dacian archers but proved little more than a speed-bump to the Sarmatian cataphracts. Over the coarse of a couple of rounds they were able to smash through both units of Roman heavy cavalry. 

Dacian right advances

The initial cavalry action - Sarmatians in the ascendancy

The second Roman unit takes some heavy hits 

Over on the Roman right with the cavalry under control, the Auxilia and skirmishers were able to move to support the main Roman line. Although not a match for the Dacians they were able to delay them and being non-core they did not impact on Roman morale.

Roman right - the lights began to wear-down the Dacians
 Returning the Dacian right we can see that they have disposed of the Roman mounted, but the reserve Legionaries pushed forward and were able to charge the rear of one unit of Sarmatians, easily destroying them and forcing the other to ride for safety and so out of the battle. The supporting Falxmen had moved in a wide arc which put them some distance from the main action.

So whilst the Romans had lost 2 core units to 1, they had managed to occupy a strong Dacian force with a smaller one. So not perhaps as bad as it looked at the time!


In the centre the Roman heavy infantry finally made it to the Dacian line and began to grind away at the tribesmen. The Romans were deployed wide, which extended the line but made them vulnerable to being swept away and meant most were outnumbered by the Dacians deployed in depth.

The action ebbed and flowed a little until the gods of war intervened. The Legionaries on the Roman  extreme left threw poorly at a critical time, exposing a flank that led to another Legionary loss. This meant the Romans had hit their break point (4 core units). 


So the final result was a 4-3 win for the Dacians, so a pretty close result. Things could have easily been different with better dice from the Legionaries or with some skirmisher shooting that nearly broke the Dacian right.

Part 2 next week will see the Romans falling back on their bridge-head over the Danube in more defensive mode. 

Campaign Update


Saturday 7 January 2017

Dacian Wars - an Armati mini-campaign

Dacians

Introduction

Our first endeavour of 2017 is a mini-campaign based on Trajan's invasion of Dacia. Primarily it is to enable us to learn the Armati rules in preparation for the Punic wars later in the year but should be a fun game in its own right.

Sarmatian cataphracts


Campaign Rules


This simple "ladder campaign" depicts the Roman invasion of Dacia under Emperor Trajan and depicts his struggles with Dacian king Decebalus. As the main purpose is the learn the Armati rules the campaign aspects are kept very simple.

The campaign will open with straight-forward pitched battle using the standard rules. Should the Romans lose they fall back to defend the bridge, having a fortified camp that counts as a key unit. Should they win they fight the Dacians defending a pass with hills on the flanks.


Whatever the result of the Danube crossing battle the Dacians withdraw and the next battle is the pass.

Again whatever the outcome the next battle has the Dacians defending a camp that depicts a position guarding their capital at Sarmizegetusa.

Casualties are NOT carried from game to game.       

Imperial legionaries


Armies


Trajan Romans


CR:
H: 5
L: 4
BP: 2
Init: 7
 
 
Unit
CV
Prot
Weapons
Number
Cost
Total
Core
Type
Legionaries
7 [2] 2
+2
Pila/Sword
3
0
0
Yes
COH
Auxilia
3 [1] 2
+2
Javelins
1
0
0
No
SI
Cavalry
4 [0] 0
+1
Spear
1
0
0
Yes
HC
Bonus Units


Legionaries
7 [2] 2
+2
Pila/Sword
2
13
26
Yes
COH
Marines
6 [2] 1
+1
Pila/Sword
1
9
9
Yes
FT
Auxilia
4 [1] 2
+1
Javelins
3
7
21
No
LHI
Auxilia
3 [1] 1
+1
Bows
1
6
6
No
FT
Auxilia
3 [1] 2
+2
Javelins
1
2
2
No
SI
Cavalry
4 [0] 0
+1
Various
1
10
10
Yes
HC
Costs
74


Dacians


CR:
H: 4
L: 4
BP: 2
Init: 4
 
 
Unit
CV
Prot
Weapons
Number
Cost
Total
Core
Type
Warriors
5 [1] 3
+1
Various
7
0
0
Yes
WB
Archers
2 [1] 1
+2
Bows
2
0
0
No
SI
Javelinmen
3 [1] 2
+2
Javelins
3
0
0
Yes
SI
Bonus Units


Warriors
5 [1] 3
+1
Various
3
7
21
Yes
WB
Bastarnae
5 [1] 2
+1
Falx
2
8
16
No
LHI
Javelinmen
3 [1] 2
+2
Javelins
1
2
2
No
SI
Noble Cavalry
4 [0] 0
+1
Various
1
10
10
Yes
HC
Sarmatians
5 [2] 0
+2
Lances
2
12
24
Yes
CAT
Costs
73

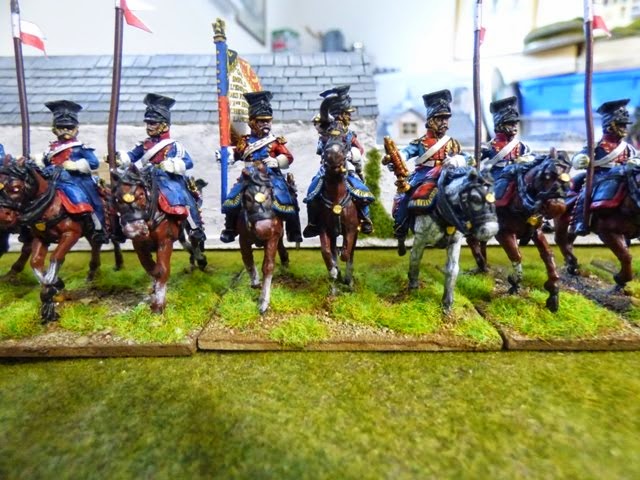
Roman eastern archers