Blog Pages

Pages

Saturday, 27 February 2016

Saracens:  28 Glory Points
Crusaders: 28 Glory Points

This weeks two games were "Sausages with Mustard" and "Blood Bath". The Teutonic knights were rested this week as Richard fielded his medieval Scottish for the first time.

Sausages with Mustard - Crusader win (3/1)

In this scenario four caches of supplies are being guarded in the middle of the table by some medieval Scottish. The Saracens attacked from the western table edge, with the remaining Scottish trying to reach them.    

The scots advance, having secured the biscuits!

Scots archers guarding the supplies 
The Saracens made the early running advancing strongly aided by their greater mobility. The infantry zero'ed-in on the archers guarding the supplies while the cavalry flanked the position.

The Saracen centre
As the two sets of archers settled down for a dual ultimately won by the Arabs, there Scots spearmen ground-forward. On the Scots left their cavalry found themselves outnumbered and were soundly beaten. In the centre the Arab horse archers took a heavy toll on the Scots isles-men and managed to rout them.


The cavalry clash

The Isles-men suffer

Arabs close-in for the kill
At this point it looked pretty bad for the Scots. They had lost several units and the Saracens were swarming all over the supply caches. One caches went up in flames but a second refused to light due to damp tinder.

Wargaming is a funny thing though and with the game seeming lost the Scottish staged a come-back as their spearmen finally made it to the conflict zone. They pushed forward relentlessly and ground-down the now depleted Arabs. The Saracens hit army break point with only one cache on fire.
Scots spearmen arrive 

The Saracens crumble
The Scottish are a fairly dour but effective bunch with a solid core of Foot Sergeants and a few more attacking units mixed-in. Their big plus is most of the units are 12 figures so they are pretty resilient. 

Blood Bath - Crusader win (5/0) 

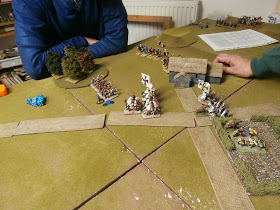
Probably the simplest of the scenarios in the book - just try to kill as many of the enemy as you can and hope to reduce them to half strength. Seeing a chance to adopt their favoured defensive tactics the English formed shallow arc across the table. Very reminiscent of the  Hundred Years War. Fearing an archery duel they could nt win the Arabs advanced smartly all across their front as they attempted to close rapidly with the English.

Agincourt or what

The Saracens attack the flanks

Saracen infantry in the centre
The Saracens launched a fierce attack along the front which met with somewhat unexpected success, chewing-up several of the English units.

The English line - thin brown-ish line in this case


Its all gone wrong for the English 
As with the previous game it seemed pretty bad for the Crusaders but it was another tortoise and hare contest. The two units English foot knights are a very tough nut to crack and they account for almost half the English army points. So despite their strong start the Arabs found themselves slowly whittled away to leave the English the winners. 

The English foot knights hold firm
Once again the English showed that when the scenario allows them to defend they are tough to beat.

Sunday, 21 February 2016

Bolt Action - soviet heavy weapons

After a bit if a surge I've now completed my final soviets for Bolt Action. Last off the painting table are the heavy weapons teams. I've used Plastic Soldier Company figures again - one box of heavy weapons and one of early AT guns.

So this gives me; 2*Maxim MMGs, 2*60mm mortars, 2*82mm mortars, and 2*45mm AT guns. The AT guns actually come with three different barrels; M1937 45mm, M1942 45mm (long barrel) and the M1943 76mm infantry gun. I went with the long-45mm version.

Under Bolt Action you are limited on the support weapons, so I have enough for two platoons.

Maxim MMG

Commissar and helper

Mortars

The completed weapons teams 

AT guns in cover
 
 
My favourites are the AT guns, not least because you get some additional bits to decorate the base such as shell casings. So a couple of additional shots of those two. I hope PSC get around to producing some additional artillery in 28mm and perhaps expanding the range to include Germans.
 
M1942 45mm AT guns

Reverse view

So there we have it - the soviets are now completed. I can now return my attentions to completing my Ancients armies which have been languishing for a few months.


Thursday, 18 February 2016

Bolt Action - our first game

Now that we've managed to paint a enough figures we decided that this weeks game would be Bolt Action. As it was our first game we opted for smallish forces  (750 points) and no fancy stuff like vehicles or off-table artillery.

The Germans fielded an elite unit of Veteran Fallschirmjäger consisting of 2 * 10man squads supported by an MG42 and a light mortar. This gave 6 activation dice 

The Soviets had a larger, but lower quality, force of regulars and inexperienced troops. They fielded 3*10man squads, an SMG squad, an MMG, a medium mortar and a sniper team. This gave 8 activation dice

We opted for a very simple scenario with both sides trying to capture a  small farm complex and eliminate the enemy.

The Game

The two sides adopted slightly different strategies. The Germans focused most of their troops to their left and centre, using the MG42 to hold their right flank. The more numerous Soviets  place a rifle squad on each flank with the third rifle squad ad the SMGs in the centre to take the farm.
Deployment overview 

The German deployment
The early game saw the Soviets advance in the centre and on their left, using the cover to gain a flanking position. On the soviet right the inexperienced rifle squad went to ground (Going Down in the rules) under mortar fire. Casualties were light but their advance was stalled.

Soviets advance on their left
Soviet SMG squad takes the house
On the Soviet left fire from a rifle squad, the MMG, and mortar all began to take a toll on the German central rifle squad. As hits gradually built they became bogged-down and wavering.
The German left  

Soviet snipers go to work
As the game progressed the Soviet left made further progress, destroying the MG42 and flanking the Germans in the centre.
The Soviet left
 In the centre the Soviet SMG squad grabbed the farm and with support from the MMG and sniper began to ware-down the second German rifle squad.
Tussle for the farm in the centre
After about 2 hours play we concluded that the Germans position was untenable and declared the Soviets the winners.

The Verdict 

Overall an enjoyable game and the core mechanics worked well. Activation of units is done by drawing a dice of the appropriate colour from a bag and then using it to indicate what the chosen unit will do e.g. Rally Shoot, Move etc. So activation order is somewhat randomised but every unit will get a go. Depending how suppressed they are they might not do anything other than  go to ground though.

With a new set of rules you are never sure if any funnies are problems, bad tactics, or us just getting it wrong and not reading the rules properly. So the major things to look at for next time are:

1. How does line of sight work over hedges? We treated more than 1 as cover but should LOS stop at the first hedge?

2. Direct fire artillery was very hit and miss, mostly miss. The rules don't allow for accidently hitting other targets and chances of causing kills seemed pretty low. Perhaps we were nt doing it right or perhaps artillery is weak to encourage movement?

3.  Veterans are tough to hit and kill. Not a criticism as it felt right. Hard cover though did nt seem to offer much more protection than soft.

4. Are we doing suppression right? The classic tactics of a base of fire to pin the element down and manoeuvre to a flanked did nt quite seem to work as the pinning was not hugely effective.  

5. The potential for double-entendre was off the chart with units Going Down and people rummaging in their sacks (for activations dice) all over the place. Kenneth Williams would have a field day.


Wednesday, 10 February 2016

Lion Rampant Campaign - week 6 AAR

Campaign Standings

Saracens:  27 Glory Points
Crusaders: 20 Glory Points

After a week off we resumed with 2 battles. Both we have fought before but we swapped sides / players around so no one was fighting a side they had used previously.   

 Hammer and anvil - Saracen win, 4 points

This scenario involved the English attempting to exit the far edge of the board. A force of Saracen infantry acted as the anvil with the Arab horse playing the hammer.

The English attacking force

Part of the Saracen Anvil

Long view of the table
The early moves seemed to favour the English with most troops moving forward smartly and the Saracen cavalry mostly failing to appear apart from some Yeomen horse archers. However once the English came in range of the Arab foot archers they suffered an unlucky  Battered on their lead bowmen. In Lion Rampant Battered units under fire can unravel quickly and that proved the case here as both units if English archers became bogged-down. 


Saracen horse arrive
With the arrival of the Saracen horse the English found themselves surrounded, under heavy fire, and with no effective way to respond. In the end they were forced to charge with their foot sergeants, which handed an advantage to the Saracen mounted sergeants.  

English try to break out

End Game
At the close of play the English had lost several units and failed to advance more than a foot into the table. A victory for Saracen shooting and wobbly English morale. We've certainly found that mounted archers or well protected foot bowmen can be a winning combination more often than not.

The Convoy - Saracen win, 4 points to 2 points

In this scenario the Teutonic knights were escorting some booty-laden donkeys from one corner of the table to the opposite one. The Saracens deployed in the other three corners, with their foot sergeants blocking the Teutonic knights exit.


The Teutonic Knights


Part of the Saracen ambushers
The Germans initial move was to send its mounted forward to clear the Saracen force threatening its right flank. After a brisk fight they were able to clear away some of the enemy but at the loss of their Saracen auxiliary cavalry. The Arab horse archers though proved as slippery as usual.

The Teutonic's try to clear the flank 

Success!

The initial threat removed, the convoy advanced down the road where some Saracen foot lay in ambush for them. As usual the fierce foot proved fun but short-lived, causing limited damage to the Teutonic foot. More successful though was the two units of mounted archers who wore away the Germans.

Ambush awaits

Germans press forward

The horse archers reappear on the flank
 
Thanks to some focused shooting the Saracens destroyed two of the three units guarding the treasure and  so the Teutonic Knights could not win. Victory was conceded to the Saracens.

Reverse view

Sunday, 7 February 2016

Bolt Action - soviet snipers

Image result for jude law enemy at the gates

Background


No soviet army is complete without a couple of snipers so I did some minor conversions to create to create one male and one female. Some sprue was added to create the sights and cloaks from old hankies with some flock for texture. Both figures are from The Plastic Soldier Companies 28mm range.

Image result for Roza Georgiyevna ShaninaThe chap was loosely modelled on Vasily Zaitzev, the legendary sniper ace with upwards of 400 kills. Any reference to the figures plastic nature and the acting in enemy at the gates would of coarse be too scurrilous for this humble Blog.

The lady could be Roza Georgiyevna Shanina , "The terror of east Prussia", another sniper ace with a more modest 60 kills.  She rose to some prominence in the Soviet Union during the mid-60's with the publication of her war diaries.


The Plastic Versions

You long-range sniper you 


Vasily and Roza enjoy a country stroll
Jude Vasily takes aim


Saturday, 6 February 2016

Russian KV-1: The Beast reviewed


The KV-1

Image result for kv1 hobby boss cast turretTo provide some much needed mobility for my Bolt Action Russian's I've invested in a KV-1. After some consideration I went with the Hobbyboss 1/48 scale kit. At £11.99 it seemed like a great bargain. I knew it would be slightly over-scale compared to the 1/56 models my opponent will be using, so I decided against the mighty KV-2 as it might look enormous.

The Build

Its been ages since I built a model kit so I thought I might do a short review of the kit as well as showing the outcome. Altogether you get about 200 parts spread across about 6 sprues. This includes some brass-etched parts and a some copper wire to make the towing ropes. The main chassis is a single-piece casting with most of the suspension already moulded on. They offer several variants of the kit which I assume mostly feature different turrets, but there are a few detailed parts too that seem to vary.  The instructions were clear with no obvious gotya's or out of sequence steps.


Main body and details


Wheels and turret

As is my custom I painted the bulk of the parts before they were assembled or part-assembled to avoid any tricky painting later. As this was being built for wargaming I omitted one or two of the details such as hatch handles.


Main chassis


Tracks


Turret
The only fiddly part of the build was building the tracks. These are solid plastic and feature tops, bottoms, and individual links to build the sections around the wheels. The tops have some nice looking sagging to suggest weight. It was a bit of a faff but they do provide a jig for the curved sections which helps a bit. Just be patient and take your time. I made some tea, put Test Match Special on the radio and set too.


The final verdict 

I was pleased with the final results and at half the price of the official Bolt Action vehicles it was certainly a good buy. It will be larger than the 1/56 vehicles but I hope that can be justified as the KV-1 is a monster and hopefully they will not end-up in close proximity on the table.

KV-1 front

KV-1 rear

KV-1 with 28mm infantry

KV-1 close-up