Blog Pages

Pages

Sunday, 28 June 2020

I'm in control

Last week we fought part 4 of the Drech'nok at Bay mini-campaign. In parts 1 and 2 both armies scavenged supplies and got them back to camp. In part 3 we arrived at the demonic portal and finding it incomplete both sides search for the missing stones. In part 4 we were trying to control territory around the portal so it could be excavated for the crystals needed to power it.

The Control scenario sees the table split into 6 zones, with a zone controlled by the player with the highest Unit Strength in at a the end of the game. Its 1 point per zone, except you get 2 points for the enemies central zone.


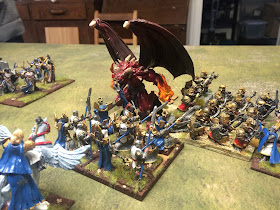
We each went with three distinct battle groups as we tried to contest every sector. The Basilean left was the Ogre Palace Guards, preceded by Sisterhood Scouts to act as a screen. The Basilean centre was Paladin Foot Guards with healing support from Samacris, the mother of phoenix's. Finally the Basilean right with fast - Knights, Gur Panthers, Elohi flying infantry, and the Abbess on a panther.

The Abyssals had a fast right - Horsemen supported by Hellhounds, Flamebearers and Drech. The centre was solid with Succubi in the woods and Abyssal Guards in the open with Efreet fire-deamon support. The left was Moloch large infantry supported more Flamebearers   

So both sides had a speed advantage on their right.


Might Molochs

The Basileans attacked swiftly on their right and were able to throw all their forces into the Molochs stationed there as the Flamebeares were trying to shoot into two zones rather than just covering the front of the Molochs. The dangerous Molochs were killed very quickly leaving the Basileans in control of the flank, but needing to garrisons the zones there as well as look to move into the middle.  They took some heavy shooting but were eventually able to destroy the Flamebears, but at the cost of not having many resources to assist the centre.


The Basileans found themselves outnumbered in the centre and so spent most the game back-peddling to avoid combat for as long as possible. The idea as to deny the Abyssals 2 VP for the central zone and hope that forces arriving from the right might help them win.  This was partially successful in that the Abyssals had to defend their flank evening-up the odds in the middle. 


Over on the Basilean left the skirmisher battle was pretty much a draw. After that we traded pieces with  the Abyssal Horsemen killing some Ogres, before themselves dying to the second unit. Both sides managed to captured the others starting zone, so cancelling out. 


Back in the centre both sides routed a few of the enemy but neither side had the strength to breakthrough for 2 VP.


So the game ended with eastern-end (Basilean left) and centres tied. The Basileans were able to hold one zone on the western-end (Basilean right) for a 3-2 victory.   

     
A close game - the Abyssal shooting meant that they always carried a threat and the Basileans needed to be careful to guard captured zones in sufficient strength not to get routed late game and lose that way. The downside was they had lots of US 1 or US 0 units so found it harder to contest zones. 

Thursday, 25 June 2020

28mm Eastern Renaissance

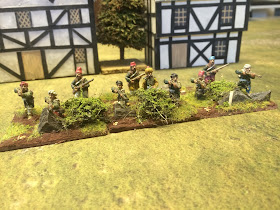
I've managed to make a start on my Ottomans, boosted by having some figures already painted from a skirmish game we did ages ago. So first to completed are a unit of Janissaries and one of Arnauts (rebased only).

Janissaries

Janissaries

Arnauts

Arnauts

Arnauts

Nigel has also dusted-off his Polish army to provide part of the opposition forces. Featured here are some tribal cossack?) light horse, some musketeers and the inevitable winged hussars. 


Sunday, 21 June 2020

The missiing pieces

With both armies having secured the required supplies for the campaign they moved to the demonic portal bent on securing it. Arriving they found that the portal was damaged and so a race was on the find the missing pieces. 

We played this as the Raze scenario. In this both sides place 3 objectives in the enemy half with a central tie-breaker. Points are scored for the objectives in the opposition, but you may block the enemy. The twist is that captured objectives are removed, allowing you to move on.

In this game both sides placed 2 on their left and 1 on their right.   


First outing for the portal 

The Abyssals forces spread across the table to contest all the objective. the army was again heavy in shooting with Flamebearers, Efreets and a Fiend. The flanks were strong which left the centre a little more thinly held.    

Gargoyles, Tortured Souls, and the demon lord. 

Molochs on the right


The Basileans focused their infantry in the centre. choosing not to contest the right-most of the Abyssal objectives. All of the cavalry and flying units were on the left facing the two objectives there.    


The Basileans advanced rapidly on their left. Heavy Abyssal shooting waivered the Knights but the flying units were able to flank the demonic forces and capture the objectives there. We traded snake-eyes with a unit of Basilean Knights being thwarted by a lowly Warlock but in turn not being routed when they were Devastated.  

Double waiver - I thought it was all over on my left.

Centrally the infantry lines clashed. The Basileans had the advantage of numbers and were able to cut their way through the Abyssals Guards opposing them.


On the Abyssals left they had focused a significant a large and powerful attacking force. This quickly captured one objected but made slow progress against the Paladins deployed in the woods guarding a second.  


Eventually they were able to break through but this left them insufficient time to claim the central objective or the one on their right.  They also left an objective unguarded, enabling a Basilean flying hero to grab it in turn 5.  


The final result was 4-2 Basilea.


Once again the Abyssal shooting was a big factor in their plan, and even armoured units can easily find themselves waivered with 40 fireballs and 37 firebolts coming down range. Certainly the Knights ended the game taking shelter behind a hill. 

This was my first try with the using a pair of War Wizards, something that features in lots of net-lists. They bring lightening bolt and banechant. I'm still undecided - they destroyed a Troop of Falmebearers and waivered some Gargoyles, so decent damage. They don't though contribute in scenario play as they have no Unit Strength and can nt really block the enemy.      


Tuesday, 16 June 2020

28mm Crimea


Nigel has been busy with some more painting - this time the Crimea. Its one of those periods I've always wondered about but convinced myself its not different enough tactically from Napoleonic's on one side or ACW on the other. Very pretty though and who could resist a Trevor Howard style Lord Cardigan.    

Film of the day – The Charge of the Light Brigade | OnTheBox

Anyway, Nigel reports
Finished painting Warlord Games 28mm Crimean War Russian Infantry and Artillery that I can use for those North West frontier games. Infantry are plastic, artillery metal. Had them for a long time but finally got around to finishing them.


Sunday, 14 June 2020

All back to camp

Game 2 of the Abyssal lockdown campaign saw both sides attempting to return supplies captured in Game 1 to their camps. In the Push scenario both sides have two loot tokens carried by your own units (2 VP each if in the enemy half and 1VP if in your own. There is a tie-breaker loot token in the centre.


Both armies saw some tweaks for this game. The Abyss removed the cavalry and went for a flying wing to carry the tokens of Gargoyles and Tortured Souls. As before it was strong on shooting with 4*Flamebearer Troops + a Warlock (37 firebolts) and 2* Efreets + a Fiend (30 fireballs).  


For this game I took no shooting and instead added more Elohi - the theory being that as flying troops they could charge the many shooting units before they caused too much damage.  


We both opted to place our tokens on their left, with the aim of also trying to capture the tie-breaker loot token in the centre. The Abyss put more emphasis on blocking the enemies tokens while Basilea  invested more in the central token.

On my left I attacked swiftly hoping to break through and clear a route for the Basilean token carrier (an Ogre palace guard captain). The attacks went in but the dice were poor with a couple of units dying without causing the breakthrough needed.


On the Abyssal left there was a standoff for the first 3 turns as the Abyssals were reluctant to press ahead and risk their token carrier against the Elohi station there. Eventually they had to move and the trap was sprung. The plan was to eliminate the Gargoyles guarding the token carrier in turns 4 and 5, then try for the loot in the last move. It was all scuppered by a snake-eyes in turn 4 which meant the devastated Gargoyles stood!      


Centrally the greater Basilean strength worked as I had hoped, with the Paladins and Ogre guards cutting through the Abyssal centre and capturing the token placed there.  


In turn 6 there was still a chance of capturing the Abyssal loot. If the Gargoyles failed to wound the Elohi they could Disengage and fly over them into the flank of the Tortured Souls and claim the loot. Sadly the Elohi suffered single wound and got locked in place.  

Last chance on the Abyssal loot


On the Basilean left the out-numbered troops tried to manoeuvre around the Abyssals and keep their tokens safe. Sadly this worked in turn 5 nit not turn 6, and so the loot was lost.  

Basilean loot captured

The final result was 6-2 for the Abyss and so 1-1 in the campaign. In hindsight the Basileans under invested in the token carriers and should have devoted more forces to ensuring their tokens were safe and less to the centre, or placed the loot carrier in the centre and pushed everything there.