Blog Pages

Pages

Sunday, 31 March 2019

A tale of two forts - round 2

The other game fought this weekend was the Vanguard part of the second round of the Tale of Two Forts campaign. The scenario is Capture the Plans where a spies body is place in the centre of the table - on  6-8 (D8) it contains the plans bit on 1-5 they will be near one of the two temples shown on the overview picture. So do you gamble on a specific site, cover them all, or go central and try to react.
Overview of the board

Nightshades force
I tried to cover all three locations in the hopes of securing the plans early as moving was harder for me since I lacked the flying troops present in the Nightstalkers army. One objective was covered by Sisterhood Scouts who could deploy before the battle, the second would be challenged by the fast-moving Panthers, and my main force would occupy the centre.

Basilean force

I swiftly moved the Panthers to challenge for the northern site and reinforced the southern with a Paladin and Sargent. Centrally I search the spy with a man-at-arms and found that the plans were located at the southern site - so the race was on.


As both sides sought to drift towards the plans my Scouts came under attack from 4 Nightstalkers. I threw some reinforcements into the fray and judicious use of Basilan Iron Resolve (which enables a high armour save of 3+) allowed them  unexpectedly bog-down the Nightstalkers for the whole game.

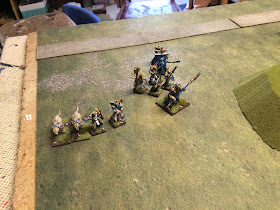
I captured the plans on Paladin hoping that his high nerve and armour would enable him to hold them.

Basileans capture the plans


With the plans secured two distinct strategies emerged. I sought to turtle and prevent any attacks (including flying ones) against the Paladin. The Nightstalkers wanted kills to boost their experience points and maybe break my force before the 5 (or maybe 6 turns) elapsed.


The game ended after 5 turns with no real threat possed to plans, although a 6th turn might have been interesting. So a win for the Basileans albeit and odd on as they wounded many Nightstalkers but were unable to kill any. Losses amongst the Basilean non-grunts proved to not be permeant and I even won some gold betting on the torments. XP was very limited though placing me at a big disadvantage in the next Vanguard battle.      

Heroes of the hour were the Sisterhood Scouts - they never fired a shot but did hold-up some decent Nightstalkers for the whole game. The Basileans are an interstsomg mox

KOW Vanguard - Forces of the Abyss first impressions

I've had my Vanguard Forces of the Abyss painted for a couple of months but not yet played them as I've been using Basileans as part of the Tale of Two Forts campaign - see my next post. This weekend though I played my first game so wanted to give some overall impressions and report on the first game.

Special Rules: Abyssal have Fury, which means for 1 Power Dice you can add 2D8 to a melee retaliation or make a retaliation if already activated and fatigued. This proved to be a powerful ability as if you survive the charge you can hit back hard, especially if you have a decent number of melee dice. So being charged is not something to fear.      

Troop Types: Lower Abyssals and Flame Bearers provide cheap melee/shooty grunts and enable unlocks without tying-up many points. Guards and Succubi provide solid warrior choices with the later giving a useful -1 to hit within 3" from Seduction. You also get good (but costly) mounted units through the Hellequin cavalry. The fun comes through the various heroes and monsters with the Tormentor (the inspiring command), Blood-Masque (mounted command), Despoiler (tough melee monster) and Seductress (nasty melee command). The disappointment is the Warlock - its a gorgeous model but you can nt have him and the despoiler as both are large. He's unusual though as a its a 4 wound caster. There are also fast support options in the Gargoyles and Hellhounds meaning you could do an all mounted army.          

And so to the game, with impressions at the end....

The Battle


The scenario selected was The Bard which involves both sides trying to kill the pesky wandering minstrel and escaping with his lute as proof. For this game I fielded; 3 * Lower Abyssal, 3 * Flame Bearers, 2 * Succubi, 1 * Gargoyle, 1* Hellequin, 1 * Bloodmasque, 1 * Despoiler, and 1 * Seductress. So a good mobile force but no spellcasting options.

We each deployed half our force in the corners, with the remainder arriving in turn 2. The Bard starts in one corner and frolics randomly down the table.   
  
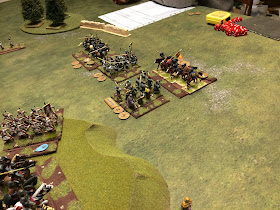
Overview with the Abyss at the top
We both pressed forward with our forces seeking to intercept the minstrel and stop his damn singing.

The Herd (left to right)  - Chieftan, 2 * Shaman, 2 * Tribal warrior and a Lycan 

The abyss - Despolier, 2 * Succubi, 3 * Flame Bearer, and a Lower
 In turn 2 we faced-off across the road with the Bard between us.


The faster Herd took the initiative and launched a double attack against my Despoiler with the Chieftain and the Lycan. A couple of wounds ensued but the retaliation was  devastating - throwing 6D8 (2 for Fury)  and with CS(3) the Despoiler stomped on both the attackers and dispatched them to the abyss.  

Despoiler deals some pain to the Herd
In turn 2 the reinforcements arrived and my plan was to use a fast-moving force to intervene and also hit the Bard.

Gargoyle, Hellequin, Blood Masque and Seductress arrive  
Centrally we each pushed units into the fight with superior numbers and Fury helping the Abyss grind-out a dominance there.  


As the Bard made his progress along the road I threw further units into the fray and tried to take-out the Longhorn centaurs. I had the edge but Inspiring / good nerve rolls stopped me killing them as quick as I wanted.


As we hit the final turn the Abyss seemed well ahead - the Bard was heavily wounded and I had two units poised.  The decisive intervention though was the Herd Shaman(s) using Kyron's Curse on my Blood Masque to root him in place and so stop him joining the Seductress in attacking the Bard. This stopped a likely Abyss win and left the game drawn as the annoying crooner made his escape.

The last turn 
So a good tense game but one where The Herd was always playing catch-up after the loss of two major models so early. The Shaman proved effective as expected, but we did nt see that much of the others.

How it played


The Fury special rule really creates a dilemma for your opponents - do I risk being charged by that nasty unit in range or attack them and risk a souped-up retaliation against me. I suspect people may want to shoot you instead, but there are a decent number of AR 4 or Stealthy units in the army. The melee potential is good with several 4D8 or 5D8 options, nice heavy cavalry and plenty of Crushing Strength to help unlock the armoured enemies. The Succubi are fun too with the -1 to hit in 3". The one weakness is you will likely have a reasonable amount of Grunts for unlocks (I had 6) so need to watch out for breakpoint losses.

The Abyss benefits from being an "official" Mantic army so gets plenty of options in the army lists. This means you can build a variety of forces - melee, fast, or shooty. Based on this game it looks to have decent points vs value balance too. So should be a fun one to play.      


Tuesday, 26 March 2019

Kings of War Crusades campaign - second battle of Damascus

Siege successful, relief force defeated


We are now firmly into the later stages of the Crusades campaign. The mountain-route army was able to capture Damascus following a successful siege but now had to face a relief-force attempting to bottle them up in the town. The scenario was Eliminate in which points are awarded for destroying the enemies three most costly units whilst trying to preserve your own.

The Saracens deployed with a strong force of cavalry on their right, the centre right held by a shooty force of horse archers, the centre left of mostly heavy infantry and a further cavalry force on the right. Some Mamluks were held in reserve centrally.  


The Crusaders deployed with the Byzantines on the left supported by a horde of crossbows. The centre was forced of knights and the remaining infantry. The right had a couple of units of knights and some light horse.


The battle began with the Byzantine horse moving forward to engage the Saracen cavalry opposite them. The shooting was partially successful but did not prevent the Saracens charging. It seemed likely the cavalry would cancel each other out' leaving the Malmuks free on the Crusaders left.  


Centrally the Crusader and Byzantine foot advanced boldly seeking to engage the lightly equipped Saracen horse archers and bring them to battle. This proved successful and the Arabs were pushed-back, forcing them to commit their cavalry reserves to the fight.  


On the right the Crusaders exploited the constrained space to even the odds against the  slight numerical disadvantage they faced. Seeking battle the knights allowed themselves to be charged to draw-out the Saracen cavalry and then counter-charged strongly.


As predicted the Mamaluks on the Crusader left were able to free themselves and attack the flanks of the crossbows. A painful blow but one that this powerful unit busy for a couple of turns.


Centrally the Crusaders were able to break through the thinly held lines and in the process kill one of the Mamluk units giving a 3 point lead as they were a scoring unit. Meanwhile on the right the knights were able to fend off the Saracen horse and then threaten the Arab left containing a second scoring unit in the shape of the spearman horde.  


By the end of turn 4 it was clear that the Crusaders scoring units were not at threat from the Saracens and they had opened a 4 point lead having captured the tie-breaker central objective. It was clear that the Crusaders could not now be caught.

With the fall of Damascus the mountain-route army could now move to assault Jerusalem. This will be the battle next week and climax of the campaign as we fight our first siege.  


Saturday, 23 March 2019

Lizardman / Aztec Temples

I've finally gotten around to starting some terrain for my Kings of War Lizardman/Salamander army. I already have some generic jungle bushes / trees so have gone for a couple of temples to be impassable terrain or something to fight over in Vanguard skirmishes.


Construction follows my usual method of a 5mm foamcore base painted in a acrylic/sand mix for texture. The various detail bits are leftover standards from Games Workshop lizardmen kits.


The second temple is a little more colourful with the addition of a cardboard band around the shelter.


Next-up I may try some of the distinctive walls often seen in Aztec cities or perhaps something swampy.


Thursday, 14 March 2019

Kings of War Crusades Campaign - second battle of Tripoli

Seige failed - relief force not defeated


For our game this week we returned to the coastal Crusader force and its second attempt to capture Tripoli. This weeks scenario was an easy one, Invade - the winner is the one with the most points in the enemies half of the table.

The Saracens deployed with a large force of shooting cavalry on the left, looking to flank the Crusaders.  The centre was held by the bulk of the infantry, backed by the elite Mamluks. The right had a force of spearmen with some light cavalry support, aiming to blunt the expected knight attack.

Left flank of the Saracens

The centre

The right with lots of spears
The Crusaders did nt mass their knights as had been expected but instead deployed them on their left (opposite the Arab spears and more centrally as a reserve. The Byzantines held the right opposite the shooting heavy Saracen cavalry.

Byzantines on the right

The left - knights and light horse

The centre - plenty of heavy stuff
On the Saracen right both sides engaged in a skirmish with their light horse. Just out of shot if a unit of horse archers whose superior shooting meant the Saracens won this initial round. This tempted the knights into range who quickly found themselves bogged-down in a grind with the Saracen spearmen. Over the game they found themselves gradually driven back and broken down.      


On the Saracen left they advanced rapidly into range and began to bombard the Byzantines with archery fire. In an unusual moment the Saracens declined a flank charge with their light horse that was within the rules but the commander felt was a bit gamey - would this cost them the game?
 

The Byzantines charged their Saracen opponents and with help from a unit of knights  released from the reserve were able to rout them, leaving just two units of horse archers to hold the Arab left flank. Not looking good for the Saracens!

The flank looks weak

Hold them!
Centrally the Saracens opted to launch an attack with their spearmen and support from some cavalry and Mamluks. This went well and broke through the lines to threaten the Brother Knights in reserve. the Brothers eventually charged the Mamluks scoring 14 hits with 18 attacks

A line break for the Saracens
Back on the Saracen right they finally dispatched the final unit of knights and swung their spearmen into action against the Crusaders centre.


Finally on the Saracen left the horse archers were able to withstand a combined assault from the Byzantines and Knights against their hill-top refuge. A timely intervention from the second unit of Mamluks helped stem the tide.


The Saracens on their hill-top 

In the end the Saracens won by a decent margin of about 800 points. They had lost more troops than the Crusaders but had pinned them in their own half so limiting their scoring units.