Blog Pages

Pages

Tuesday, 26 February 2019

Kings of War Crusades Campaign - Battle of Tripoli

Siege unsuccessful - battle lost


For our game this week we return to the coastal Crusader army who had Tripoli firmly within their sights. The scenario selected was Loot - three loot counters were placed along the centre line with the winner being the one who controlled the most at the end of 6 turns. Units move is limited to 5" when carrying a loot counter.

The Saracens deployed with their cavalry in the centre and on the right, with the better troops in the centre. There left contained all the infantry. The Crusaders deployed with the Byzantines opposite the Arab infantry. The centre was a mixture of infantry / knights with an all cavalry left flank.    

The Saracens quickly spotted a flaw in the Crusader deployment - the eastern loot marker was only guarded by a unit of crossbowmen, who would need to move or be hindered in their shooting. So there was an all-out attack which overran the loot, allowing a unit of light horse to capture it in turn 1.    

Crusaders left

Eastern loot counter falls in turn 1

Away on the Crusaders right the Byzantines advanced against the weaker Saracen infantry force with the aim of pushing them back and taking the loot counter.

Byzantines ready to rock


In the centre large amounts of heavy horse were on the move with both sides pushing forward. The Saracens managed to snatch the central loot counter from the more cautious Crusaders but rapidly found themselves embroiled in a series of chare/counter charge moves which the heavier knights seemed to be getting the better of.    

Mamluks advance in the centre

Mass cavalry charge

Very messy in the centre

On the Saracens right with the loot token secured for minimal damage they turned their attention to the out numbered knights on that flank. It took 2 turns to finally break them and release some vital cavalry to move across to the centre.  

Out numbered but not out classed on the Crusaders left

Sneaky Arabs grab a token

The blow and counter-blow continued in the centre with the Crusaders slowing gaining an edge but being unable to break free and pursue the central loot counter slowing creeping towards the base edge in the hands of some heavy spearmen.

Crunch!

On the Crusaders right the Byzantines were tearing chunks from the Saracen infantry but somehow a unit of skirmishers had managed to snatch the final loot counter from under the Crusaders noses and make off with it.  

Bad day for the Saracen infantry

As we entered turn 6 the Saracens had managed to get one loot counter safely off the table and had possession of the other two, but both were under potential threat. The western counter was carried by a unit of skirmishers who were attacked by the Byzantine psiloi, who bounced-off leaving the Saracens 2-0 ahead. The central counter was under threat from several units of knights but some timely flank / rear charges has denied them the chance to intervene.  A timely 1-1 for Nerve also allowed a unit of Saracen cavalry to last an additional turn.  

The double 1 that may have saved the central loot toekn

So a 3-0 win for the Saracens but it looked like it might have easily been 2-1 to crusaders up until turn 6, so a nice tense game.

Tuesday, 19 February 2019

Kings of War Crusades Campaign - battle of Aleppo

Siege successful and relief force defeated

The Crusaders taking the mountain route moved onto their second target at the fortress of Aleppo. This weeks scenario was Push in which both sides have three tokens, with the winner being the one who gets the most tokens over the half-way line after 6 turns.

The Saracens deployed all their shooting cavalry on the right, most of the infantry in the centre, and much of the heavy cavalry on the left along with the spearman horde. The mamluks and infantry horde each carried one of the tokens.  

Saracen left

The centre 

Massed archers on the Saracen right

The Crusaders deployed the Byzantines and two units of knights on the right, the infantry in the centre, and a mixed light / heavy cavalry on the left. The tokens were all placed on a unit of foot knights deployed behind the Byzantines.  The plan was to hold on the left and attack on the right to push the knights over the line in the later turns.

Crusader left

The centre

Byzantines and knights on the right

The Saracens pushed forward on their right with their large force of mounted archers. Under this firestorm the light cavalry quickly melted away leaving the knights alone.


On the Crusaders right the Byzantines quickly got stuck into the Saracens medium cavalry and quickly found themselves bogged-down in a protracted and fairly even fight that would rage for the bulk of the battle.


The Saracens spearman horde also advanced towards the enemy and immediately attacked a tempting unit of light cavalry that stood in their way. This opened-up a charge lane into which a unit of Knights and a unit of Brother Knights leapt.  Despite the loss of thundering charge against the spearmen the knights combined charge began to wear-down the spearmen.


Knights get stuck into the horde

To and fro with the Byzantines

Over on the Crusaders left they came under heavy fire from the mounted archers but their superior armour meant they were able to withstand the attack.


Tiring of the pesky pelting the knights on the left launched an assault which pushed-aside a couple of units of Saracens and generally stabilised the flank.

Knights hold the left

Back on the Crusaders right the spearman horde has been vanquished, along with its precious token. This meant the way was now open to attack the flanks of the mamluks who also carried a token.  

The knights break through

By the end of turn 4 the Crusader line was stable and the foot knights carrying the tokens heading for the centre. One Saracen token had been captured and a second was in severe danger.  So victory was declared for the Crusaders.

Mamluks-eye view


Sunday, 17 February 2019

Kings of War Crusades Campaign - second battle of Antioch

Siege successful - Battle drawn

Having been defeated by the Saracen relief force in the previous battle the Crusaders on the coastal route again found themselves before the gates of Antioch. The scenario was Pillage, meaning points were scored for holding objectives at the end of the game. One was deployed in the centre of the field with 2 deployed by each player; not within their set-up zone and not within 18" of another.

Long shot from the Crusader right

The Crusaders opted to split their objectives between their left and right flanks, with both just outside their deployment zones. They loaded the bulk of their cavalry on the right flank and the infantry on their left. The Byzantines occupied the centre.

Crusader right

Crusader centre and right

The Saracens placed both objectives on their right and deployed the bulk of their infantry guarding these, with a small cavalry force on the extreme right. The Saracens left contained the medium and light cavalry, with the Mamluks in reserve.

Saracen left 

Saracen centre
The Crusaders moved first and advanced across the line hoping to close the distance as quickly as possible with the Arabs. The Saracens sought to create some charge lanes by pushing forward their light cavalry to tie-down the advancing knights. They also harassed the crossbow horde with some skirmishers and generally sat-back to shoot the advancing Crusaders.


The Crusaders spear horde quickly seized the objective closest to their set-up zone while the knights and Byzantine cavalry generally got stuck into their opponents. At this stage things looked poor for the Saracens - a couple of unlucky morale roles left them outnumbered and against heavier opponents on their left.    


Although things looked bad for the Saracens as we hit turn 5 they were putting up some resistance against the knights as the Mamluk reserves joined the fight. On their right the Saracen infantry was unscathed and facing weaker opposition.

So it was that Saladin took a risk and abandoned the objectives being guarded there and attacked with the infantry.  This proved a successful move and the Crusader infantry fell back under the advance.  


Turn 6 ended with both sides holding 2 objectives and 1 contested, so a draw.


The Crusaders certainly had the advantage early-on but this scenario is all about the end-game. In hindsight the knights started too far from the Saracen objectives to mount a serious attempt at capturing any of them. So although they smashed the enemy they did not influence the battle outcome.    


Wednesday, 6 February 2019

Kings of War Crusades campaign - second battle of Turbessel

Fortress captured and relief force defeated

For this battle the scenario generator threw-up Dominate - where points are scored for all units within 12" of the oasis at the end of the game.

View from the Crusader right

View from the Saracen right
The Crusaders adopted a simple plan - the knights and light horse massed on their left looking to deliver a strong flanking attack. The Byzantines occupied the centre along with the crossbows to provide a solid base of fire opposite the oasis. The Crusader heavy infantry formed a refused right flank.


The Saracens opted to mass most of their horse archers on the right, so opposite the knights. The Mamluks were in support on the right. The Saracen centre and right was a mixture of infantry and medium cavalry.


Facing a large number of horse archers the knights opted to push full-steam-ahead, using the light horse as cover to shield them the Saracen shooting. Within 2 turns the Crusaders heavy cavalry was engaged across the line and eating into the lighter Arab horsemen.


In the centre the Saracens edged forwards but came under sustained fire and the advanced became bogged down as they sought cover to preserve their forces.


After some initial hesitation the Saracens attempted to outflank the Crusaders on the left but found there way blocked by a spearman horde and a unit of foot knights. This quickly settled into a grinding match that would tie-up the Saracens for the rest of the game.


On the Crusaders left the superior numbers and quality began to tell as the Saracen line unravelled, with units routed and holes appearing that opened-up flank charges.
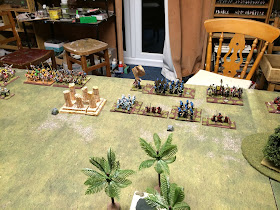


By the end of turn 4 the Saracens right was all but destroyed and the centre weakened badly. It was clear that the Crusaders had one as they had plenty of potential scoring of units able to move into the centre zone in turn 5.


A brutal game with the massed knights overcoming the massed horse archers.