Blog Pages

Pages

Sunday, 30 December 2018

Vanguard - Capture the Giant

This battle again featured Basileans vs Nightstalkers but in an unusual scenario. Both sides sought to weaken and then capture a rampaging giant, whilst avoiding being trampled. Points are awarded for wounding the giant and killing the enemy. He moves randomly and hits like a truck if he moves through your models.

Giant minotaur - the main objective

Seeing the need for rapidly attacking the giant I tried a harder-hitting warband with 1* Vet Sarg, 1*Sarg, 2*Sisterhood, 2*Paladins, 1*Ogre, and 2*Panthers plus a Grunt to round-out the points. This meant dropping the Battle Wizard and with it the healing spells.  

Nightstalkers
The Basileans got stuck-in, scoring the first hits on the giant and ploughing into the enemy to try and wipe-them out. The Ogre made mince-eat of the Nightstalkers costly Mindscreech, killing him outright in a furious assault. He was quickly mobbed and killed himself, but it seemed a good trade to remove such a powerful creature.

Charge!

The Basileans then split their forces with the Vet Sarg, Sisterhood and Paladins attacking the Nightstalkers main force while the Panthers nipped at the giants heels

Take that big brain


Literally nipping at his heals

I had great success against the Nightstalkers, steadily reducing the warband and eventually pushing it past its breakpoint for very little losses. The Panthers fared less well though as they chased the giant around the board doing no meaningful damage.


The Nightstalkers Shade managed to accumulate a couple of turns where they outscored the Basileans against the giant and so built-up a small lead in Victory Points. Despite all-but annihilating the Nightstalkers I still lost by 4 points.

End game

The flaw in my cunning plan was that I lacked Crushing Strength against the giant and so was unable to penetrate its armour often enough to build-up the required VPs to win. In hindsight perhaps the Paladins or the Ogre should have attacked the giant?  

Wednesday, 26 December 2018

Kings of War Fire Elemental

Christmas gives extra time for painting and I've finished-up a project that's been on the blocks for a couple of months - a Greater Fire Elemental from Mantic games. The figure is about 120mm high and comes in Mantic's familiar softish grey resin. Assembly is minimal with just the arms to attach.


I'm not certain whether to ingrate this into my Lizardmen or look to build a Nature army with a range of elemental forces.

Size comparison against a Basilean Paladin
 
Its a tough hombre with decent melee and breath attacks, but perhaps a little weak with Defence 5+

Unit SizeSpMeRaDeAtNePtsSpecial
    (1) 6 4+ - 5+ 9 -/19 260 Breath Attack (12), Crushing Strength (4), Pathfinder, Piercing (4), Vicious

Monday, 24 December 2018

The Crusades - practice game

The next campaign we're planning is a refight of the 1st Crusades, so this week we held a small practice game to teach people the rules we'll be using. I've selected Kings of War Historic as it allows you to fight a large game in a few hours.

Both sides had a balanced force - the Crusaders were stronger in heavy cavalry but the Saracens had more horse archers. The scenario was Invasion, meaning the winner was the one with the most units in the enemy half at the end of 6 turns. Some artists license was allowed with the inclusion of Military Orders on the Crusader's side.

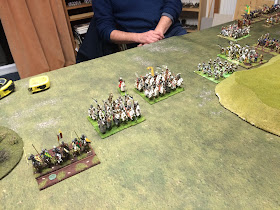
Both deployed with infantry in the centre and the better cavalry on the Saracens left flank.

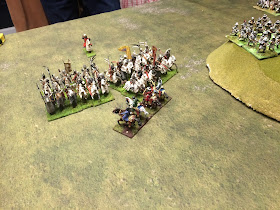
Crusader right with Knights and Military Orders.

Crusader left - medium and light cavalry

Saracen right - medium & light cavalry with some infantry support

Saracen left / centre - the better cavalry here

Vong view
Both sides refused the flank on the Saracen's right but attacked in the centre and the Saracen's left. The Crusaders winning initiative meant they went first and we're tempted into a charge against a small troop of skirmishing horse archers. This manoeuvre allowed the Saracen Mamaluks to make the first charge but they failed to make the expected breakthrough.    


In the centre the Saracens charged headlong up the hill and smashed a unit of crossbowmen, The supporting Spearmen Horde though suffered the ignominy of bouncing-off a Troop of Levy!

Saracens assault the central hill


On the Saracen left the Crusaders launched their counter-charge which crunched the Saracen medium cavalry but they then threw the dreaded double 1 for the Nerve test, thus leaving the crippled Arabs  to withstand the attack and eventually push the Knights back into a rout.


Sensing they were losing against the Saracens left the Crusaders now began to attack on their right flank. It was a desperate measure though as they were put numbered and out shot on that side, leading to the attack quickly bogging down.


In the centre / Saracen left the Arabs managed to achieve flanking positions on several units and with double damage these were quickly cleared. Things looked grim for the Crusaders.  


Military Orders badly outnumbered 

Foot Knights are surrounded
With the Crusaders centre and right crumbling we declared a win for the Saracens.

The end is nigh
As I had hoped we were able to play the game to conclusion in about 2.5 hours including deployment. Very good for rules most had not played before.

The turning point was the Crusaders failure to break an badly damaged Arab unit by rolling snake-eyes. This would have opened-up the flank but instead they found themselves  routed the next turn.    

Saturday, 22 December 2018

The (Desert) Eagle Has Landed - some WWII fun & games

Image result for the eagle has landedAs the campaign had finished we decided this week to recreate the famous movie but reset in the desert as we already had the terrain / figures out for that. Steiner led a force of 3 FSJ squads (each of 2 fire teams) and faced 2 platoons of British (3 squads each) supported by 2 M3s and a Bren Carrier.

The aim was simply for Steiner (Michael Caine) to run from the Cafe to the church and locate the escape tunnel, which would take 4 turns.

The terrain comprised a small village with the church at its centre. On the southern side was the cafĂ© where Steiner begins the game. Also to the south was a large warehouse playing the part of the watermill. The Germans began with a squad each in the warehouse, church, and a house. It sounded a simple matter for Steiner to run to the church whilst his men held for a mere 4 turns!      

View from the north side

View from the south side

Steiner waits in the Cafe
True to form the inexperienced Colonel Pitts (Larry Hagman) launched a rapid attack on the village rushing troops in trucks from the east and north towards the church in an attempt to intercept Steiner. As with the movie they were strafed by the Germans and pinned on the roads.


As Steiner began his move towards the church British reinforcements arrived from the north in the shape of a motor rifle company with M3s and a Bren Carrier. They quickly established a base of fire with their armour and pushed their infantry towards the church. with Captain Clark (Treat Williams) now in charge things would get harder for the Germans

This officer seems to know his business

With Colonel Pitts forces still pinned-down on the Clark manoeuvred his units to launched an assault on the church with his whole platoon. In the meantime Steiner had arrived and begun his search for the secret passage that would allow his escape.


The initial assault was a partial success, pushing into the church and forcing Steiner out. He then counter attacked pushing some of the British back in-turn, in a pleasing see-saw combat.


Then came the crucial moment of the game as Steiner bravely led another assault to clear the British from the churchyard. Although a success it left him in line-of-fire from one of the M3s. In a hail of 0.5cal bullets he fell fatally wounded, handing a win to the British.  

The eagle is down
   

Friday, 21 December 2018

Vanguard - Basileans vs Nightstalker

This week I got to try out two new items - my new Deepcut battle mats (very nice) and my freshly painted Basilean warband (also nice). The scenario selected was the supply train. The defending Basileans gathered VPs by destroying the Nightstalkers, who it turn needed to destroy the pack mules.

I opted for 3*Men-at-arms (Grunts), 2*Paladin defenders (Warriors), 2*Sisters (Warriors), 1*Paladin Chaplin (Caster), 1*Ogre guard (large), 1*Sargent (Warrior), and 1*Veteran Sargent (Command). So a slow moving force but one with good defence.

Basilean defenders
 The Nightstalkers went with 3*Scarecrow (Grunt), 1*Needlefang swarm (Grunt), 2*Horror (Warrior), 2*Shadow hound (support), 1*Reaper souldrinker (Command), 1*Mindscreech (Caster) and 1*Butcher fleshripper. So lots of additional power dice from the commands but about half the points invested in them.  


Nightstalkers in the north of the table

Nightstalkers in the south

I deployed with my most defensive troops guarding the mules and central reserve of the hard-hitting Ogre / Sisters. My plan was to let them come on and then hit them hard with the reserve.


Plans change though and in turn 1 I spotted that with the northern Nightstalkers moving slowly I might be able to pin them away from the mules and so reduce my risk of a loss. So I pushed a Paladin and Man-at-arms forward hoping to tar-pit the key units of the enemy.

Eeck!

This actually worked rather better than I had hoped with the dynamic duo hanging on for most of the game due to judicious use of the  Iron Resolve special ability  to boost their armour saves.

Battle is joined

In the south the Nightstalkers moved rapidly to attack me so I was forced to deploy about half my force to block them, risking an overrun in the north. I held them but felt exposed if I could not break the main force in the north.  

Down Shep !


Seeing this as a job for the Ogre I mobilised it, but quickly found myself discombobulated by the Mindscreech which has the ability to make a single model miss a whole turn. Both the ogre and Chaplin in turn found themselves locked-down and unable to act.

Nightstalkers still in the tar-pit 

Eventually I dispatched the force of shadow hounds in the south and was able to bring my full force to bear on the enemy in the north, with a win declared for the Basileans after about 2 hours play.

Victory is close

The Basileans ability to survive was once again shown in this battle. With decent power dice the key troops are very tough to kill so they can wear you down in the end. The Sisters are also interesting to use - cheap, high damage but poor defence, so a classic glass cannon!