Blog Pages

Pages

Friday, 27 October 2017

Victory Is Near, WWII Campaign - Week 3 battle 2

The second battle of this round saw the Russians on the attack as they continued their offensive deep into German territory. The terrain was favourable to the defender with a bunker dominating the centre of the table and guarding the road junction. Fields, woods, and low hills completed the table.


View from the German right flank with the bunker in the distance 

View from the Russian right
The Russians planned for a battle of manoeuvre and so fielded all three of the tanks available to them as their reinforcements; a KV-1, a T34-85, and an SU-76. The Germans picked a Panzer IV and 2 * 75mm AT guns, one placed in the bunker.

Pak43 in the bunker - a tough nut to crack
The Russian plan was typically brutal as they chose to mass all their armour and about a third of their infantry on their own right flank, the aim being to hook around the bunker and breakthrough the German lines. On their left an infantry platoon sought to infiltrate through the woods whilst a small force held the centre to distract the Germans.  
T34-85 deploys

The Russian attack builds up


As the Russians pushed forward on the flanks the Germans responded by expanding their position to cover more of the flanks and try to stall the attack. On the Russian right they carefully manoeuvred their infantry and tanks ready for a full scale assault on the  Germans defences.
Germans spreading out 

The assault force is ready to roll

Looks scary from the German side
In the centre the small Russian force was successful in drawing off some of the German reserves, while the larger force of infantry made steady progress through the woods on the left.   
Russians screen the centre

Mike's Russians sneaking round the flank

The Russians then launched what was supposed to be their decisive attack on their right, with tanks leading the way. Although they were able to rapidly destroy the Panzer IV combined fire from the bunker, a second PaK43 and panzerschreckts was  enough to knock-out all three tanks in rapid succession. Not what the reds had planned!

Things looked dire on the Russian right but over on the left the steady progress made by the infantry put them within assault range of the German defenders flank and a successful charge cleared half of them from the fields. There then followed a series of assaults that left the Russians in charge of one of the victory points and several Germans units routed.  
Charge!

Germans swept from the field


Russian attack stalls

another assault - this time unsuccessful
Unfortunately the same trick did not work on the Russians right and several assaults were stalled as the Germans on Overwatch were able to pin the attacker. 
Germans on over watch pin the Russians

German right is blown away
The Germans ran-out 6-3 winner but the game was rather closer than the victory scores imply and it was very nearly a successful assault.

Pleasingly there were lots of situations at the end where the Germans had to choose to either fire at the Russians in cover (risking a successful assault afterwards) or wait on Overwatch in the hopes they could catch the Russians in the open (but risk not firing if they stayed put).

Week 3 ended with the Russians further forward but neither side having successfully captured their objectives. So hostilities renew next time with both trying to secure the ground they attacked last time out. High command have been generous though and allocated both commanders some additional forces for their attacks.

Sunday, 22 October 2017

Kings of War campaign - game 2

Over the weekend I played the second game of my infrequent Kings of War fantasy campaign that pits my fantasy Persians against the Kin (Dark Elves). The second game was a capture the flag (hill in this case) game. Bot sides start in possession of a hill and there are two neutral hills roughly on the half way line. You gain 2 victory points for a hill in the enemies half and 1 point for one in your own.

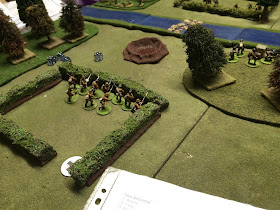
We both deployed in a very similar pattern, guarding the hill we owned and making a strong attack on our left, over the hill on the half way line and towards the enemies hill.

Kin (Dark Elves) right flank which was refused

The Kin's attack on the left
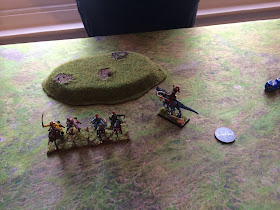
My deployment had two features I hoped would enable me to secure a win. Firstly the Mamkil on the hill (Chariot Horde) has such a deep base its impossible for flying units to get behind it and snatch the hill. Secondly my own flying units, and the Mounted Scouts, were opposite the enemies hill so if this was not guarded I might be able to snipe it at the end of the game.

Persian left ready to attack 

Persians guarding the hill on the right

Flank guards on the Persian right
 Both sides advanced rapidly on their lefts securing the central hills and looking to push on into the enemies rear to grab the 2 point hills. To slow the Kin's advance I was forced to throw my flanking cavalry into the massed Dark Elves. They died inevitably but combined with the massed shooting from the Mamkil and Archers it was enough to delay the Elves attack for 5 moves.
Persian cavalry assault the hill
 
The Kin attack forms up
On the Persian left I came against strong resistance from a faster moving force, meaning I was forced to draw the enemies charge and hope to counter attack with the remaining troops.  I had loaded this side with my most resistant troops and so after a few swaps of units I had control of the vital hill and had cleared a number of the enemy away.

Persians attack towards the Kin's right 


Tough slogging but the Persians would emerge victorious 

Persians hill never seriously threatned
 As we entered the 6th and final move I unleashed my flying troops and scouts to secure the enemies hill and hopefully grab victory. Lacking time to attack my hill the Elves focused instead on regaining their own hill. Their mage supported by archers was able to rout the magic carpets but with my scouts contesting the hill it was a 2-1 victory to the Persians.

Persians snatch the hill


Contested hill securing victory
This was the first outing for my newly acquired Air Elemental. It performed reasonably well, kills two units of artillery and helping to rout a unit of spearmen. Its special ability to push-back enemy units is highly situational and not needed in this battle, but the flying is useful.

Air Elemental
 
Update: An account from the Kin's perspective is here http://fishpondswargames.blogspot.co.uk/2017/10/kow-campaign-battle-2-or-its-scenario.html 

Friday, 20 October 2017

Victory is near, WWII camapign - week 3, battle 1

As we enter the third turn of the campaign both sides are on the attack. The Germans are still trying to cross the river in square 9 and the Russians are assaulting fortified positions in square 1.

The first game was the Germans renewing their attack on the river crossing. For this game we increased the pregame bombardment to 6 rounds of fire from 3. The Germans went with a single Tiger as their reinforcements. The table was as before - heavily wooded with three crossings, but the river assumed to be mostly dried-up.

Overview of the board from the Russian left 
As with previous games the Germans spread their forces across the table, with infantry on both flanks in the woods and more infantry plus the Tiger in the centre. The pregame bombardment proved wholly ineffective, either hitting the wrong place or missing the target by too wide a margin.


The central attack forms up

Russians advance to hold the river

Germans sneaking around the left flank

The German right - largely static

Some German sniping
After some initial caution the Germans eventually deployed their ace card - the Tiger - right in the centre of the table ready to lead the advance. It headed straight for the main bridge across the river in the centre of the Russian position.    

The Tiger advances

Tiger's eye view of what awaits
This was a bold move as the Russians had laid a trap with both their AT guns concealed in woods and trained on the bridge.
The trap is laid
Bold is not always wise though and as the Tiger trundled over the bridge and into the heart of the Russian position some exceptional dice were thrown. Three 10s in a row from the Russians left the Tiger brewed-up in the middle of the road.
 
Boom!!
With their main attacking weapon destroyed the Germans then relapsed into a long period of exchanging fire with the Russians deployed opposite them. This actually proved surprisingly effective with the Soviets slowly worn-down and the German left flank largely cleared of Russian infantry.

Germans in the centre form a base of fire

Russian right exchanges fire

Russian left


Germans clear their left flank
As the light faded the Germans advanced across the rover forcing the Russians to redeploy their last reserves to block the attack on the German left that penetrated deep into the Russian position. This was sufficient to stall the attack but the Russians were thinly spread and with more time the victory could have been the Germans. In the end a 6 - 2 win on points to Russia.
Scramble to the flank

Germans stall on the river assault

Russian centre stands firm
This was certainly the best of the German attacks to date and should have been a win for them but for two factors. Firstly their infantry attack could have been made earlier and in greater strength thus allowing time for this to effect the outcome of the game. Secondly the Tiger charge was fairly suicidal and so took this powerful asset out of the game far too early.


Tiger Tiger burning bright...
 A rule change we discussed was to allow some coordination between fire teams all shooting at the same target so there is a cumulative effect. The following rule is proposed

Optional: Instead of firing individually, up to 2 fire teams may provide supporting fire to another. The supported team receives +1 for each supporting team, maximum +2.

So in the case of a standard team supporting another (e.g. deploying a whole squad) you get the same score as you would for a large fire team, as now. You may still choose though to fire as two teams in the hopes of doing greater damage.
  

Saturday, 14 October 2017

Forward, Victory is near - WWII camapign, week 2 battle 2

The first battle of turn 2 saw the Russians successfully expands their bridgehead and move towards the German baseline. In this second battle we see the Germans still trying to force their way across the river and begin their drive to victory.

For this scenario we made two tweaks to favour the attacker. Firstly we assumed the sun had come out and so the river was largely dried-up, so counting as rough ground. Secondly we allowed the attacker some pre-programmed artillery. They got 3 medium artillery strikes, which must be aimed at Jump-Off points, be within the first 3 turns, and be predetermined. The battlefield itself was heavily wooded, offering ample cover to both sides.
  
Table from the Russian right

Table from the German right with a broken-down Hannomag  
The German's preprogrammed artillery was targeted at the ford on their right and the bridge in the centre, arriving in turns 1 and 2. The Russians chose to ignore it and deployed early, which proved a good decision as the artillery strikes did little damage due to some poor dice.

If you go down to the woods today...

Russians guarding the foot bridge on the German left 

The central bridge
The Germans chose to deploy their forces across the front of the Russian positions with infantry squads spread thinly across the board.  On the German right they deployed their Panzer, hoping to work it through the woods on that flank.
 
Germans in the centre

Panzer sneaking through the woods 

Russians on the German right

With most of the Germans deployed the game settled into a exchange of fire at fairly long-range which was causing limited damage to both sides.  The Russians deployed their 2 * AT guns in a position where it could cover the dried-up river at a point where the Panzer would need to cross.

The AT battery arrrives

Germans approach the ford

Face-off across the river

At this point the Germans felt they were bogged-down and so rolled the dice by advancing the Panzer to break the deadlock. As it dashed across the river it shrugged-off several rounds of AT fire before engaging the gunners. Poor rolling by the Germans and good rolls from the Russians eventually told and the Panzer brewed-up mid-river.   
The Panzer advances

They shoot, they miss

The AT guns find their range
At this point the German attack began to stall so it was agreed that the game was a draw, which means the Germans must attack again to break through.

Germans on the left well entrenched

Brewed-up Panzer

We concluded that the pregame bombardment was a useful addition but needs to be more powerful. So for the next round of games we will use 6 strikes from heavy artillery instead.