Title

Title
Tally Ho!

Saturday 31 October 2015

Le Haye Sainte - After Action Report

The Scenario

In this scenario the French were attacking Le Haye Sainte and the ridge beyond. As historically the Rifles deployed as a line battalion and could not skirmish. To simulate the French Grand Battery we ruled that every British unit on the ridge would take one casualty per turn until the French came within musket range
Le Haye Sainte scenario
This was also the first game using the Muskets and Marshals rules from Ian over at Hinton Hunt.
 http://hintonhunt.blogspot.co.uk/. More on that in the reflections section

The Battle

We deployed as per the map with a strong French attack against the farm and to the right against the ridge. A single brigade attacked to the left of the farm. 


Le Haye Sainte deployment


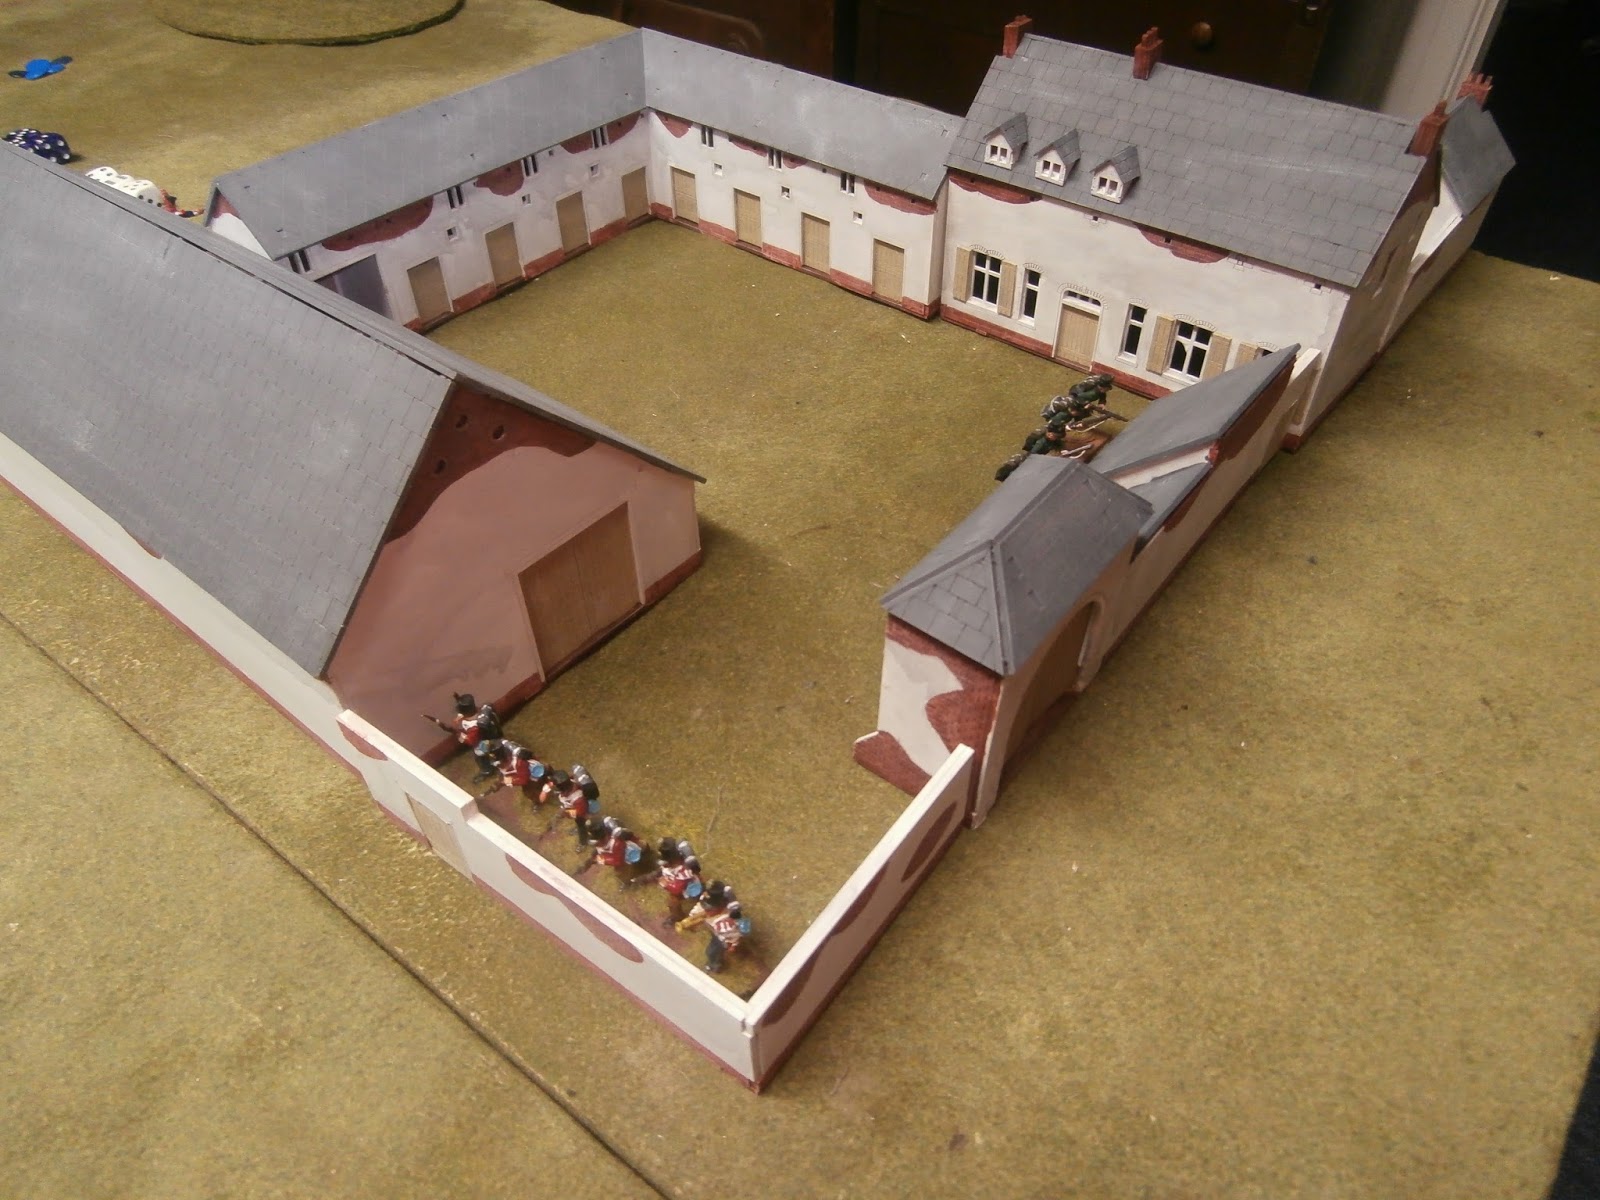
The attack on the Le Haye Sainte

The opening attack was against the farm complex, with three French veteran battalions assaulting the German defenders. On the French right a steady advance took place that tied-in the Rifles.   


The initial assault on Le Haye Sainte

The assault on Le Haye Sainte
On the French left a veteran brigade found itself opposite three battalions of Hanoverian landwehr and so attack vigorously driving back part of the front line. Due to their niffy caps and red uniforms they were quickly dubbed the Hanoverian post-men.

The Hannovarian postmen attacked
In the centre the battle for the farm continued. In M&M the combat system works by rolling dice and pairing highest to lowest, somewhat like in Risk. This does mean that high quality attackers in hard cover are awfully tricky to shift. For this reason as French reinforcements arrived they were used on the flanks not in the meat-grinder developing in the farm. 

Le Haye Saine meat-grinder
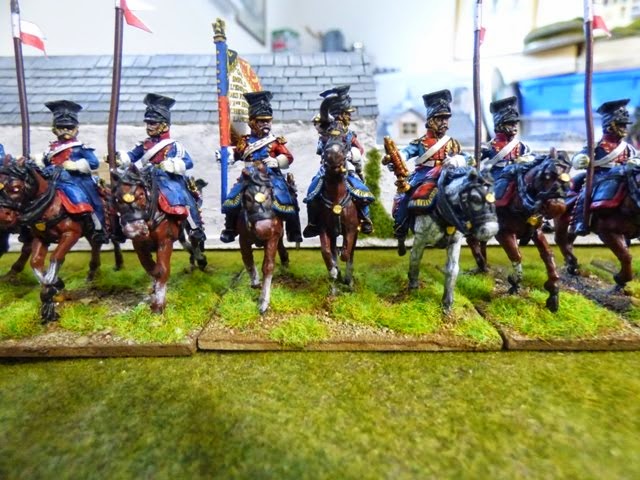
As things began to look dicey for the Hanoverians the Household and  Union Cavalry brigade arrived on the scene, accompanied by Lord Uxbridge. Somewhat uncharacteristically they did not launch headlong into a charge but lurked behind the ridge forcing the French attackers into square.  
The attack on the French left

The attack on the French right
 Eventually numbers began to tell and the German lights were forced from Le Haye Sainte, but not before a battalion of KGL had been able to reinforce the farm.


For the remainder of the battle most of the action occurred on the French left. With the arrival of some French cavalry and infantry they once again went on the offensive  and finally drew Uxbridge into an attack. This went well for the French who made steady progress on the ridge

The French cavalry attack

Frenchies making progress

On the French right the British mounted a limited counter-attack but were repulsed by musket and artillery fire. They withdrew behind the ridge leaving the high-ground to the French

British go hull-down

The result was probably a winning-draw for the French. They had failed to capture Le Haye Sainte but had made decent progress on the ridge-line.

Reflections

This was our first club gain with M&M having only previously played a large 20mm game. We had about 15 units a side and played 12 turns over two nights. We did gossip a fair bit though and could probably have got more moves completed.

The main feature of this battle was the difficulty of shifting good quality troops like the KGL when they are in hard cover. Even after 12 turns of almost continuous fighting Le Haye Sainte was only half secured. However looking at Waterloo it was tough to capture the farms. In pervious games we've used massed artillery to simply blast them and burn the place down.

Another feature of M&M is that fire combat tends not to be decisive or quick unless you are facing low quality troops. So some softening-up and then a quick bayonet charge feels like the way to go.  

Sunday 25 October 2015

Le Haye Sainte - painted

A few weeks ago I posted some pictures of the Italeri 1/72 model of Le Haye Sainte. I've now managed to complete the painting and taken a few pics with some 28mm figures.

Le Haye Sainte - side view

Le Haye Sainte - front view

Le Haye Sainte - farm house and buttery

Le Haye Sainte - rear view
Finally a slightly closer-up view of the  farmhouse and stable


It turned-out fairly well and for comparison below is my homemade version of Le Haye Sainte. Its deliberately smaller to fit the table better. On balance I prefer the tile-effect on the homemade version over the simple etching on the MDF one. If I had time I would have likely gone with tiling on the Italeri one.


Saturday 24 October 2015

Lion Rampant Arabs

The Cavalry

With the completion of the heavy cavalry my Lion Rampant Arabs are now completed. I've gone with 2 units of sergeants who can be upgraded to include bows if needed


Both units

close-up of the officers

Arab heavy cavalry

Arab heavy cavalry

A horse archer

The Whole Army

So the whole army is complete. I've made the gamble of completing an army without ever playing the rules, so I've goner with my usual tactic of quantity over quality and focused on having quite a few units.


So the Army comprises
  • Two units of mounted sergeants (upgradeable to bows)
  • Two units of foot sergeants
  • One unit of bows
  • One unit of fierce foot 

Thursday 8 October 2015

Hougamont After Action Report

The Scenario

This is the third of our Waterloo scenario games - this time we started on the battle proper with Hougamont. As you will see from the pictures we went for a stylised Chateau using a more generic farm and some gardens.


Hougamont scenario 


The Battle

The scene was set with Allied troops in defence and the French massed to attack the Chateau in force. It featured a relatively rare massed attack in column as the French were shielded from the main Allied artillery

The French left

The British left 
The attack on Hougamont
The initial attack on Hougamont proved swift and pretty deadly. The columns pressed forward scattering the skirmishers and crashing into both the Guards and Germans with great initial success. The sheer weight of 2 full brigades breaching the defences.

The French initial attack
 The French then pressed forward across the line with cavalry on the left and infantry on the right.
After the fierce struggle in the centre the French secured Hougamont, but the troops were spent, so precious reinforcements were needed to secure the gains.

Hougamont secured
The French cavalry though met with much less success. They advanced smartly expecting to brush aside  the British hussars and fall upon the Allied lines. However great élan, and supporting fire from the Guards, the Hussars routed two regiments of French and went on to capture a gun battery. However in true British cavalry style they over-did things and end-up isolated in the French rear and eventually cornered.

Eek - the guns are lost

British cavalry over-extended again
On the French right the British launched a spoiling attack against the wary French advance. Some deadly shooting a suspect Hanoverian morale meant this was short-lived though

The thin blue line

 As the end of the game approached a draw was declared. The French held the chateau but lacked the strength to assault the ridge and the Allied troops were of too low a quality to assault Hougamont

Reflections

The initial attack was a great success with a flawless assault and fairly low casualties. However clearing the  chateau of the remaining defenders (and reinforcements) severely depleted the French. In the end the reinforcements were needed to hold the gains leaving nothing to assault the ridge. The unexpected success of the British Hussars also denied the French any chance of out flanking the British right flank.

Saturday 3 October 2015

Ligny - After Action Report

The Scenario

This is the second part of our Waterloo campaign, this time featuring the Prussians. The battle is on one flank of the battlefield and features a French assault across a stream. The stream is fordable along its length but you count as disordered the move you emerge. Both sides had about 12 battalions.
Ligny Scenario

The Battle

The initial dispositions from the end of the table

Initial dispositions
Some close-ups of the defenders of both villages

St Armand defenders


St Armand Le Haye defenders
And now the attackers ranged against them

The main attackers line


No money, no Swiss - guess they got paid today

The battle opened with a general attack across the whole front from the French. On the French right this made slow progress due to the village, but on the left the attack was more successful with the cavalry making good gains against the Prussian horse


The infantry attack

The French cavalry push forward
Not wishing to be passive observers the Prussians crossed the river in several places and launched at assault of their own on the French right. It was a bold move that would decide the battle.

Prussian Reserve brigade attacks

The Prussians ford the river
The Prussian attack stalls 
Unfortunately the Prussian attack failed to make much headway and the poorer quality troops became discouraged, falling back behind the river. As we know a retreat can become a route and the Prussians found it harder to rally than to attack.
The French capture St Armand Le Haye
 With the capture of St Armand Le Haye the Prussians hit army break point and withdrew
 

Reflections

Perhaps the key decision was the Prussian one to attack rather than withdrawing to the reverse slope. The logic was not bad - in a fire-fight on the rivers edge superior French morale would have told. Had the attack been made by a full brigade of regular troops (not landwher) it might have distracted the French enough to stall them. Also attacking brought the French artillery more into the game then might otherwise have been the case.